Do you want to upgrade your computer’s internal storage to fast solid-state drives (SSD)? Are you wondering if this is a DIY process or if you must go to a computer service center? Read on to learn how easy it’s to install an SSD yourself in no time!
The development of semiconductor-based non-volatile storage technology has taken the world by storm. Now, you don’t need to cope with the substandard read and write speeds of magnetic disc drives like HDDs.
You can upgrade the mass storage of your computer with an SSD to get 16 to 17 times faster read and write speed. Installing an SSD is also a lot easier. If you’re planning to buy an SSD for your Esports PC, high-spec PC, or streaming PC, read on to learn how to install SSD in PC below.
Contents
Can You Install an SSD in Any Computer?
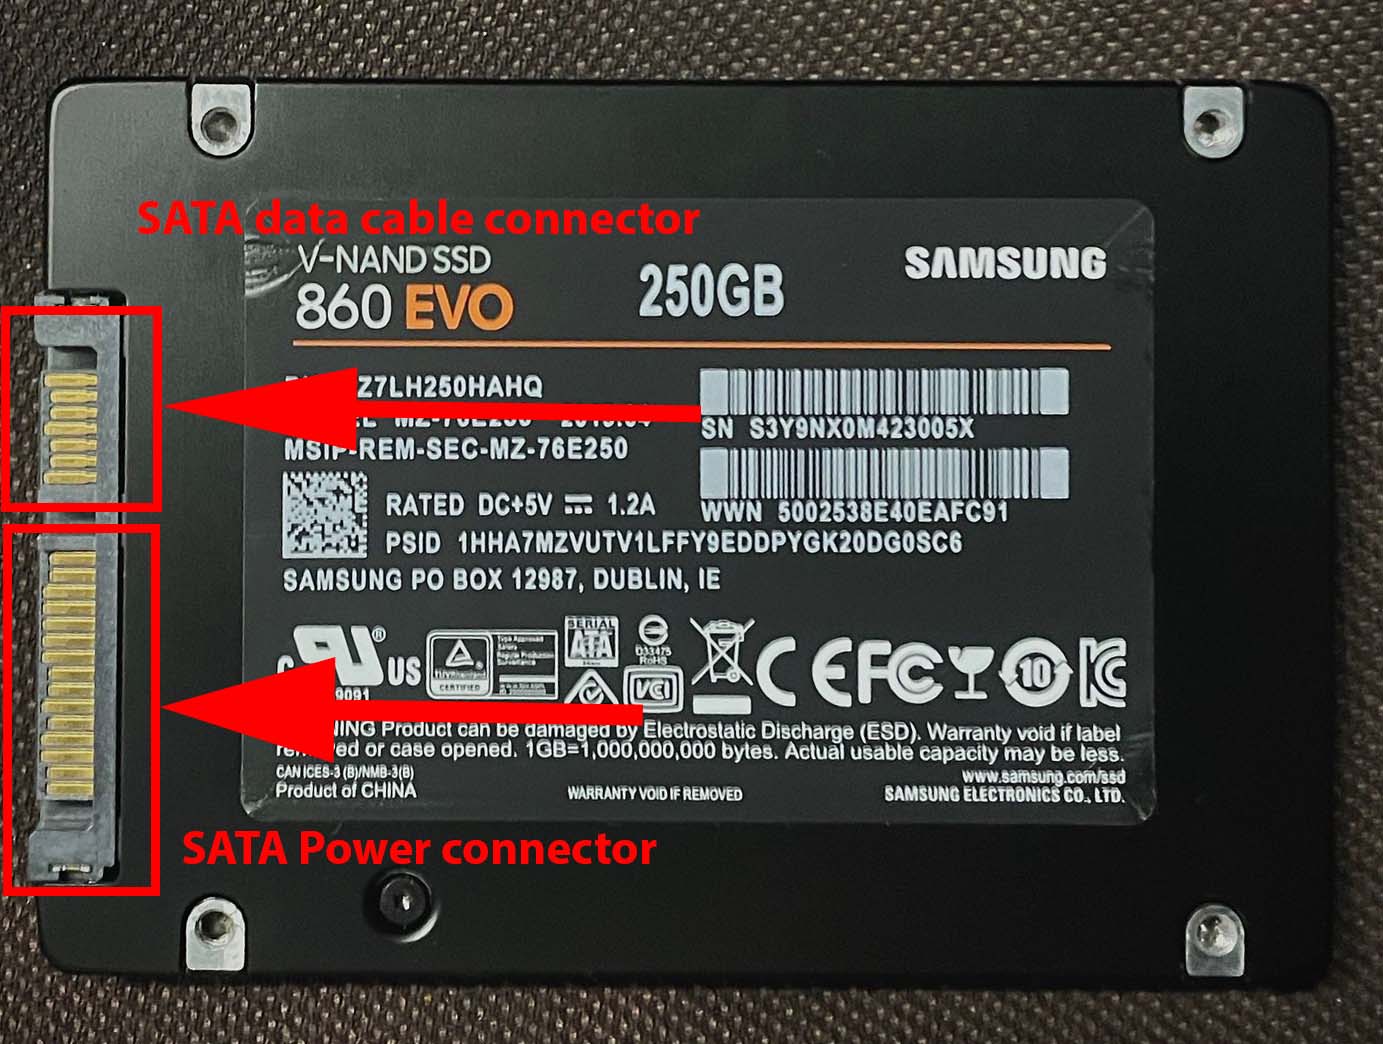
If you’re wondering if your computer is eligible to install an SSD, then the answer is simple. If your computer comes with SATA technology on the motherboard and your PSU has SATA power slots, you can definitely upgrade your PC with an SSD.
Here’s how you can become more confident in deciding whether your PC is suitable for solid-state drives:
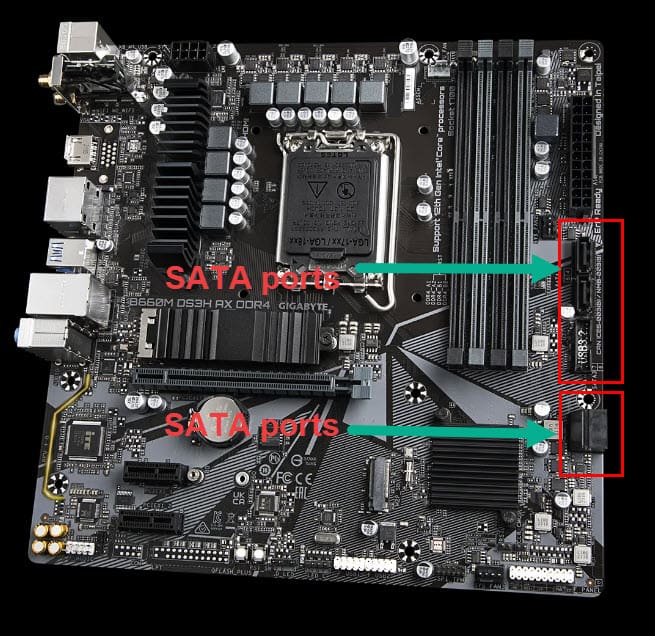
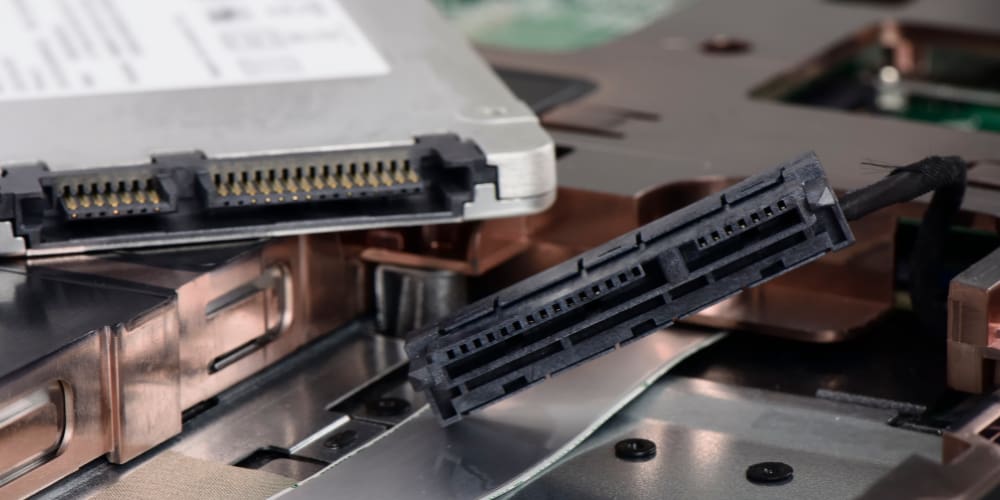
- Open the PC case and look for the above-shown connectors on the motherboard. If these are available on your PC’s chassis, you’re good to go.
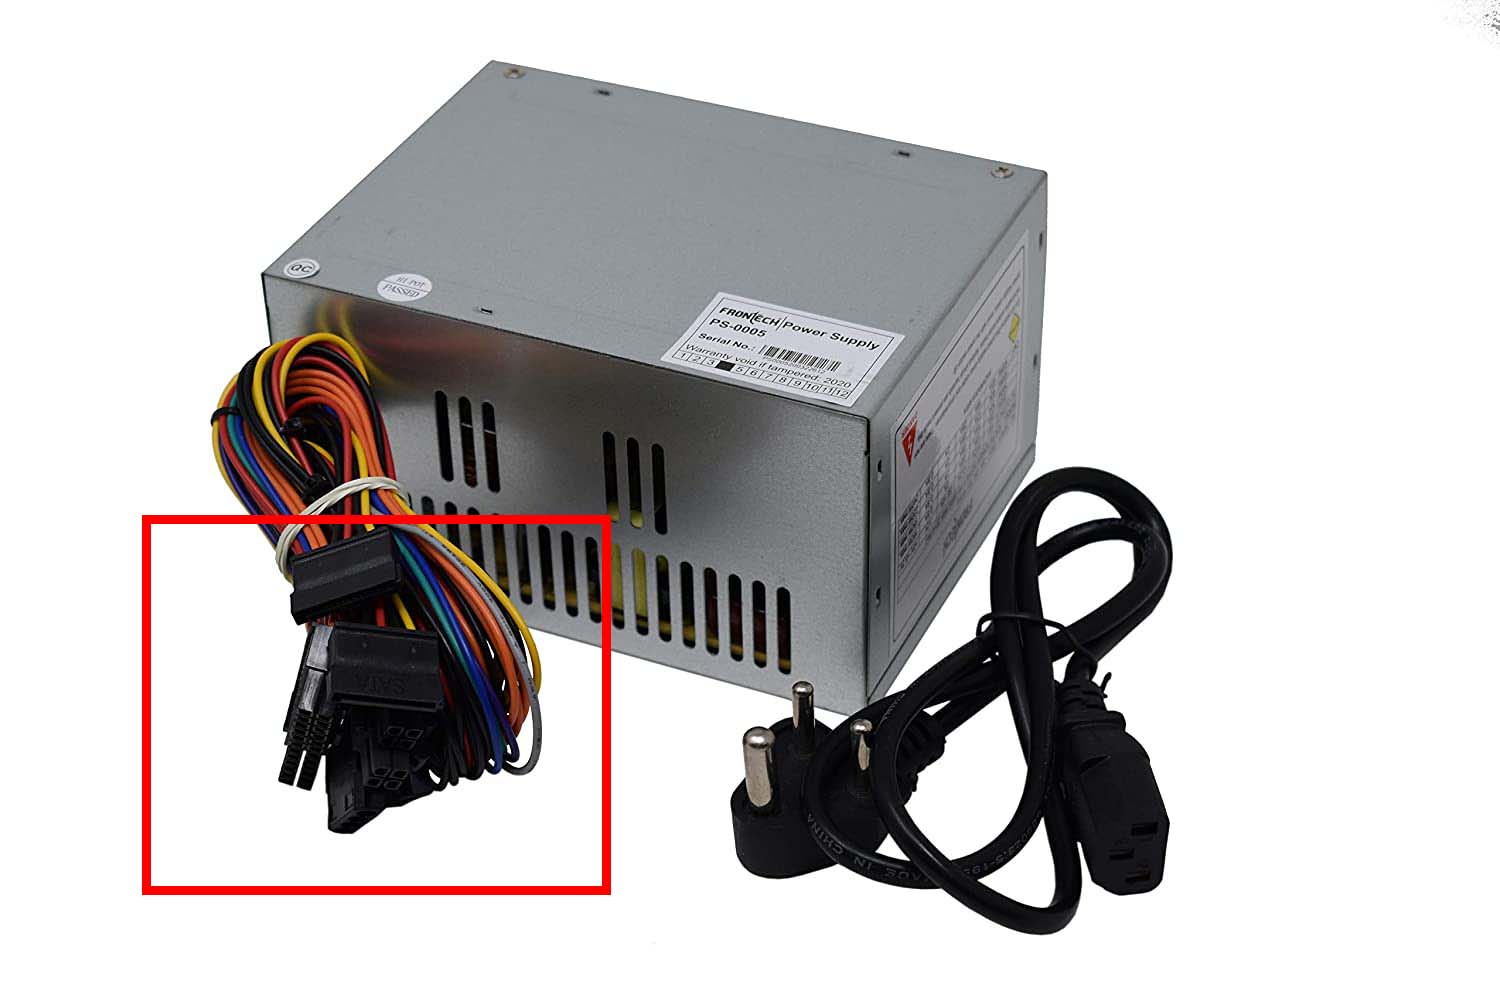
- SSDs need external power from the PSU. To provide the right voltage, the PSU will come with the above-shown power connectors.
If you have all the above, you’re in luck! You can easily install an SSD right away.
Also read: SATA Vs NVMe SSDs
How to Install SSD: The Prerequisites
To put an SSD inside your desktop PC, you must arrange the followings:
- A 2.5-inch SSD
- A screwdriver that matches the screws required to fasten the SSD to the HDD bracket on the desktop case
- SATA data cable comes with the motherboard
- An ESD wrist strap or anti-static wrist strap
Also read: Best Budget SSDs 2022
For a laptop, you may need an SSD spacer. Most SSD vendors provide a spacer with the SSD when you buy it. If the vendor didn’t supply a spacer, you can get any spacer that’s compatible with a 2.5-inch SSD. Find below some suggestions for SSD spacer:
SSD with spacer
Only spacer
How to Install SSD: Desktop PC
First, you need to get the desktop ready to connect the SSD. Then, you can plug in the SSD and reassemble the PC case.
Prepare Desktop for SSD Installation
- Shut down the PC.
- Open all cables like power cables, mouse wires, keyboard wires, speaker wires, etc., from the desktop case.
- Put the PC case on a table.
- Press the power on switch for a few seconds to discharge any remaining electric charge.
- Open the PC case on the left side when the front side is facing you.
- Touch any unpainted metal surface or wear an ESD wristband to protect PC components against static electricity shock.
Plug In the SSD
- Unpack the SSD from its box.
- Don’t touch the gold-plated connector ports and any other electric circuitry of the SSD with bare hands.
- Check your motherboard box for the SATA data cable. If the PC came as a bundled package, the SATA cables should be inside the PC case.
- You can also recycle the SATA data cables of the hard disc drive.
- Take a SATA data cable and connect one end to the SATA port of the motherboard.
- Now, put the SSD inside the internal storage or HDD bay of your desktop case.
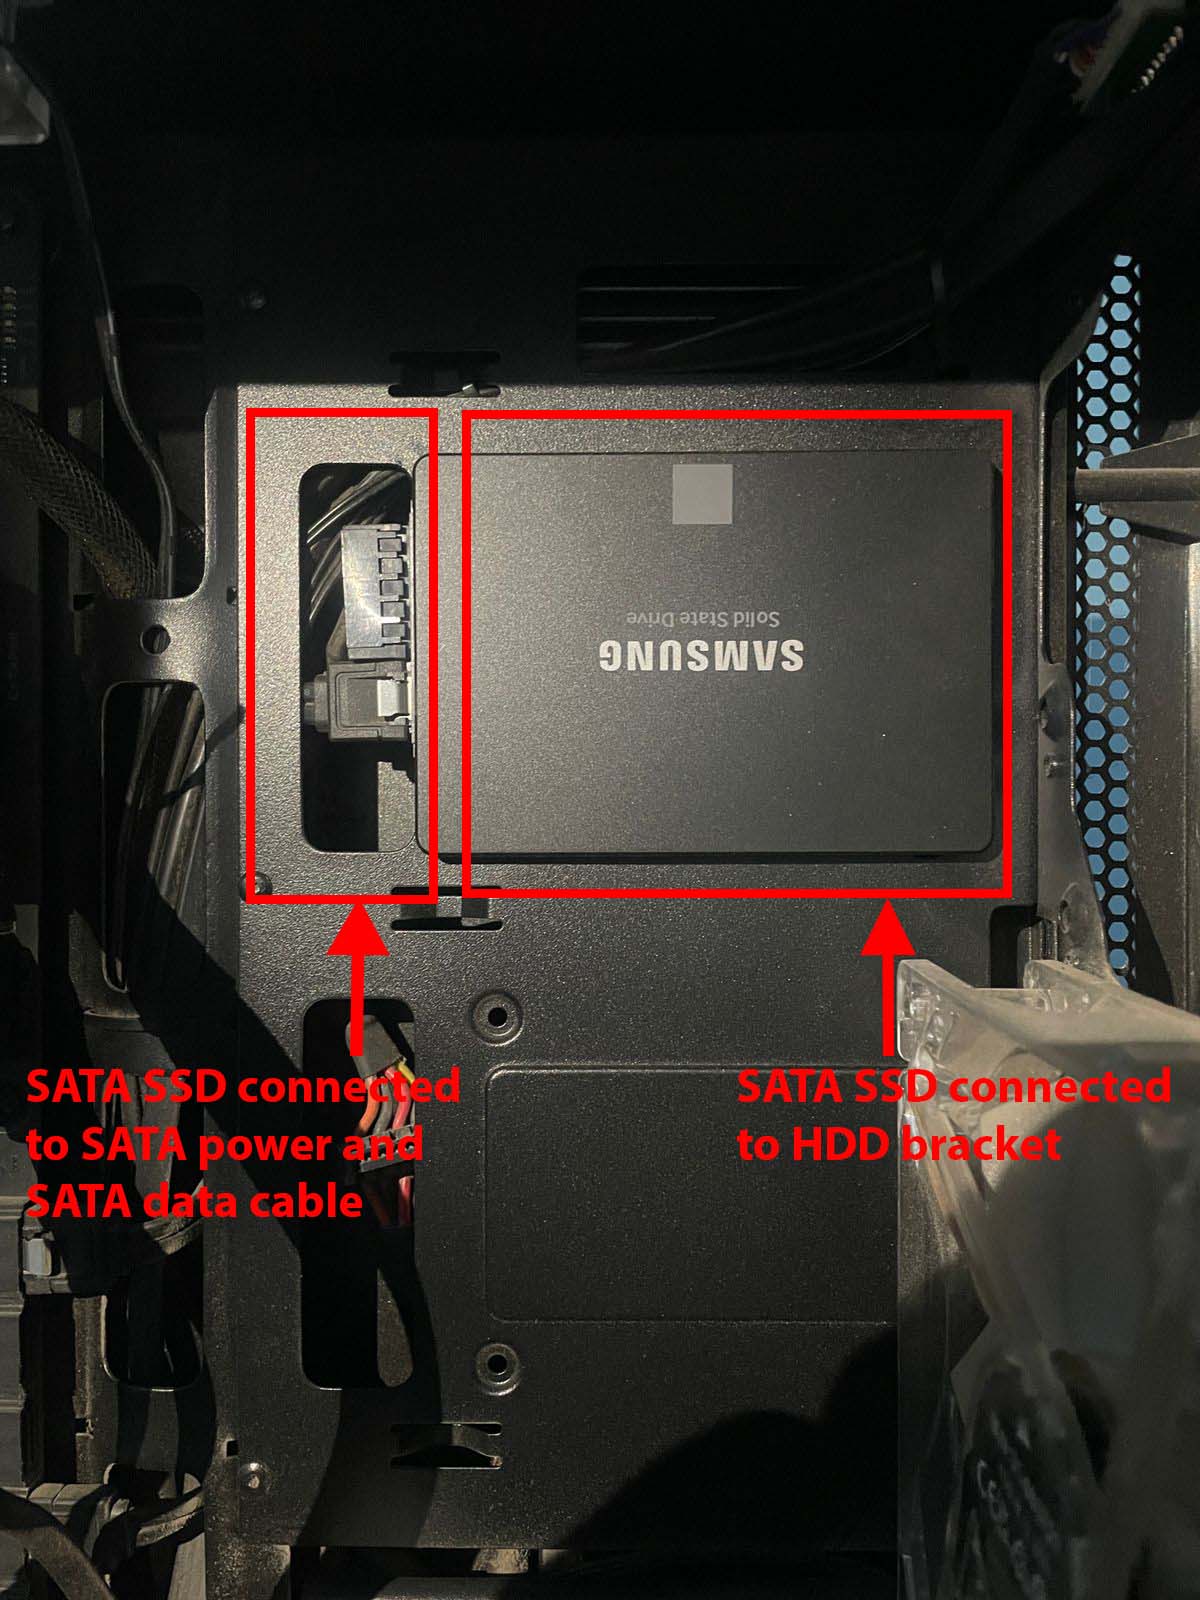
- Most modern desktop cases come with dedicated space for 2.5-inch SSDs. If your PC case doesn’t have one, use a 2.5-inch SATA to 3.5-inch converter so that the drive fits snugly into the HDD bay.
- Insert the SSD into the HDD bay by facing the data and power port outwards.
- Now, connect the SATA data and power cable to the SSD.
- Reassemble all other parts and close the desktop case.
- Connect all the wires along with the power cable.
How to Install SSD: Laptop
Installing a 2.5-inch SSD into a laptop is easier than doing it on a desktop. Here’s how it’s done:
Prepare the Laptop for SSD Installation
- Shut down the laptop computer and unplug the charging cable.
- Press and hold the power button for up to five seconds to discharge any residual electric charge.
- Now, use an appropriate screwdriver to unscrew all the screws at the back of the laptop.
- Carefully open the laptop’s bottom cover.
- You should now see the 2.5-inch HDD connected to a combo SATA power and data port.
- If there are any screws, unscrew those and carefully remove the HDD from its bracket.
Install the SSD
- Unbox the SSD and place it on the table carefully. Don’t touch any internal circuit boards or connector ports with bare hands.
- Align the SSD power and data port with its counterpart on the laptop motherboard.
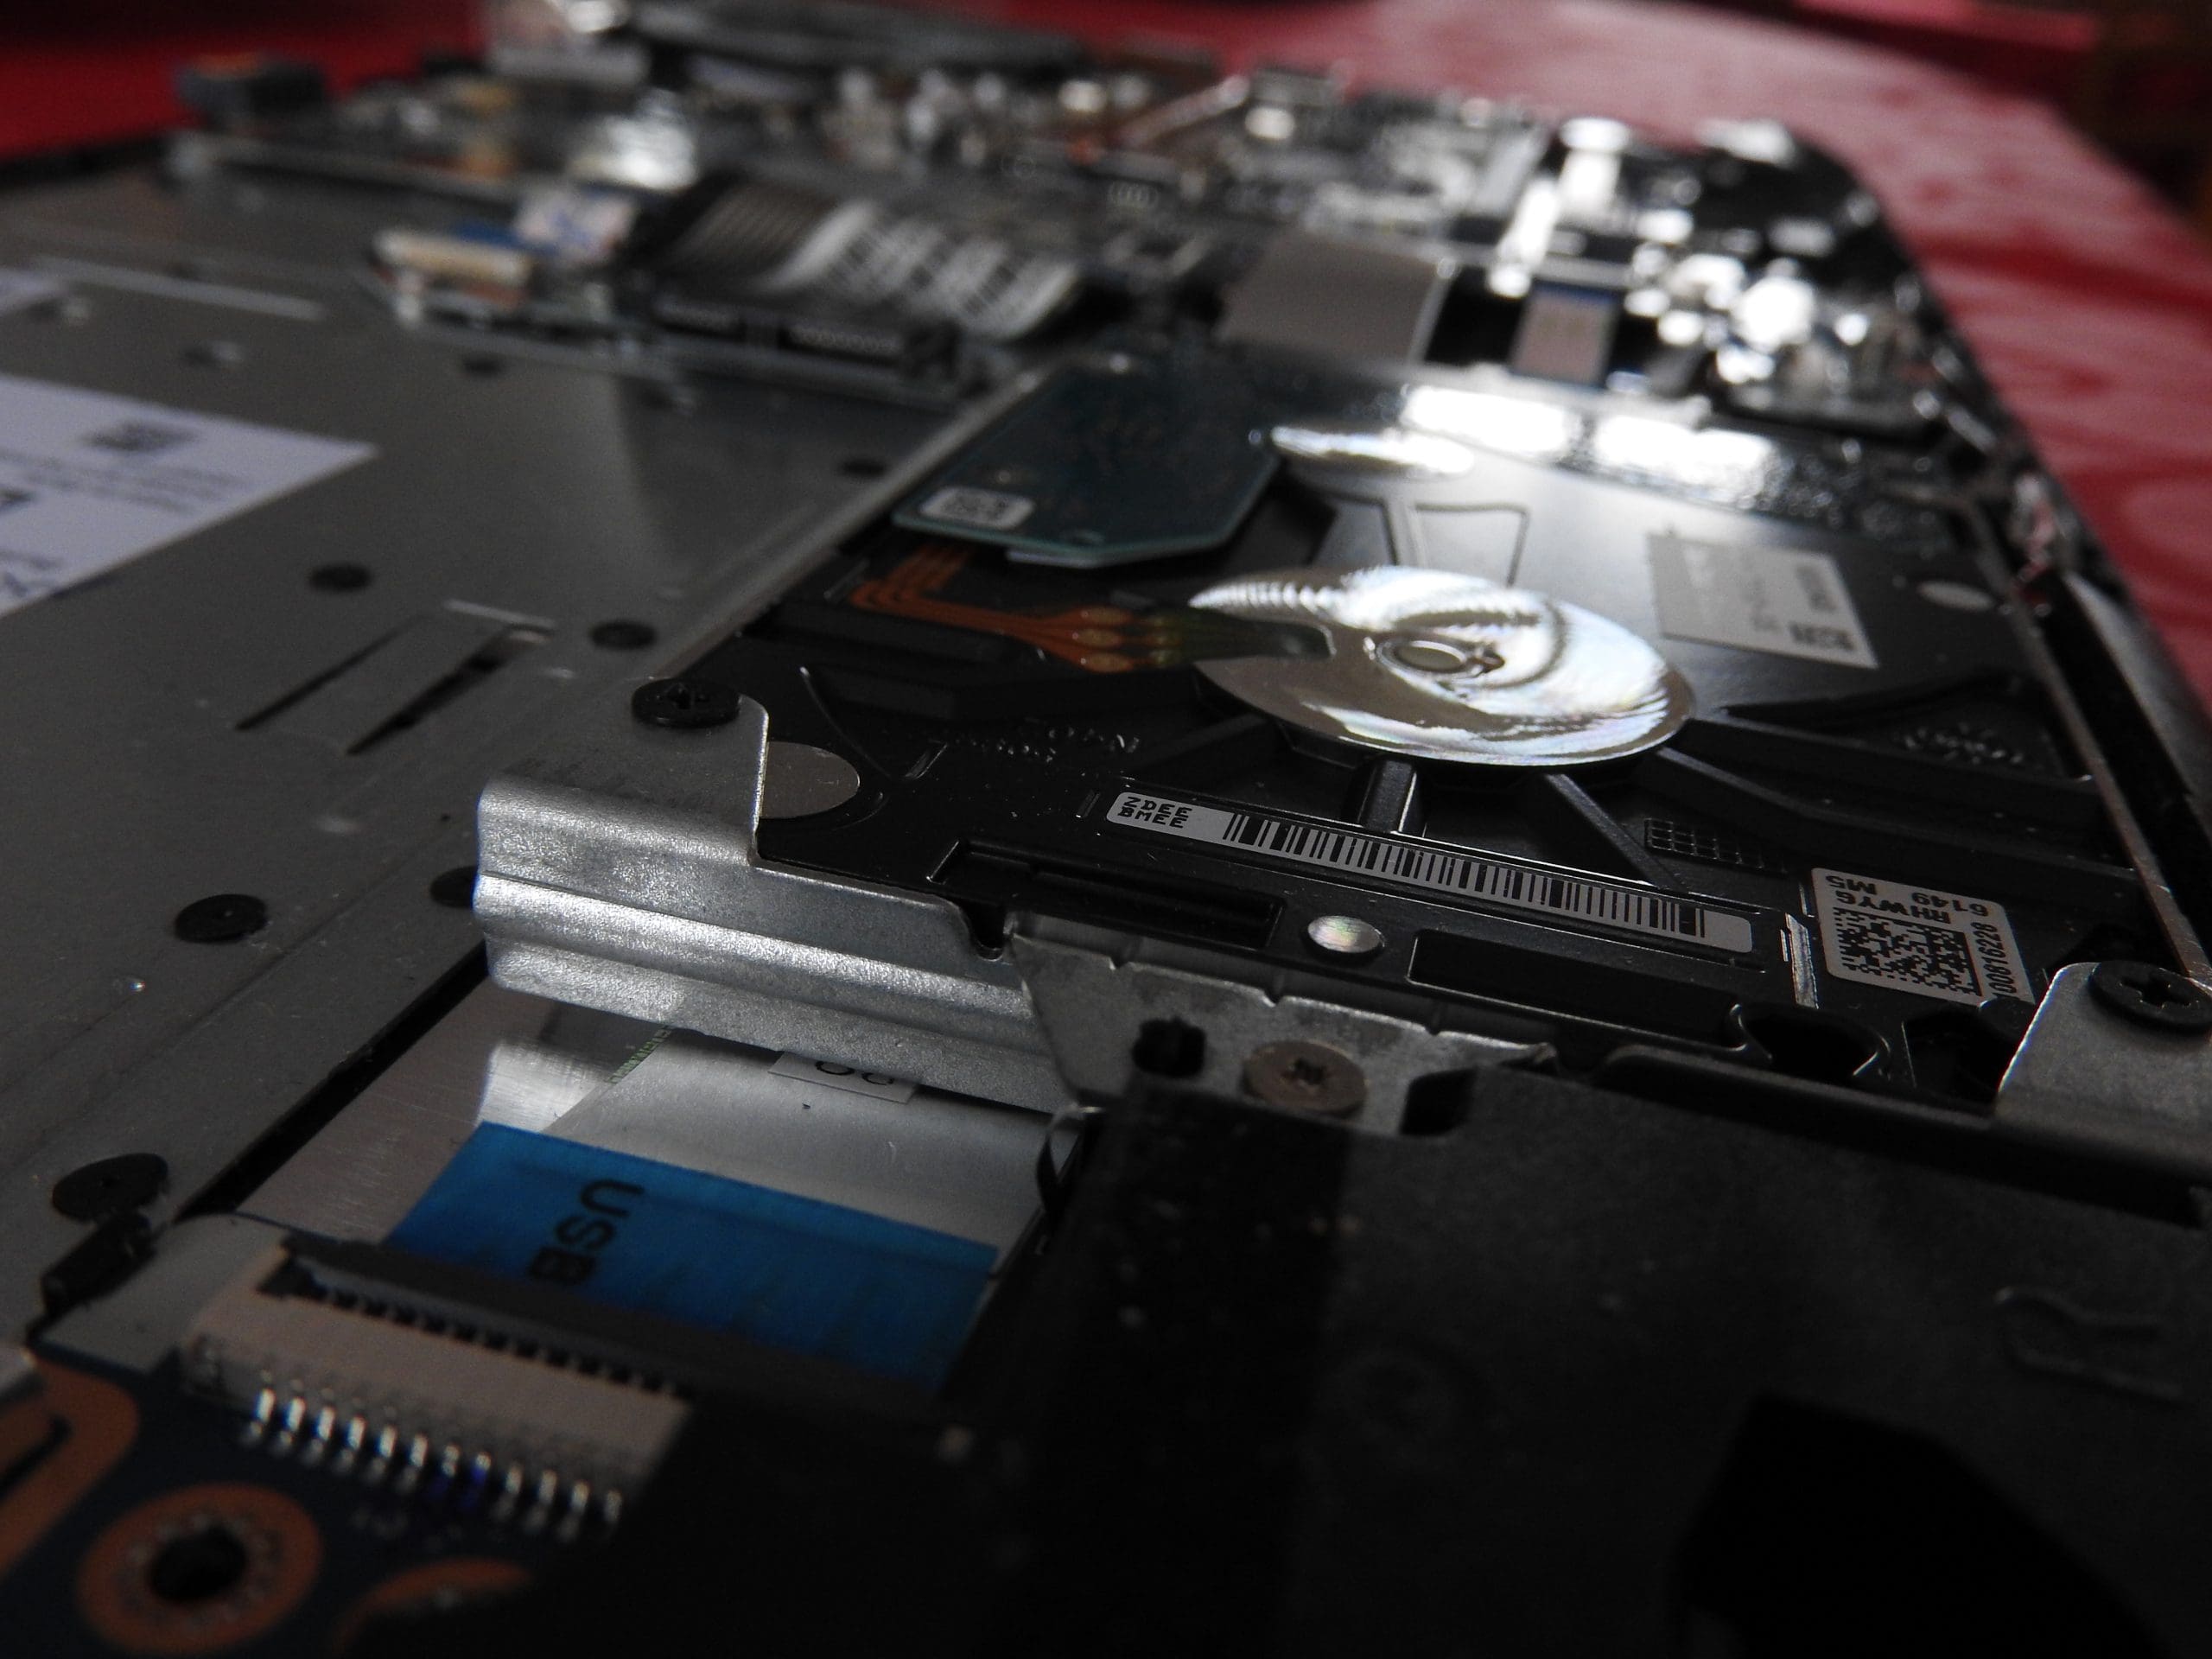
- Then, delicately push the SSD into the connector ports while placing it on the HDD bay.
- If you see that the SSD isn’t fitting snugly into the HDD bay, use the 2.5-inch SSD spacer that came with the SSD or bought separately.
- Put the laptop bottom cover in its place and fasten all the screws.
How to Create and Format Partitions on the SSD
So far, you installed the SSD on a desktop or laptop. It’s not yet ready for use because internal mass storage devices like HDDs and SSDs aren’t plug-and-play devices. Here’s how you can set up the SSD for further use:
- Power on the desktop or laptop PC.
- Press Windows + S keys together to open the Windows Search tool.
- Now, type in Format in the search box.
- Click the search result that says Create and format hard disk partitions.
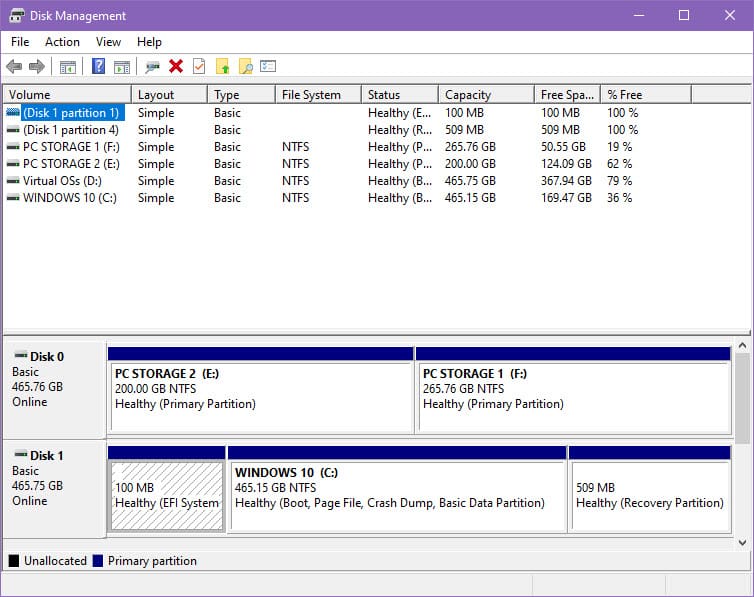
- You should see a new unknown disk in the tool that opens.
- Also, the Initialize Disk dialog box will show up automatically.
- Select GPT as the partition type and select OK.
- Once the wizard closes, the news SSD will show up as an online drive in the Disk Management utility.
- Right-click on the black ribbon of the newly installed SSD and select New Simple Volume.
- The New Simple Volume setup wizard will open where you can either create a single partition and allocate all the drive space to this or create multiple partitions.
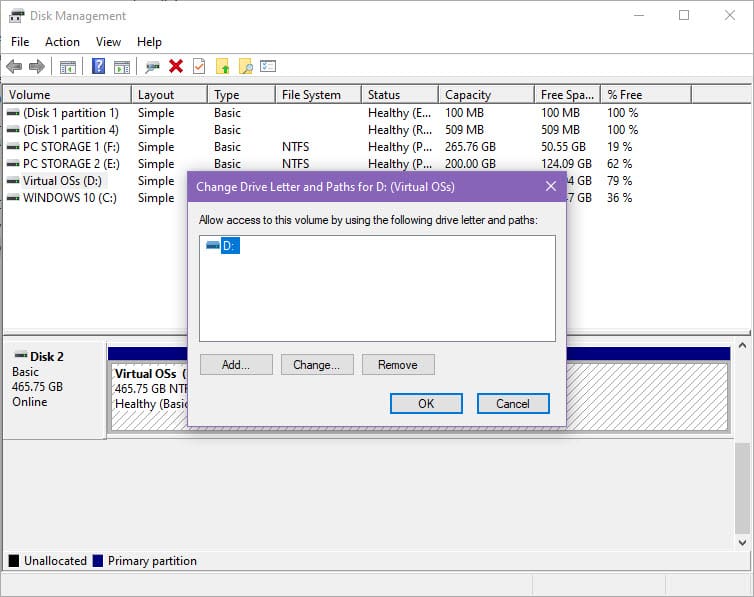
- In this wizard, you’ll also get the option to choose drive letters for one or multiple partitions of the SSD.
That’s it! Now you can use the new SSD for software installation or as media storage on your PC. If you want to run your operating system on the SSD, then you need to either clone the existing HDD to the new SSD or re-install the Windows operating system.
How to Install SSD: Final Words
Now you know how to effortlessly install a solid-state drive on your desktop or laptop PC without disturbing other hardware or internal peripherals of your computer.
If you take the right kind of precautions while installing the SSD, you won’t damage the PC in any way. Take extra care when handling the internal equipment of a PC by wearing an ESD wristband.
Give the above methods a try and mention in the comment box below how did it go. You might also like to know how to install an NVMe SSD on a desktop and laptop computer.