Streaming is a pretty awesome hobby – it’s social, it combines gaming with chatting with friends, and of course, if you have a big enough audience, you can make some money from it. To start streaming, you do need to have access to certain things – and the primary thing in question is a powerful PC that can handle the challenges of streaming.
We’ve compiled a simple guide for what you’ll need to build yourself your own powerful streaming PC while staying within your specific budget. Some of the parts you’ll need aren’t cheap, so be aware that you probably won’t be able to build it as cheaply as you might a computer for another purpose. You’ll have to budget for a minimum of about $650-750 dollars.
Contents
Step 1: Make a list of what you need
To build yourself a streaming PC, you’ll have to make sure to tick certain boxes with your machine – if you don’t, you might just find your stream failing at the worst moments. In fact, if you can’t maintain a high-framerate, low-lag stream, you’ll struggle to grow your audience, even if your content is awesome.
The first step to building your new streaming machine is making a list of all the parts you’ll need. Technically, a streaming PC will require the same parts as any other computer, but when you make your budget, you might have to make some adjustments to optimise your PC for streaming. For example, if you need a new camera or microphone, or even a stream deck, you’ll have to accommodate them into your budget on top of the regular parts!
Step 2: Finalise the budget, pick the parts
When you’ve worked out exactly what you need for your streaming setup, it’s time to look more closely at the exact parts you’ll want to buy. The sort of PC you can build will depend on your budget and how you stream will depend on what you want to stream. If you’re looking to stream on a budget, you’ll have to accept lower quality, whereas you can get better quality with a mid or high-end build.
Tip: If you want to stream console games you’re going to need a capture card to take toe video input to be able to stream it. Realistically, however, if you’re only wanting to use that computer for streaming and aren’t planning on playing games on it too, you can get away without having a dedicated GPU.
CPU
There are three ways to encode the video for your stream, and the CPU is key for two of them. These two options are software encoding and hardware encoding. Software encoding is significantly more CPU intensive, especially at higher resolutions, framerates, and quality pre-sets. Hardware encoding is much less intensive but results in lower quality output.
Software encoding requires most of the processing power of multiple CPU cores. his can have a negative impact on your computer’s performance in games as the CPU is busy encoding rather than processing the game. It’s only really a good idea if you’ve got a particularly powerful CPU and you’re not stressing it in the games you play. It can also be a solid option for a dedicated streaming computer that’s using a capture card. For software encoding the more CPU cores you have the better, though beware of spending too much for diminishing returns.
Hardware encoding uses the integrated graphics chip on the CPU. Given that you’ll be gaming on your dedicated GPU this is generally sitting idle and so makes a fair amount of sense to use for encoding. It is important to note, however, that the output is lower quality than that of software encoding, as hardware encoding is optimised for speed. You may see a small performance impact, but this is generally because it increases the heat output of the CPU, leaving less thermal headroom for the CPU cores to do their thing.
Tip: Some CPUs don’t come with an integrated graphics chip. These are generally high-end CPUs that have enough spare cores and processing power for software encoding. The lack of an integrated GPU, however, means that they are incapable of hardware encoding.
It’s also important to remember that your CPU does have a direct performance impact on your games. While the core count is useful in games, raw clock speed generally provides better performance when you’ve got more than four cores.
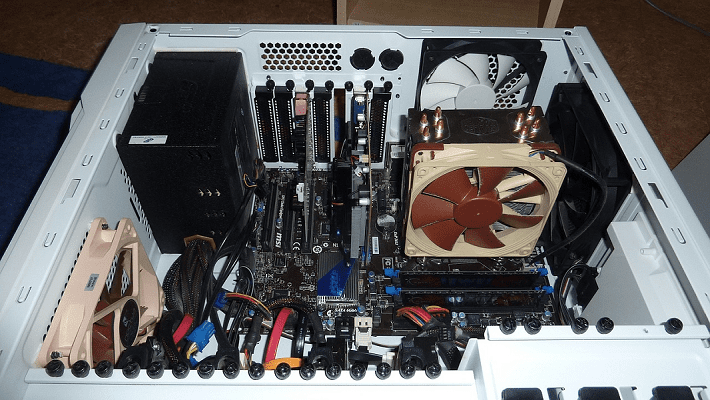
CPU Cooler
Your CPU is one of the two main heat sources in a computer and streaming generally puts a fair amount of load on it. This means a fair amount of heat, and means you need a decent CPU cooler. Most CPUs come with a stock cooler. The one provided with Intel CPUs is generally weak and should be replaced with an after-market cooler. The AMD stock cooler is generally better and can be enough for budget streaming PCs.
Given your CPU will need a fair amount of heat dissipating, you’re going to want a decent cooler. A mid-to-high-end air cooler should do for most streaming computers. Alternatively, an entry-to-mid-level AIO (All In One) watercooler should provide more than enough cooling.
Motherboard
The motherboard isn’t particularly important to performance; however, you don’t want to skimp on the budget here too much. Budget motherboards often aren’t as reliable, especially at providing power to the CPU. Given that your CPU will be consistently drawing a fair amount of power, you want it to be stable.
Case
Like the motherboard, the case provides little to no performance impact. As long as the case you pick is big enough for your components and has enough airflow to keep your computer cool almost any case will do.
Graphics Card
The GPU is important for your stream as it will be running your games. Like any gaming PC, you’ll want a decent GPU. If you’re struggling to afford a strong CPU you may want to consider downgrading your GPU a tier or two. While this will affect your framerate, and potentially the game settings you can play at, it’s important to remember that you can only really stream at 30 or 60fps, anything above that is wasted on your stream. You may want to choose to sacrifice some of your game performance for stream performance.
You may remember that the CPU uses its integrated graphics chip to perform hardware encoding. Well, dedicated GPUs can do that too. All modern graphics cards support hardware encoding but support can vary in streaming software suites. This comes with essentially no performance impact, but like CPU hardware encoding, it doesn’t produce the same quality that software encoding can.
If you’re streaming from another device such as a console, you need a capture card to accept the input video stream. Realistically though, if you don’t plan to game on the computer you’re using to stream console gameplay you can get away without a dedicated GPU if you have a CPU with an integrated graphics chip. This can save a fair amount of money in your budget but only works if you never plan to game with that streaming computer.
RAM
Neither RAM speed nor capacity really plays into stream quality. While you need enough RAM to play the games you play at the settings you want to play, streaming doesn’t really require much. Realistically you should be fine with 8GB of decent RAM in a budget build, though you’ll likely want 16GB if your games demand it and budget allows it.
Storage
Streaming doesn’t really touch your storage devices. While you’ll benefit from an NVMe SSD for your operating system and your go-to games, this is a reasonable area to save some money, if you don’t mind accepting some slower boot times and loading times in games.
PSU
Gaming normally puts a heavy load on the GPU and some load on the CPU. Streaming generally increases the load on the CPU and so increases your power requirements. You’ll want to make sure that your PSU exceeds your component’s power draw by about 20-30%, comes with a decent efficiency rating, and fits in your case.
Step 3: Hunt for deals
Once you’ve decided on the parts you want to buy, we highly recommend you shop around for the best prices. It’s worth looking into physical stores if they’re convenient to get to but you’ll often find the best prices online. Price comparison sites can help but if you look at very similar parts as well you may find that there happens to be a great deal on a part that is better than the one you were thinking of.
You should also double-check that everything is compatible and that you’ve not overspent in an area that will provide minimal benefits. Compatibility is critical for CPU and motherboard be aware that competing and incompatible motherboard chipsets can have fairly similar names. When thinking of compatibility remember to check that the parts can work together and that they can physically fit in your case and on your motherboard.
Step 4: Assemble!
Once you’ve decided on your components and bought them it’s time to put them together. If you’ve not done that before or aren’t confident you can find plenty of video tutorials online. Make sure to check at least two sources, though or to find a reputable source, you don’t want to follow the instructions of a troll and end up ruining some expensive parts.
Pretty much everything in a computer can only go in the correct place, incompatible connectors have been designed to be physically different. Be careful not to force anything or you may break it. If it’s not obvious where something should go, make sure to read the installation guide that will come along with your motherboard.