
Windows users always enjoyed customizing their PCs with wacky backgrounds, cool animated screens, and unique icon and taskbar placements. It seems as if Microsoft has begun to take a hardline stance on customization, as they made it much harder to move the taskbar around like in previous iterations. The reason why it’s hard to move the taskbar is because all animations, code, and specific preferences are designed with a bottom-center taskbar in mind. So if you want to enjoy that creative freedom on your Windows 11 PC, you’ll have to mix your creativity with technical knowledge. Lucky for you, we’ll discuss how to move the Windows 11 taskbar step-by-step to make it easy for you even if you’re not with technical processes.
Contents
Related Reading:
- Windows 11: How to Remove the Taskbar Search Button
- Windows 11: How to Automatically Hide the Taskbar
- Fix: Taskbar Icons Missing in Windows 11
- Windows 11: Change Taskbar Size, Position, and Color
What Is the Taskbar?
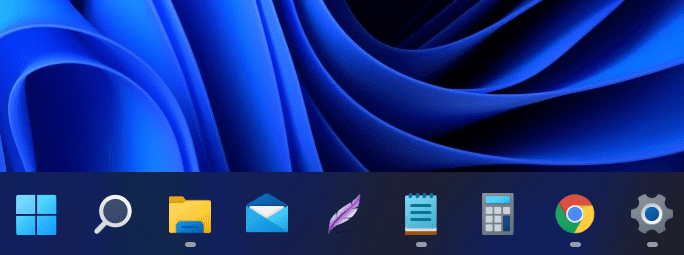
The Windows 11 taskbar is the menu at the bottom of the screen that stores shortcuts to your most frequently used programs, the search function, and the Windows Start Menu. The taskbar has looked different in each Windows iteration, but the core functionality has remained the same for decades.
Think of the taskbar as the control center for your computer. You have your system preferences on the right-hand side, such as keyboard language, network settings, notification center, and background applications. If you right-click on the taskbar, you can open the taskbar settings menu and change some preferences to your liking.
How to Move the Windows 11 Taskbar

So Microsoft removed the ability to move your Windows 11 taskbar unless you comb through your PC’s registry editor and settings. If you don’t feel comfortable changing these system files, we encourage you to keep the default factory settings. However, none of these processes will damage your computer and are entirely safe to do. To move your Windows 11 taskbar, follow these steps:
- Open the Start menu on Windows 11.
- Search for “regedit” and open Registry Editor.
- Follow this path: HKEY_CURRENT_USER\Software\Microsoft\Windows\CurrentVersion\Explorer\StuckRects3.
- On the main screen, double-click on the Settings binary file.
- You’ll see a Value Data screen pop up.
- In the second row and sixth column, you’ll see the 03 value. Press the delete key.
- Replace the 03 value with 01 to move the Windows 11 taskbar to the top of your screen.
- Change 03 to 02 for a right-side taskbar.
- Change 03 to 00 to move the taskbar to the left.
- Press Ok when done.
- Press Ctrl + Alt + Delete on your keyboard.
- Enter the Task Manager.
- In the Processes tab, find Windows Explorer and click the Restart button.
- You’re done!
Other Windows 11 Tips
If you enjoyed our guide on how to move the Windows 11 taskbar, you might be interested in these other tips and tricks for your PC:
Utilize Widgets
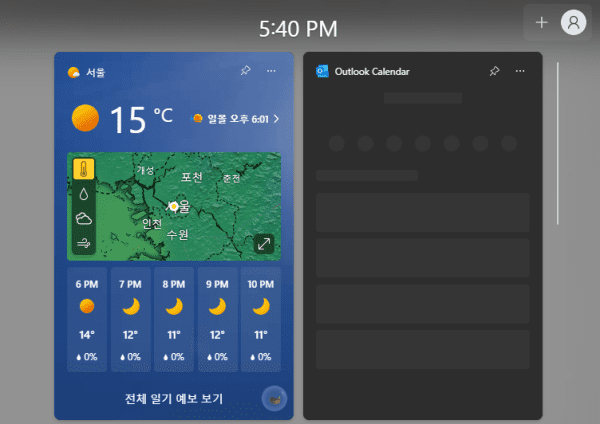
Not many people know that you can customize your desktop to show different widgets in the Start Menu or your desktop screen. Widgets are cards that show rich data snippets, such as news articles, the weather in your area, your calendar, and other relevant information.
To see your widgets, click on the weather icon on the very left side of your taskbar. This will open up your widget center, where you can see the relevant information you don’t need to search for. Instead, Windows 11 creates a personalized hub that you might be interested in. You can edit widgets by adding the ones you want with the plus icon in the top right.
Organize Desktops
Similar to widgets, few Windows users understand you have multiple desktops and layouts you can toggle between. If you feel one desktop is too cluttered with open apps, you can create a new one to work on and switch between the two as necessary. You’ll notice an icon next to the magnifying glass search icon representing two squares on your taskbar.
This is how you can switch between different desktops. For example, you can switch between desktops if you’re editing pictures on one desktop and don’t want a cluttered workspace—one for your work and one for your social media applications, etc.
Snap layouts
Many Windows users have complained about switching between open applications quickly. For so long, Windows has felt extremely one-dimensional because you have to manually navigate to the application you need at a particular time. If you press the Windows Key + Z, you can see a pop-up showing different layouts you can employ for your applications. Or, press the Windows Key and arrow keys to snap the application open to a side of your screen. This way, you can navigate and organize your apps.


It didn’t work on the 22h2 update…. any other hint?