
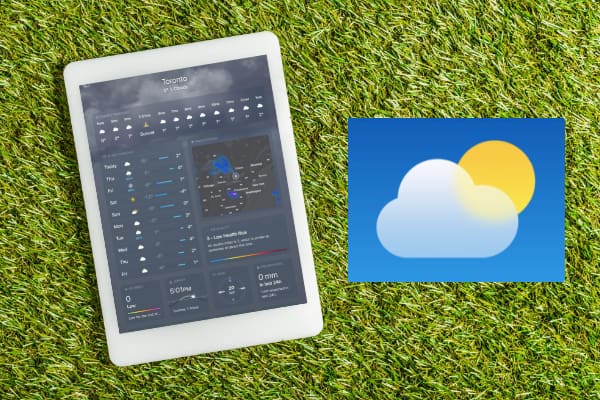
The Apple Weather app has been on iPhone for a long time. But it’s a new addition to iPad since the iPadOS 16 upgrade. In this new Apple Weather app explained article, I will walk you through some of the best features in the new Weather app edition.
The Weather app is another masterpiece from Apple! It’s the native weather reporter app for iPhone and Apple Watch.
Recently, Apple included it in the latest iPads and iPad software upgrades.
Furthermore, Apple’s acquisition of the Dark Sky weather technology platform allowed Apple to inject more weather data and features into its flagship Weather app.
Don’t get overwhelmed if you see new and unknown features in the app. Find out how to read the new Apple Weather app and familiarize yourself with some of the best features below.
Contents
Apple Weather App Overview
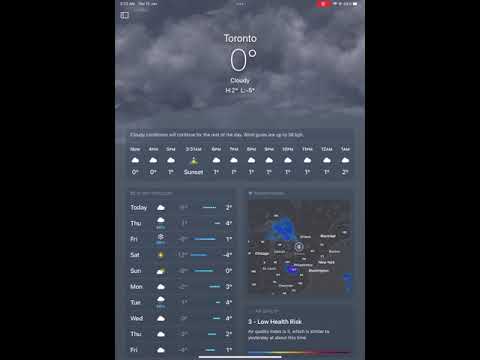
The Weather app opens with a screen of animated background that reflects the current weather status of your location. It’s a scrolling app, just like the scrolling website of Apple.com.
You can swipe your finger from the bottom to the top of the screen to view all the information cards the Weather app offers. Additionally, you can swipe left to check weather reports for saved locations.
The all-new Apple Weather app consists of the following weather data cards:
- Next Hour’s forecast for weather conditions like snowfall, flurries, etc.
- The Map card
- Hourly weather forecast
- 10-Day Forecast
- Air Quality status
- UV Index card
- Sunset and sunrise timer
- Wind speed and direction
- Precipitation meter
- Visibility display
- Humidity dashboard
- Pressure meter
- Feels like meter
The Apple Weather app looks like an all-in-one information dashboard for everything about the weather, weather conditions, and weather news (only in select countries).
The Side Panel of the Apple Weather App
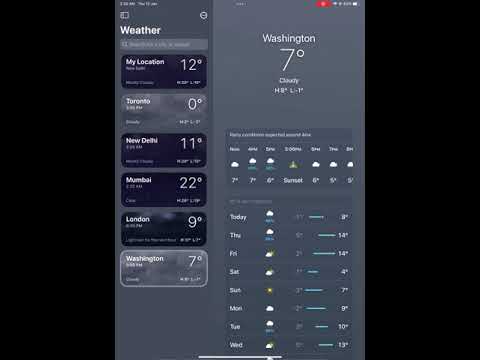
The new Weather app includes a side panel for additional features like cities, airports, weather metrics, notifications, etc.
You can tap the hamburger menu icon on your iPhone to view this panel. On iPads, you need to tap the small side panel icon on the top left corner of the app.
The Weather app side panel lets you add multiple locations as favorites for weather reports. You can tap on the location, and the main screen will change accordingly.
It helps a lot if you travel frequently. You can add the frequently traveled locations in the Weather app on your iPhone or iPad. Then, swap the cities or locations to know the present weather forecast.
Other cool things that you can do on the Weather app side panel are as mentioned below:
1. Switch Temperature Scale
After opening the side panel, tap the circle with the three dots icon. Now, select Celsius or Fahrenheit according to your preference.
2. Edit Favorite Location List
From the three dots menu, you can tap Edit List on the Weather app side panel. Now, tap the solid red circle beside the location you want to remove and select the bin or delete icon on the right side.
3. Weather Notifications
You can also set up custom weather notifications for specific locations by accessing Notifications from the three dots menu of the side panel.
Just select the location showing up on the Notifications screen. Then, you’ll see notification options for Severe Weather and Next-Hour Precipitation. Toggle On the respective options to start getting on-screen notifications.
How to Read Apple Weather App
Ensure that you’ve activated the Locations Services on your iPad from Settings > Privacy & Security > Location Services > Weather. Now, open the app from Home Screen.

- Tap the Hourly Forecast card.
- Then, touch the tiny thermometer icon on the top corner.
- Now, you can switch the hourly-forecast data to reflect information from options like UV Index, Wind, Temperature, Feels Like, Precipitation, etc.
- You’ll see an hourly graph for the option you choose.
A useful addition to the Weather app is the Map card that shows you local and global maps based on Precipitation, Temperature, and Air Quality. Simply touch the Map card and tap the icon below the GPS location icon.
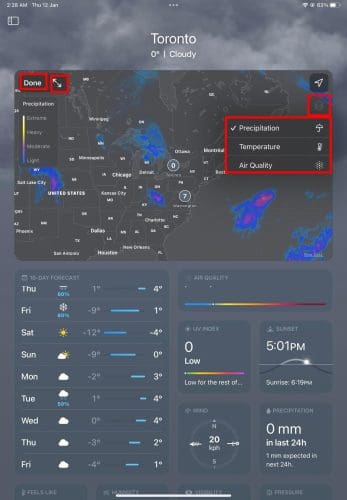
Now, you can choose between Temperature, Precipitation, and Air Quality. You can also squeeze two fingers on the map to zoom out and then select other locations in the local or foreign regions. Tap Done to save the changes.
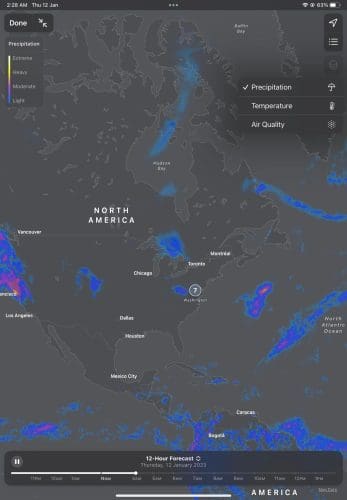
The Map card can also show you a full-screen view of the option you choose between the above three. While on the Map card, tap two opposite arrows beside the Done button. This iPhone or iPad gesture will open the weather map covering the entire screen.
Now, you get additional views like a scale for Temperature, Precipitation, and Air Quality.
Also, you’ll find a new hamburger icon beneath the GPS icon in the top right corner. Tap the hamburger icon to switch the map between your favorite locations you saved earlier. Tap Done again to close the full-screen weather map.
Apple Weather App Explained: Final Words
So far, you’ve developed a clear understanding of the new Apple Weather app for iPad and iPhone. Finally, this iPhone Weather app explained article should help you navigate around the Weather app like a pro.
Next up, read this iPhone Weather Widget article to add the Weather App as a widget to iPad and iPhone Home Screen. Also, if you want something different than the Apple Weather app, check out the best Weather Apps for iPad on App Store.


The Apple Weather app offers several paid subscription levels, but for the life of me, I cannot find anything that differentiates between them. The two highest cost options have the same name with different costs. How is one supposed to determine what level best suits one’s needs?