
If you’re a PC gamer, you probably have Steam installed as it is the most popular store for PC games. If you regularly play games on your computer, you may want to configure Steam to launch automatically when your computer boots up. This option won’t be for everyone, as not everyone will want Steam to open automatically and it does slow down your boot-up times a little.
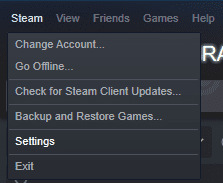
If you want to configure Steam to launch as Windows boots up, then you can enable this in the Steam settings. To open the settings, click on “Steam” in the top-left corner of the main Steam window, then click “Settings” in the drop-down menu.
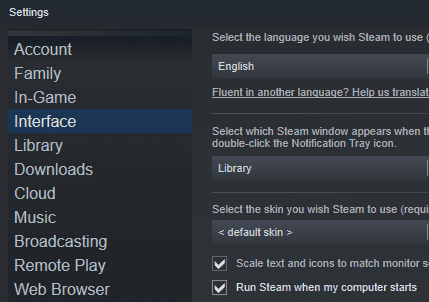
Once you’re in the Steam settings window, switch to the “Interface” tab. Here you can set Steam to start automatically with Windows by ticking the “Run Steam when my computer starts” checkbox, found roughly halfway down the page. Click “OK” in the bottom-right of the window to save the change.
Tip: Sometimes when Steam is configured to launch automatically with Windows, it struggles to correctly apply updates to the Steam client. If you see an update window pop up every time Steam launches, then you may be experiencing this issue. If the update fails, no error message is shown so it can be hard to notice this happening. To ensure that Steam updates correctly, close Steam then restart it with administrative rights. To do so, press the Windows key, type “Steam”, then click “Run as administrator”. This will ensure that Steam has the permissions it needs to update correctly.


Steam running on startup was already checked and it doesn’t start when windoze boots. It starts fine when I manually double click the steam icon.