The number of people working from home has increased exponentially in recent months. Office meetings moved to online and millions use tools such as Zoom, Microsoft Teams, and Skype for business or work-related video conferences.
Obviously, in order to join video conferences, you need a webcam. You can either use your computer’s built-in camera or install an external webcam.
Error 0xA00F4289 is an annoying error code that affects Windows 10’s camera app preventing you from using Skype, Zoom, and other video conference apps.
In this guide, we’ll show you how you can quickly fix this error.
Contents
How to Fix Webcam Error 0xA00F4289 on PC
→ Useful Tip: Your computer may fail to detect the camera because the webcam is loose. If you’re using an external webcam, make sure it is properly attached to the computer. Gently press everything around the camera itself.
If you’re using a built-in webcam, gently squeeze the camera area on your laptop lid. Check if you got rid of the error code 0xA00F4289 by simply applying light pressure on the area around the webcam.
Update your drivers
If your camera stopped working or Windows 10 failed to detect it, ensure you’re running the latest webcam drivers to avoid compatibility issues.
To update your drivers:
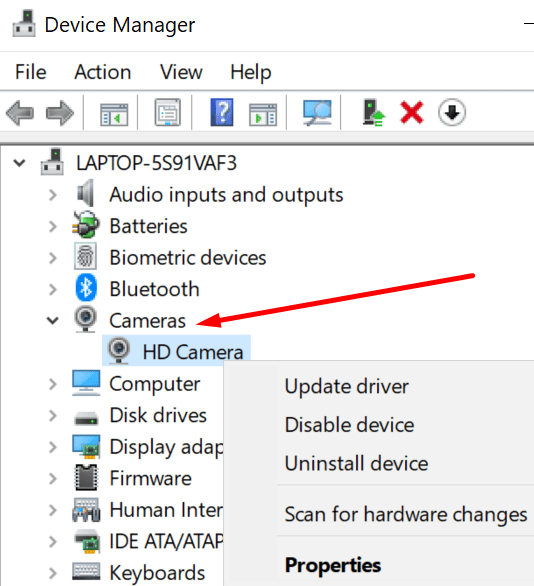
- Open the Device Manager
- Select Cameras and expand the list
- Right-click on your webcam
- Select Update driver and check if the error is gone.

If updating the driver did not work, try uninstalling it. The steps to follow are the same, you just need to select the Uninstall device option instead of Update driver. Restart your computer to automatically reinstall the latest webcam drivers.
Check your privacy settings
Another reason why your computer may fail to detect your webcam with error 0xA00F4289 is that you denied camera access under privacy settings.
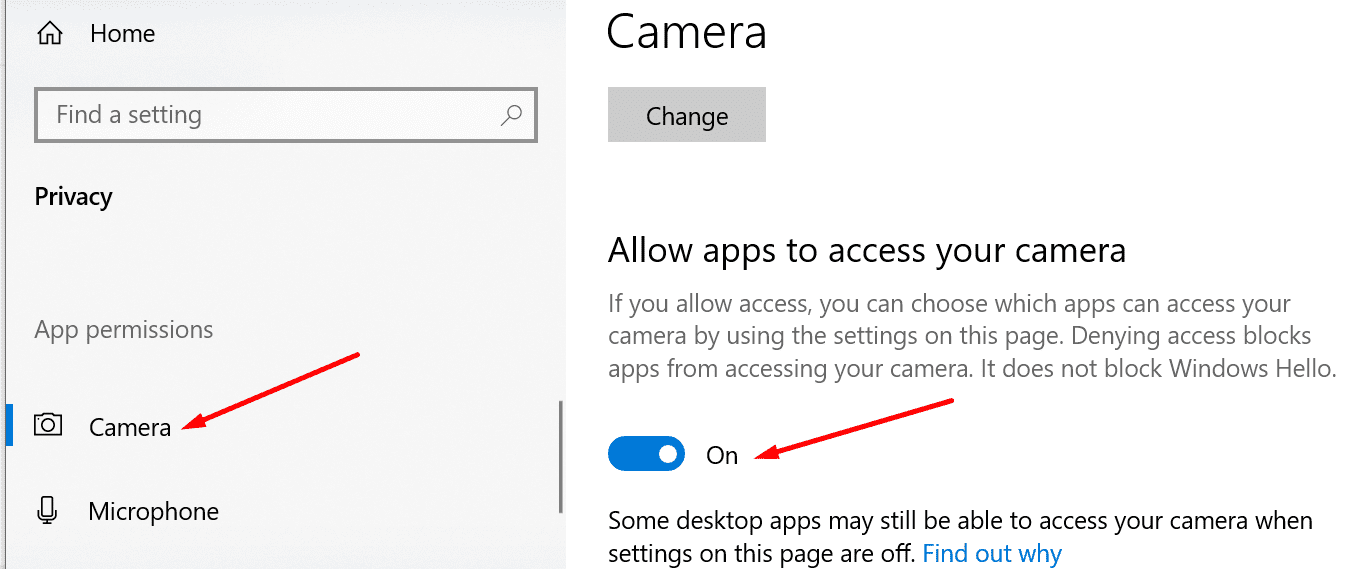
- Go to Settings
- Select Privacy
- Under App permissions, click on Camera (on the left-hand pane)
- Scroll down to Allow apps to use your camera and toggle on this option.

Check if your computer can now detect the webcam.
Run the Hardware & Devices Troubleshooter
The next method on the list involves running the Hardware & Devices Troubleshooter.
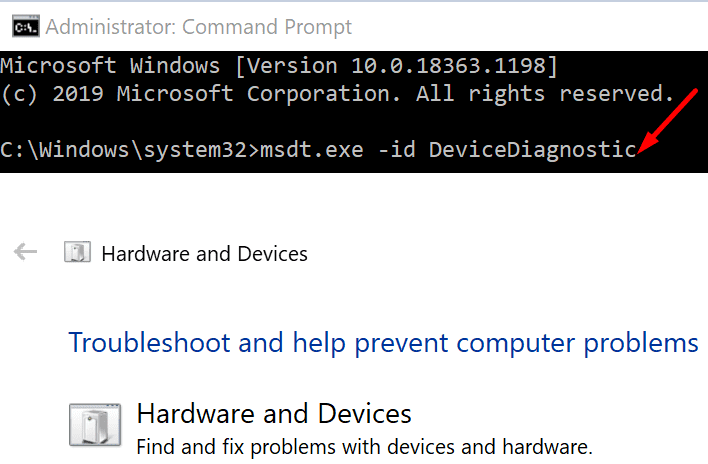
- Launch Command Prompt with administrative rights
- Enter the msdt.exe -id DeviceDiagnostic command and press Enter

- The Hardware and Devices window will pop up, click on Next to launch the scan
- Restart your computer and test your webcam.
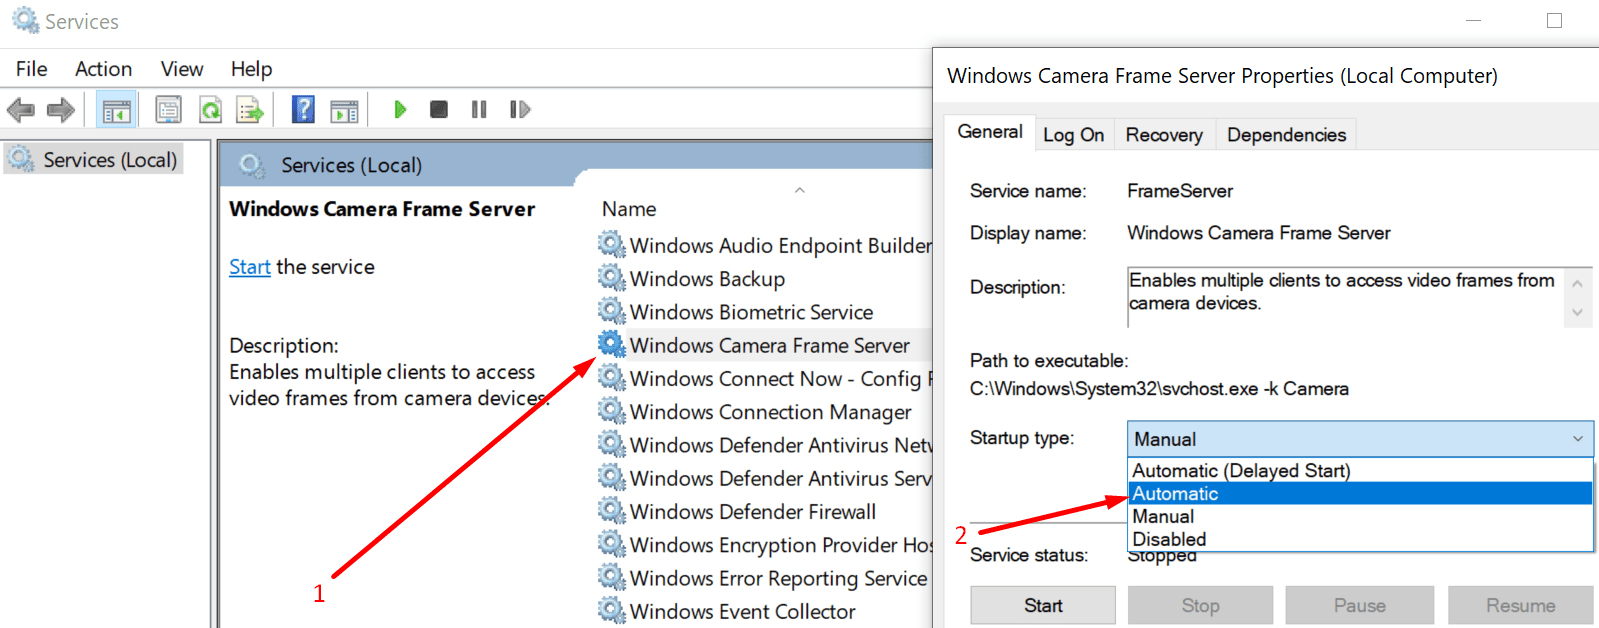
Restart the Windows Camera Frame Server Service
In order for your webcam to work properly, the Windows Camera Frame Server Service also needs to be running as intended. Restarting the service may prove to be the solution you’ve been looking for.
- Type services in the Windows search bar
- Open the Services app
- Scroll down to Windows Camera Frame Server Service
- Right-click on the service and set the Startup type to Automatic

- Apply the changes
- Then right-click on the camera service again and select Refresh.

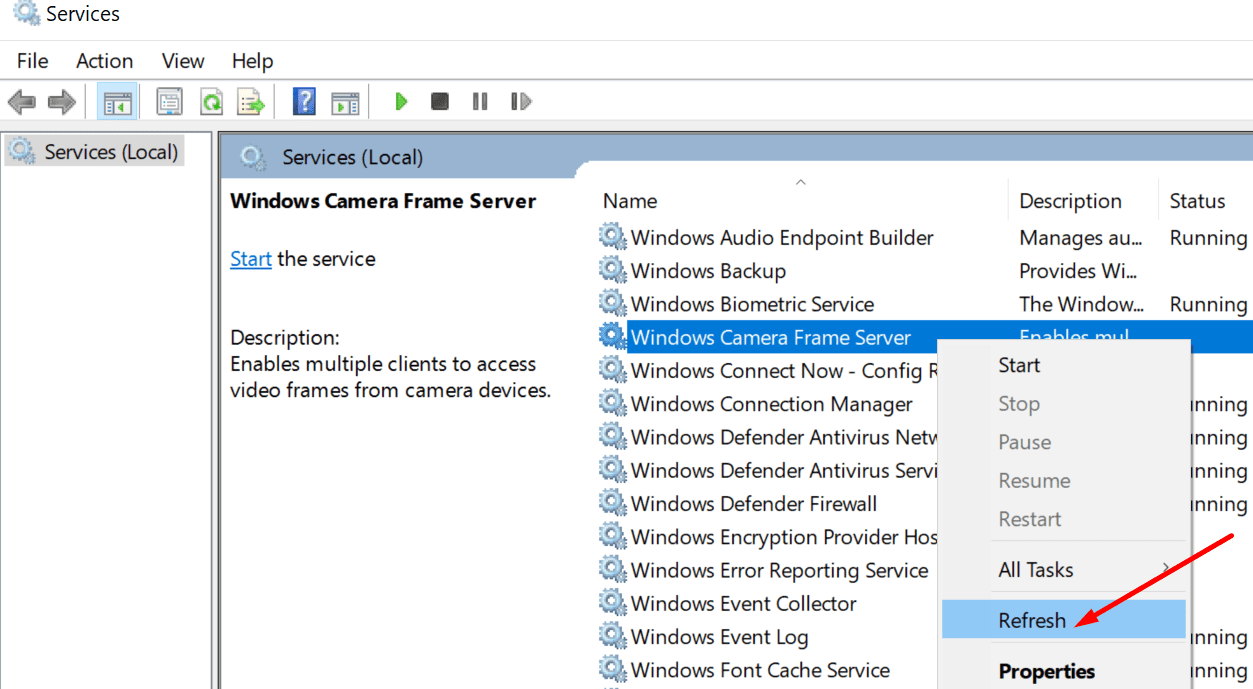
Check if you can now use your webcam.
Uninstall the problematic video conference app
If webcam error 0xA00F4289 affects only one particular program, go to Control Panel, select Uninstall a program, and remove the problematic program.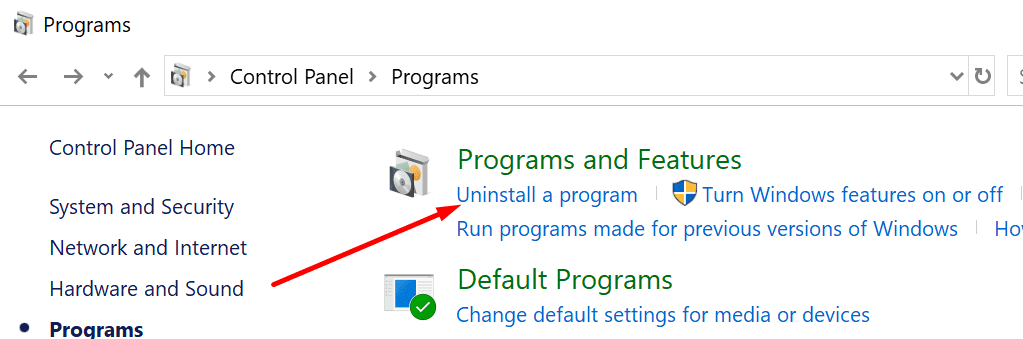
Restart your computer and reinstall that program. Check if re-installing the tool fixed the issue.