Creating a great document isn’t just about the words you use. How you present those words also matters. Mismatched fonts, uneven headings, clunky formatting… these don’t exactly scream “professional.” But then again, keeping track of all those formatting details feels like a chore. The good news is that you don’t have to remember anything. Word will do it for you. The program offers a handy Style Sets feature that will pull the entire document together with a single click. Here’s how to use Style Sets in Word and where to find them.
Contents
What Are Style Sets?
There are two Word features that you should know – Styles and Style Sets.
Each style is a set of formatting rules for your text – in paragraphs or headings. Your chosen style will determine things like the size, color, and spacing of your text. They also affect the paragraph alignment and spacing.

Style Sets group several of these styles together. The styles in question are grouped based on how good they look together. As a result, your entire document will become incredibly visually appealing with a single click. But more importantly, you won’t have to apply individual styles to each part of your document. This feature will automatically format everything – from headings to paragraphs.
Most Style Sets have pretty self-explanatory names like “Newsprint” or “Elegant.” This allows you to find a style that matches the tone of your document without much thought.
How to Use Style Sets in Word: A Step-by-Step Guide
Here’s how to access the Style Sets feature in Microsoft Word.
Step 1: Go to the “Design” tab at the top of your document.
You’ll instantly see the Style Sets in the “Document Formatting” group. However, this group only contains a few pre-selected sets. If one of them works for you – great. Just click on it, and you will apply it to the entire document. If, however, you want to explore other options, you should proceed with this guide.
Step 2: Click on the down-facing arrow in the bottom-right corner of the Style Sets. This will expand your options.
Step 3: Click on the set that best matches your document.
And just like that, your entire document gets a fresh, new look.
How to Modify Style Sets in Microsoft Word
If you’re a perfectionist, you might want to tweak your chosen Style Set. And that’s perfectly fine. You can even save the end product as a new Style Set. Just click on the “Save as a New Style Set” button that appears when you expand your set options. But thi changes are made manually.
The only way to automatically modify a Style Set in Microsoft Word is by adjusting individual styles within it. Here’s how you can do that.
Step 1: Go to the “Styles” group on your “Home” tab.
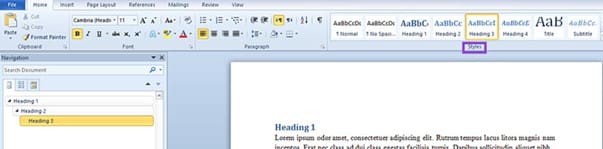
Step 2: Click on the down-facing arrow to expand your selection.

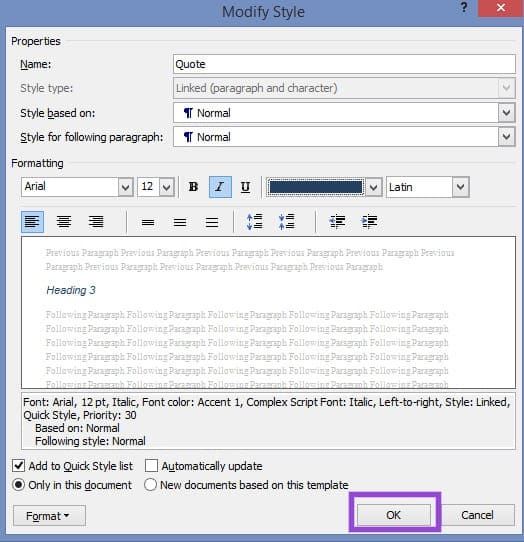
Step 3: Right-click on the Style you want to tweak and select “Modify” from the dropdown menu.

Step 4: Make the desired formatting changes in the “Modify Style” dialog box.
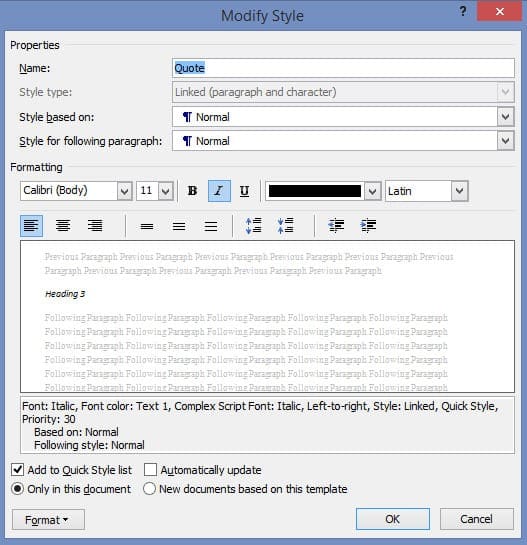
You can practically change every aspect of the selected Style – the font, the color, and even the name.
As you make the changes, the preview box will instantly show what they look like. This handy addition helps you get the exact look you want before hitting that “OK” button.