On October 1, 2024, Microsoft began rolling out the 24H2 version of Windows. Like so many big updates before, 24H2 brings new features and bug fixes. Unfortunately, for some users, it has also brought quite a few problems.
If you want to roll back Windows 11 24H2 update and return to a less problematic version of Windows, here are a few options.
Option 1. Roll Back Windows 11 24H2 Update Through System Restore
There are two main methods for undoing the 24H2 update. The easiest is to use the System Restore utility. This essentially takes your machine back to a prior state, almost like traveling back in time.
Step 1. Open the Settings menu. You can access it by pressing the “Windows” and “I” keys together.
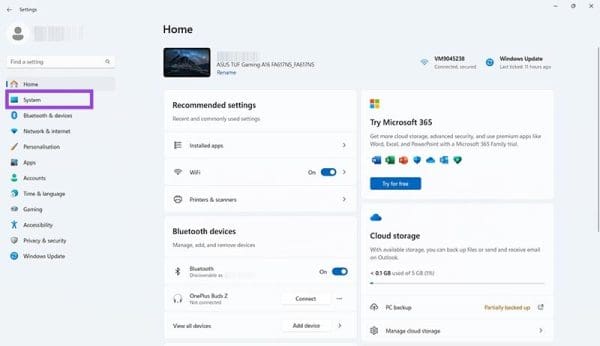
Step 2. Click on “System” and then scroll down and select “Recovery.”
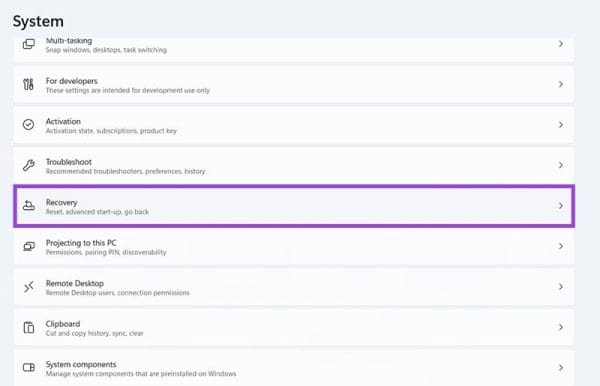
Step 3. Look for the button marked “Go back” and click on it. Follow the on-screen prompts in the pop-up window to proceed with the System Restore. Once it’s all done, your device should restart and you’ll be on the version of Windows you had before installing the 24H2 update.

Note: If the “Go back” button doesn’t appear for you, it’s most likely because your PC doesn’t have the data it needs to carry out a System Restore. In that case, you can try clicking the “Reset PC” button instead to reinstall Windows. It should fix the issue, but you’ll probably have to reinstall some apps and reconfigure your device once the process is done.
Option 2. Roll Back Windows 11 24H2 Update With a Clean Install
Your other option to roll back Windows 11 24H2 update is to do a clean install of an earlier version of Windows, before 24H2. This can take some time and will essentially reset your device, deleting apps, settings, and personal files, so you should back up your data beforehand.
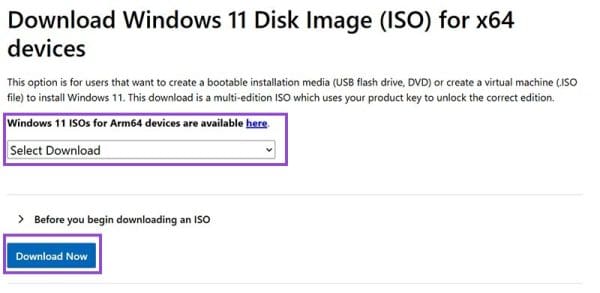
Step 1. Go to the official Windows download page and download the installation media for the version of Windows you want.
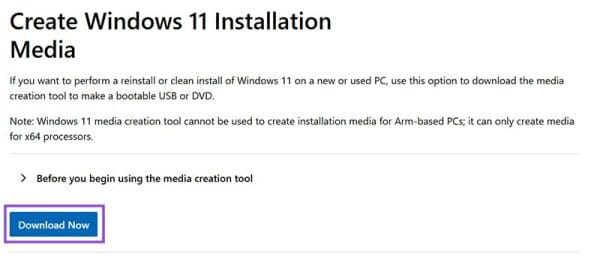
Step 2. On the same website, download the Media Creation Tool, which you can use to create a bootable USB or DVD for a clean Windows installation.
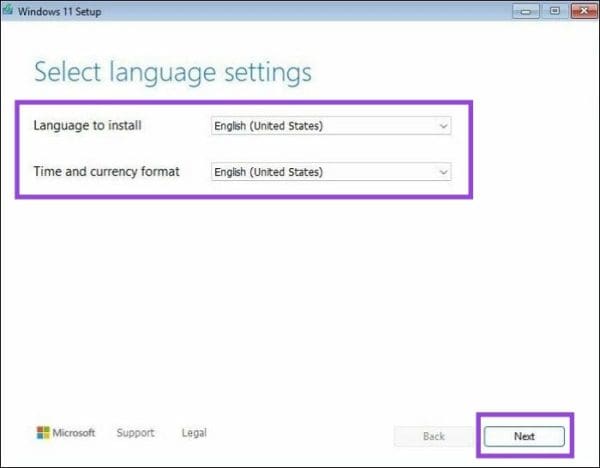
Step 3. Boot up your device using either the USB or DVD to begin the clean install. In the window that appears, set your desired language and click “Next.”
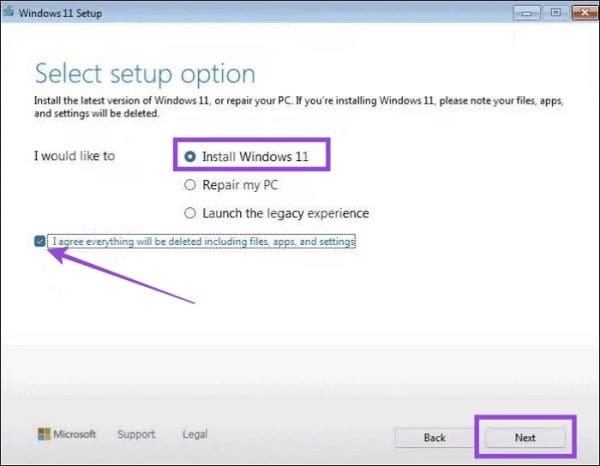
Step 4. Select “Install Windows 11,” tick the “I agree” box, and click “Next” again. Then, continue following the on-screen instructions and clicking the “Next” button each time, entering your product key (if you have one) and choosing where to install the system. When done, wait for the OS to boot up, and you should be on an earlier version of Windows 11, without any 24H2 issues.