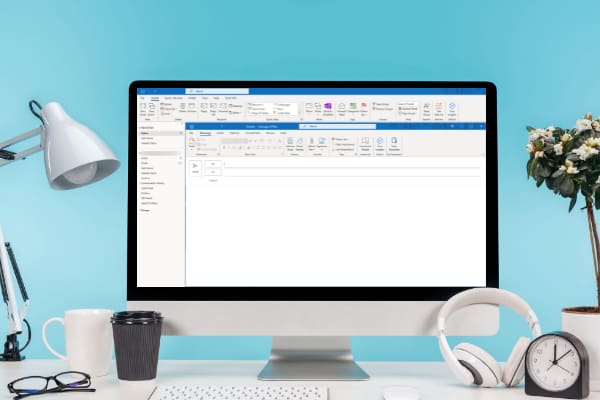
There is always a reason to send emails to various people. Here is how you can create a distribution list in Outlook.
As an Outlook user, you may need to send important official or personal emails to multiple people. In such situations, sending emails individually will need more time and effort.
You can set up a distribution list in Outlook and eliminate the hassle of adding multiple email addresses in the To field.
But first, let’s learn more about the distribution list and its importance.
Contents
- 1 What Is a Distribution List in Outlook?
- 2 Why Do You Need a Distribution List in Outlook?
- 3 Difference Between Distribution List, Distribution Group, and Contact Group
- 4 Creating a Distribution List in Outlook from Web App
- 5 How to Create a Distribution List in Outlook Desktop
- 6 How to Create a Distribution List in Outlook for Mac
- 7 Conclusion
What Is a Distribution List in Outlook?
The distribution list is a list of contacts or email addresses that can be used to distribute or send emails to all of them.
So, it’s a group of email addresses that you can use to send an email. These lists are also mentioned in different Outlook versions as Contact List and Contact Group.
If you’ve got a distribution list, it’ll appear in your contact list and address book.
Why Do You Need a Distribution List in Outlook?
Sending an email to various people can be difficult, especially if you’re part of an organization with hundreds or thousands of employees.
The distribution list automates this mundane and repetitive task of adding email addresses individually whenever you want to send an email to a group of people.
You can create the list once and use it for years unless some employees join or leave the organization or team.
In that case, you can also seamlessly edit the distribution list to keep it up to date. Moreover, a distribution list helps you avoid accidentally adding someone as your email recipient.
Difference Between Distribution List, Distribution Group, and Contact Group
You’ll find that terms like distribution list and contact group are used interchangeably in the Microsoft or Outlook ecosystem.
While these mean the same thing, the distribution list is used in the older versions of the Outlook app.
Some people might also use terms like distribution group and contact list to refer to the distribution list.
In the case of Office 365 subscriptions, distribution lists are meant for the entire organization.
Besides being managed centrally, these lists receive emails from the organizational email instead of the personal email address.
Conversely, contact groups can be created on a personal Outlook email account.
Creating a Distribution List in Outlook from Web App
While accessing your Outlook from the web app, you can follow these steps to add a contact list or distribution list:
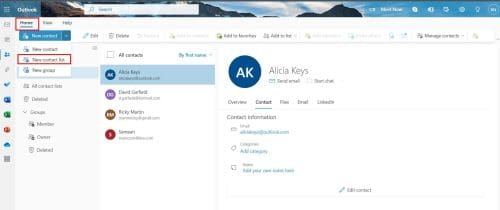
- Open Outlook on the web browser and click on the People icon.
- Click on the dropdown arrow beside New contact to select the New contact list.
- A popup will appear on the screen.
- You need to enter a name for the list.
- Add the email addresses of all the people you want to include in this distribution list.
- If you want, you can also add a description.
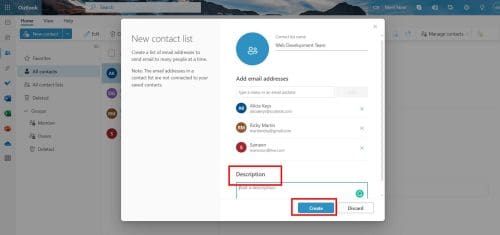
- Click Done, and you just created an Outlook distribution list.
- When emailing the group, add the group name in the To field.
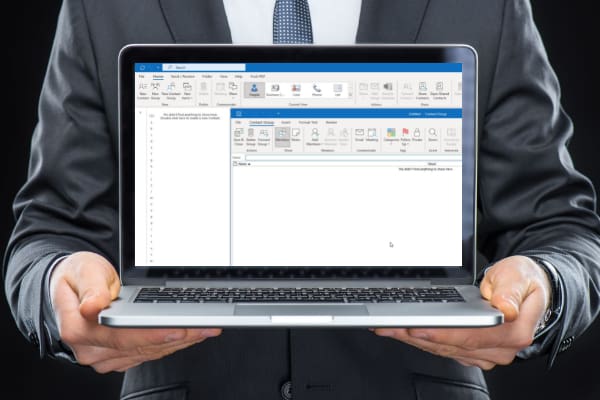
How to Create a Distribution List in Outlook Desktop
Even if you’ve got an Outlook app on your Windows, you can easily create a distribution list known as a Contact Group. Here are the quick steps to create an outlook distribution list there:
- Open the Outlook app and select the People tab.
- Click on the New Contact dropdown arrow.
- Choose Contact Group.
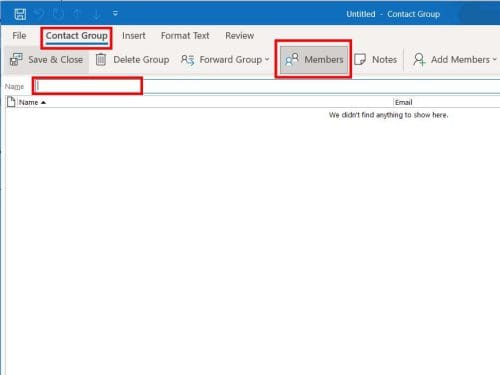
- You’ll see a new window for that group or list.
- In the Name field, add the list name.
- Click on Add Member button.
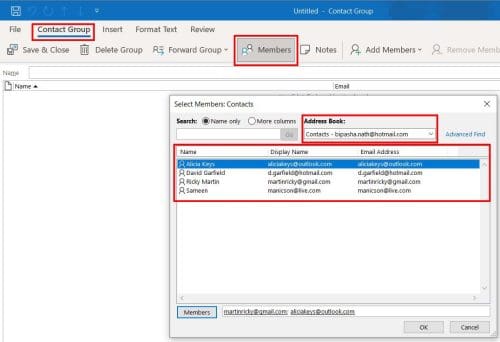
- Choose from where (Outlook Contacts, Address Book, E-mail Contact) you want to add people to this group.
- Select someone, and click the Members button to add them to the list.
- To select multiple people simultaneously, press the Ctrl key while selecting all the names.

- When done, click OK to return to the Contact Group window.
- Click Save & Close to apply changes.
How to Create a Distribution List in Outlook for Mac
The outlook distribution list feature is also available for Mac users. So, you can create a distribution list in Outlook Mac with these steps:
- Open Outlook for Mac and select People.
- Choose New Contact List under the Home tab.
- Assign a name to the list.
- Click on Add button and type the first few letters of the contact’s name you want to include.
- Select that name to add it.
- Type the email address to add someone who isn’t on the contact list.
- Click the Save & Close button when all names are added successfully.
Conclusion
Now that you know how to create a distribution list in Outlook, you can seamlessly send your emails to many people.
Whether you use Windows or Mac, following our steps will help you create an Outlook distribution list.
You can comment to share your experience with setting up a distribution list in Outlook. After creating a list, you may want to share contact list with another Outlook user.