Did you know it’s possible to transfer Windows files to iPad devices and other Apple tech? You may find this especially useful if you need to work on Office documents on the go. Work on your documents in the office or at home, then transfer them to your iPad or iPhone for remote work.
In this guide, you’ll learn how to transfer files from Windows to iPhone or iPad devices with two simple methods. For the first method, you will need the Apple Devices app from the Microsoft Store.
Contents
Method 1: Using a USB Connection
Arguably the easiest way to transfer Windows files to iPad or iPhone devices is with the iPhone charging/data transfer cable.
Step 1: Plug Your iOS Device into the Windows Computer
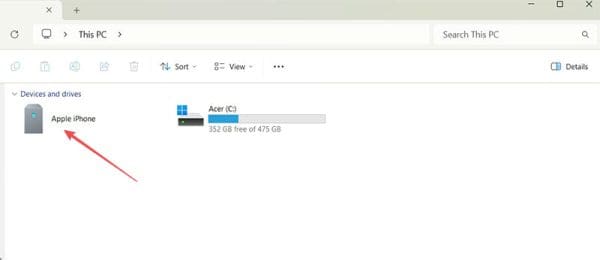
Connect the “Lightning” end of the iOS charging cable to the Apple device and the USB end to the computer. Now click “Start” on the Windows computer and head to “File Explorer.” Click “This PC” on the left-hand side menu and you should see the Apple device in your available devices and drives. This step is purely to check a successful connection between both devices.
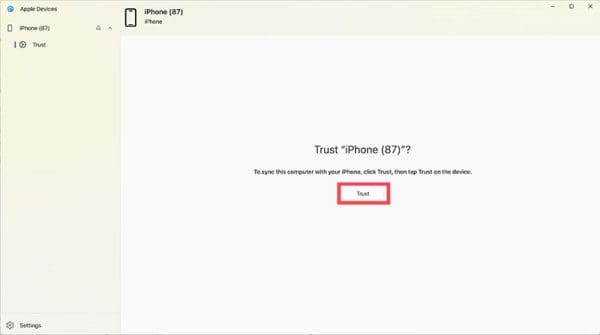
Step 2: Start the Apple Devices App
From “Start,” launch the Apple Devices app. When prompted, confirm that you trust the Apple device you’ve connected.
Step 3: Select the Files You Want to Transfer
The Apple Devices app will list the types of Windows files you can transfer. Click on the file type, then click the file you want. Now click “Add file” which prompts the app to add the files to your iOS device. Wait for any process to complete before disconnecting your iOS device.

Method 2: Using Cloud Data Storage Services
It’s possible to use a Wi-Fi connection to transfer Windows files to iPad or iPhone devices. You just need to ensure you have the same file storage app on both machines, e.g., Google Docs, Dropbox, or OneDrive. Make sure you’ve logged into both devices on that app with exactly the same login details.
You can now use that app connection to access any Windows files:
- Save the files you want to that storage app on the Windows computer.
- Open the corresponding app on the iOS device.
- Open the files you need to work on from the iOS app.
Troubleshooting Common Issues
- USB connection keeps failing: This is usually due to a faulty cable or USB socket. Try moving the cable to a different USB socket on the computer or swap cables.
- Apple device doesn’t appear in “This PC”: Unlock the iPhone or iPad screen while it’s connected to the computer. Some charging/data transfer cables won’t work while the screen is locked.
- Files don’t appear in the iOS version of the file storage app: This usually means that the files simply haven’t synced yet — a common problem with larger files or slow internet connections. Wait 10-15 minutes, restart the app and try again.
Frequently Asked Questions
Yes, but only if you have an iPod touch. Older iPod models won’t accept music or files transferred using the above methods.
Yes, as long as there’s a Windows version and an iOS version. Remember to always use the same login details in both apps.
Yes, you can access files from your iPhone or iPad on a Windows device using either method above.
Now that you know how to transfer files from Windows to iPhone or other iOS devices, you can manage and organize your data more effectively. Follow the steps outlined in the article and bookmark them for future use. Remember, these steps will work on any current iOS device. You don’t have to learn a new Windows to iOS file transfer method when you upgrade your device.