

Millions of people rely on Microsoft Teams to attend video meetings. Whether you’re a school teacher, student, or business professional, Teams are part of your everyday life.
Well, Microsoft Teams may sometimes fail to detect the camera. This means you can’t share video images, and the other meeting participants can’t see you. And you may also get all sorts of errors in the process, such as:
- No Available Camera Found.
- Camera Not Detected.
- Camera Not Working.
Let’s see how you can troubleshoot this problem on Windows and Mac.
Contents
- 1 Fix Microsoft Teams Not Accessing Camera
- 1.1 Unplug Your Camera and Disconnect Other Devices
- 1.2 Configure Camera Settings Within Teams
- 1.3 Check Your Privacy Settings
- 1.4 Re-Register Your Camera App (Windows)
- 1.5 Close Other Programs Accessing the Camera
- 1.6 Update Teams
- 1.7 Update Your OS and Drivers
- 1.8 Fix Camera Issues for Teams on the Web
- 1.9 Other Fixes Suggested by Users
Fix Microsoft Teams Not Accessing Camera
Unplug Your Camera and Disconnect Other Devices
If you’re using an external camera, gently press on its edges to ensure everything is connected properly. If that did not work, unplug it and restart your computer. You can then plug the webcam back in.
If there are other peripherals connected to your computer, unplug all of them. This includes external storage devices, controllers, coolers, you name it. They might interfere with your webcam.
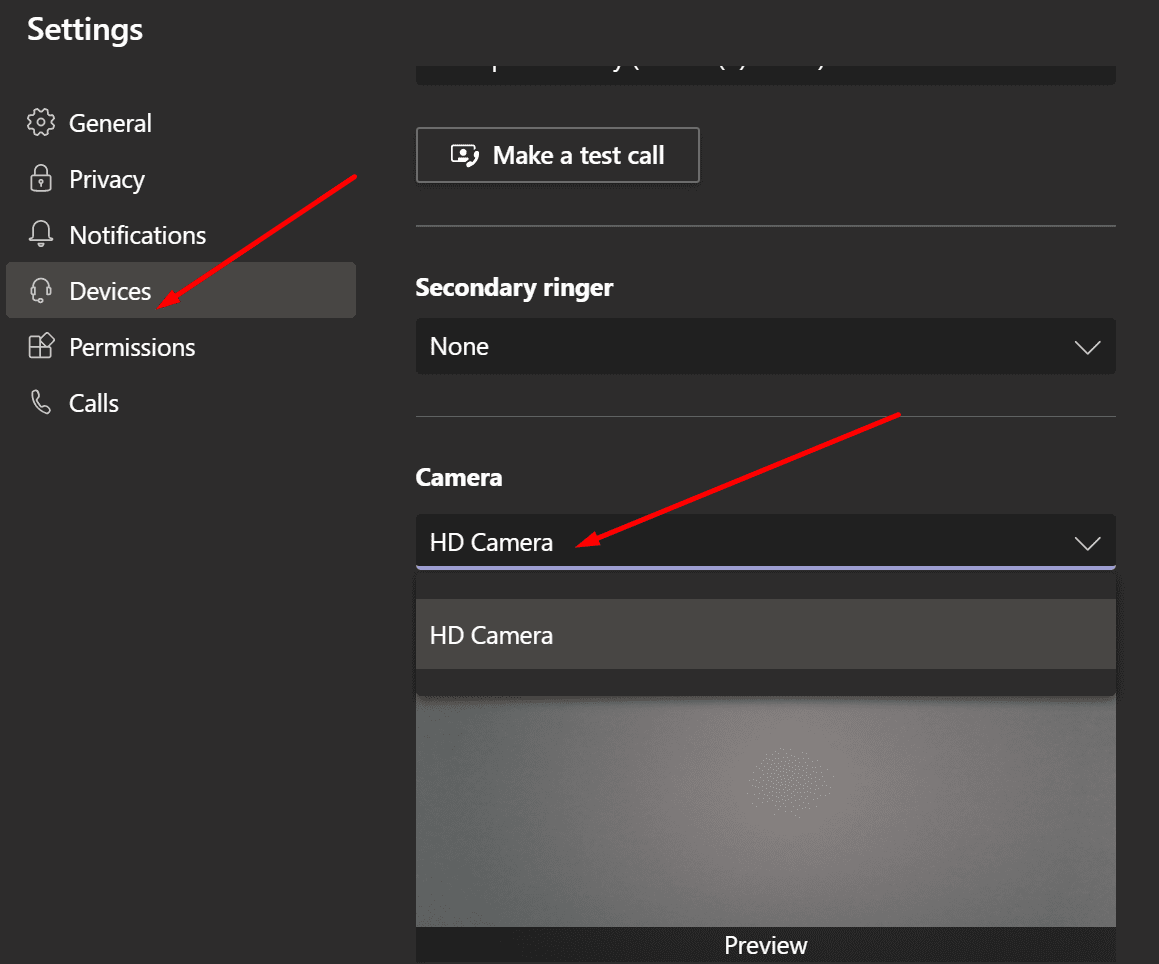
Configure Camera Settings Within Teams
- Launch Teams, click on your profile, and select Settings.
- Then click on Devices and scroll down to Camera.
- Check your camera preview or use the drop-down menu to select the camera you want to use.

- Do that if you have a built-in webcam and an external camera.
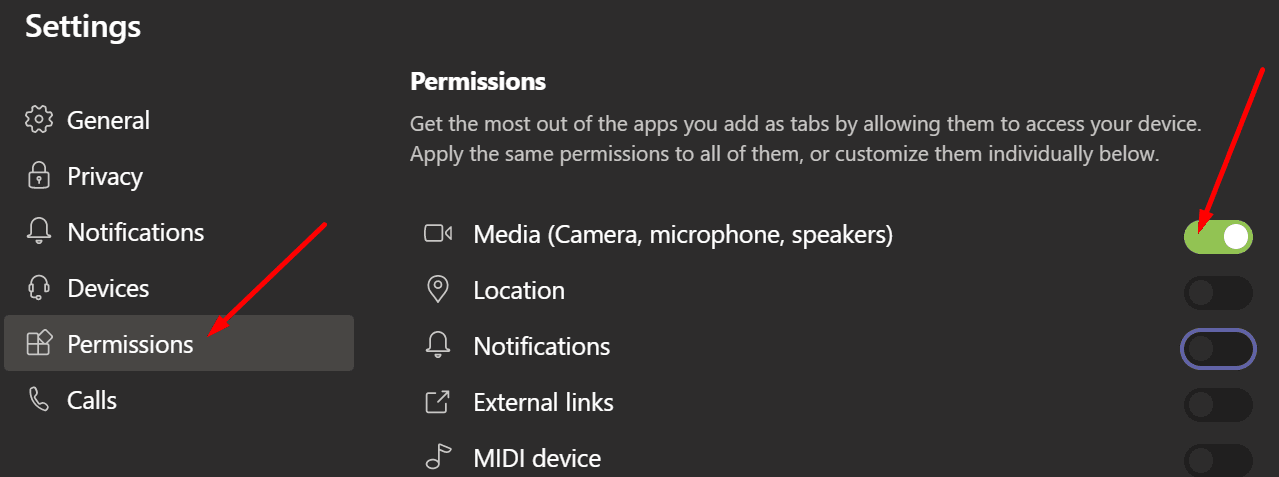
- Next, click on Permissions and make sure Teams is allowed to use the camera. Toggle on the Media option.
Check Your Privacy Settings
Both Windows 10 and Mac come with built-in privacy settings that you can use to prevent apps from accessing your camera. If you enabled these settings, Microsoft Teams wouldn’t be able to access and use your camera.
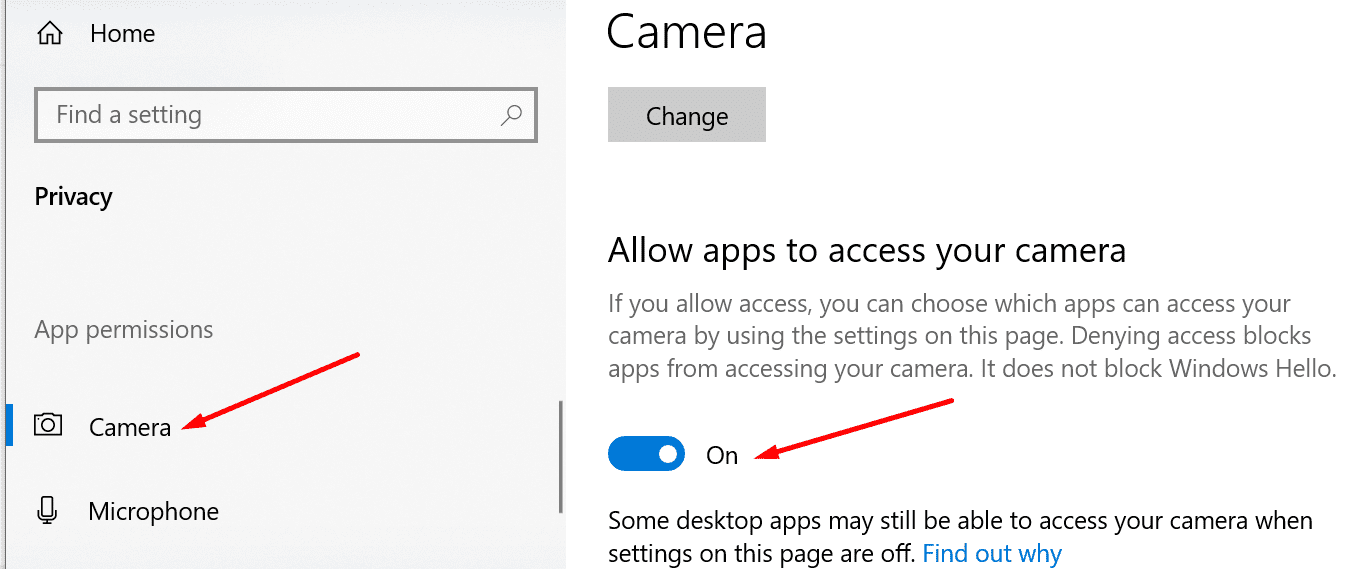
On Windows 10
- Go to Settings and click on Privacy.
- In the left-hand pane, under App Permissions, click on Camera.
- Enable the option that says Allow apps to access your camera.

- Then, go to Allow desktop apps to access your camera.
- Make sure the option is enabled, and Teams is on the list.

- Note: If you installed Teams from the Microsoft Store, go to Choose which Microsoft Store apps can access your camera. Enable the option and toggle Teams on.

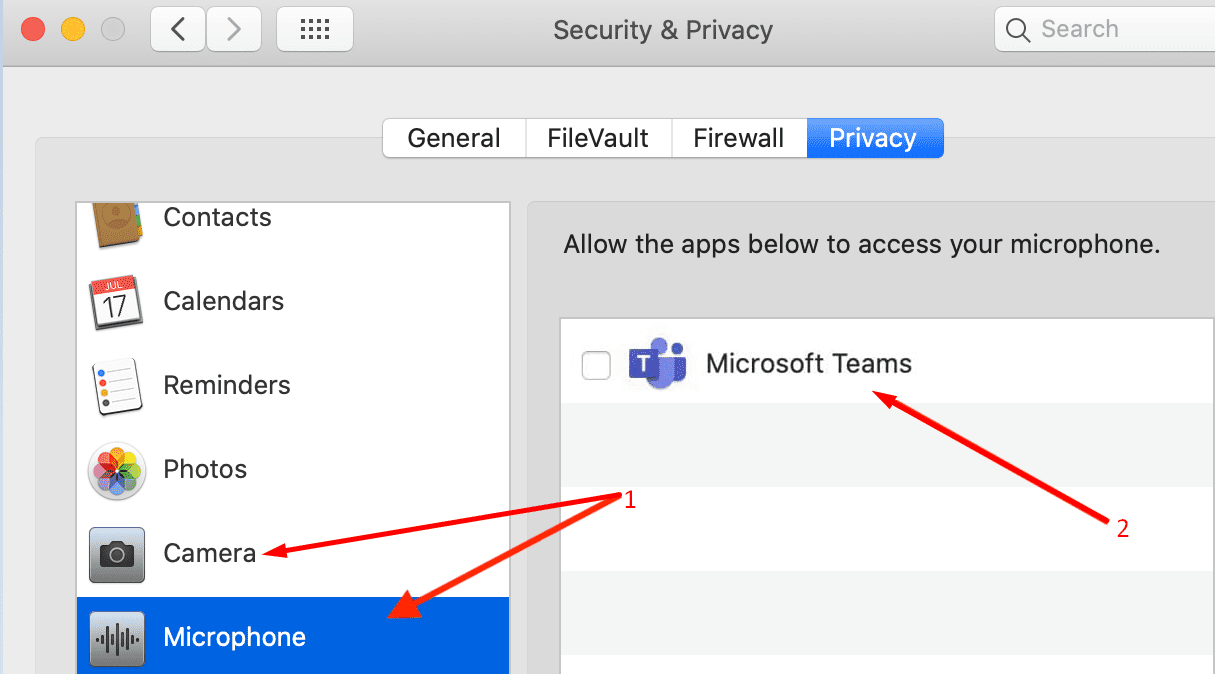
On Mac
- Click on the Apple menu, and go to System Preferences.
- Then click on Security & Privacy, and select Privacy.
- Click on Camera and then on Microphone.

- Tick the checkbox next to Teams to allow the app to access your camera and mic.
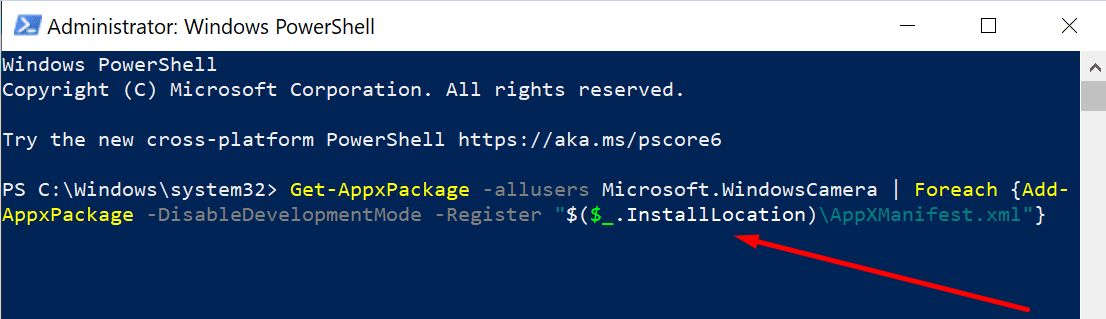
Re-Register Your Camera App (Windows)
Use this fix on Windows 10 computers.
- Press the Windows +X keys at the same time. Right-click on Windows PowerShell and launch it with admin rights.
- Enter the following command to register your Camera app again:
- Get-AppxPackage -allusers Microsoft.WindowsCamera | Foreach {Add-AppxPackage -DisableDevelopmentMode -Register “$($_.InstallLocation)\AppXManifest.xml”}

- Get-AppxPackage -allusers Microsoft.WindowsCamera | Foreach {Add-AppxPackage -DisableDevelopmentMode -Register “$($_.InstallLocation)\AppXManifest.xml”}
- Close Windows PowerShell. Check if Teams can access your camera now.
Close Other Programs Accessing the Camera
Check if other programs could potentially access your camera. Go ahead and close them if they’re running in the background. If another program is using your camera, Teams won’t be able to access it.
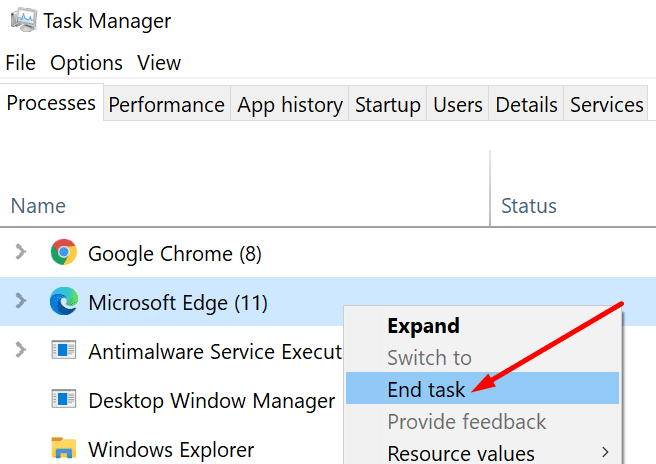
On Windows 10
- Open the Task Manager and click on the Processes tab.
- Locate any programs that could be using your camera (Zoom, Skype, etc.).

- Right-click on them and select End Task.
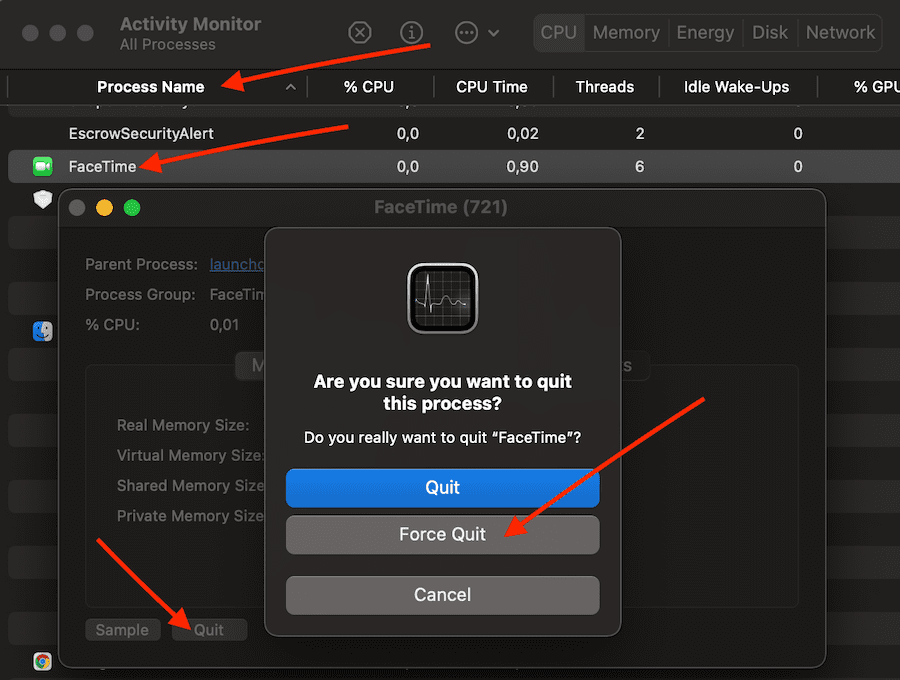
On Mac
- Launch Finder and select Applications.
- Then open Utilities.
- Next, double-click on Activity Monitor. All the programs and processes running in the background are listed on the Process Name column.
- Click on All Processes to filter the active processes and programs.
- Select the programs that might be using the camera, including FaceTime, and hit Force Quit.
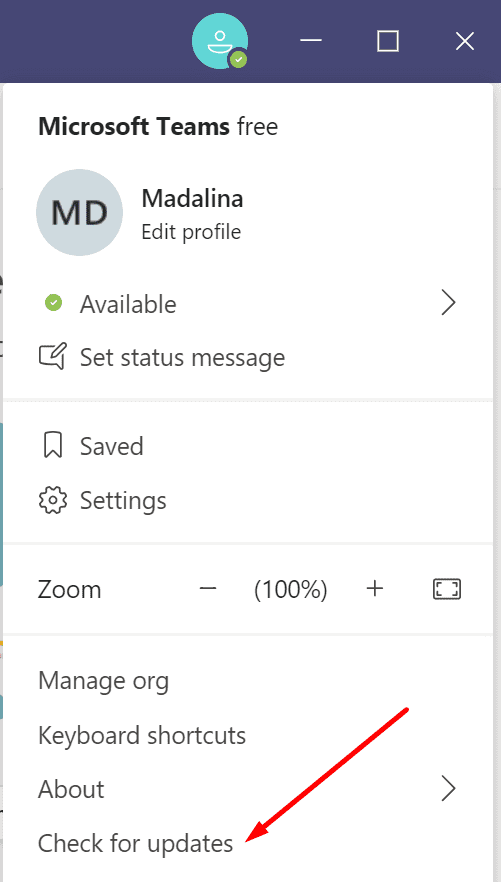
Update Teams
Ensure you’re running the latest Teams version on your machine. The app automatically installs the latest updates. But if something went wrong and the update failed to install, you can manually install the latest Teams version.
Click on your profile picture and select Check for updates. Restart your computer after you installed the latest updates.
Update Your OS and Drivers
Speaking of updates, make sure you’re running the latest Windows 10 or macOS version on your computer.
On Windows 10
Go to Settings → Update & Security → Windows Update and Check for updates.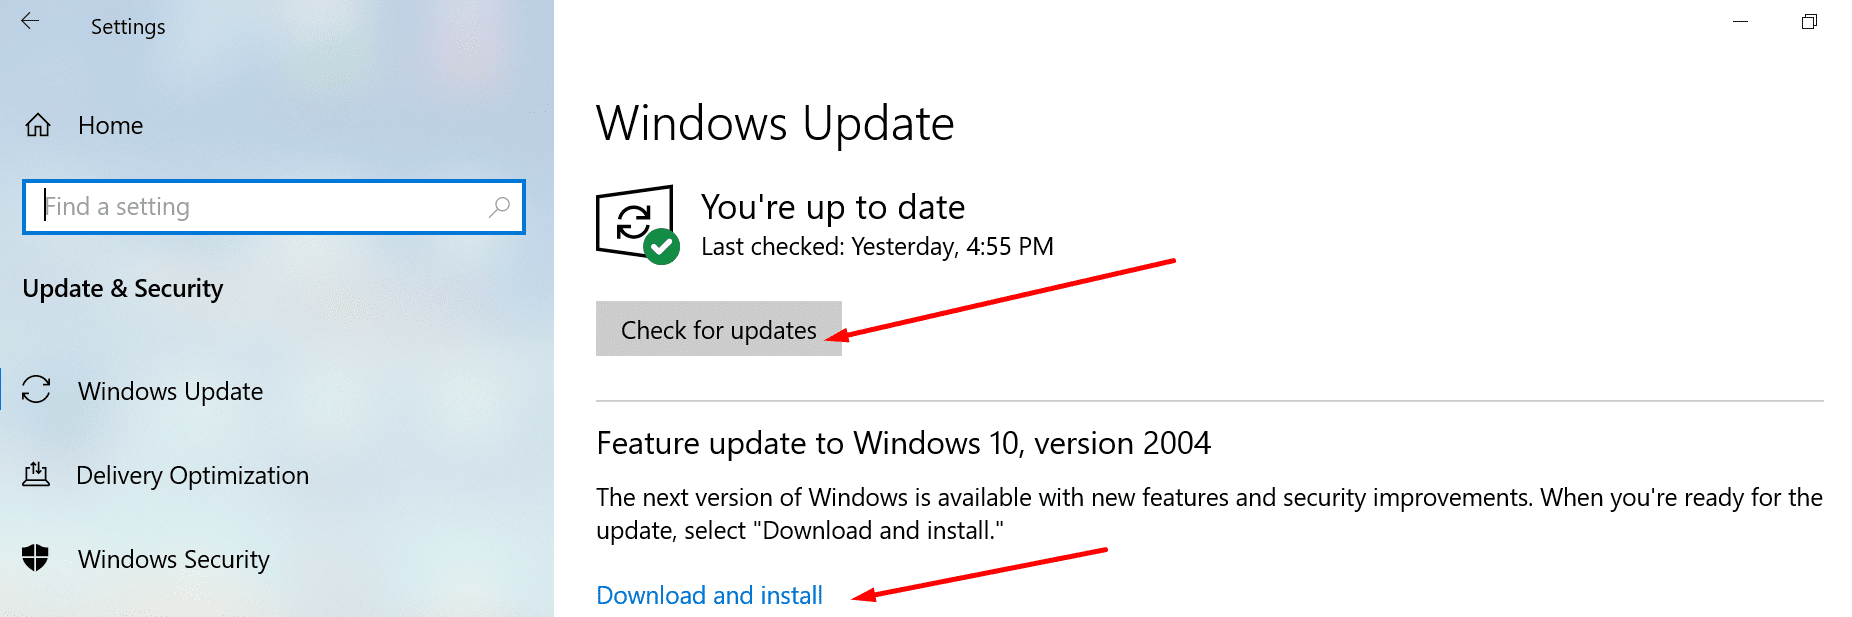
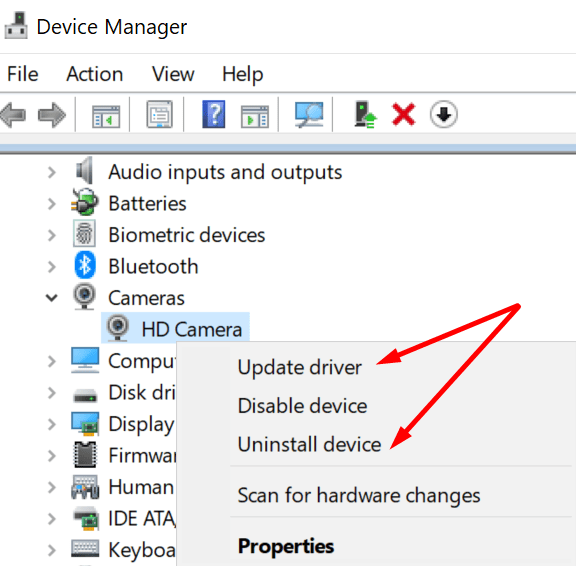
- Open the Device Manager and click on Cameras.
- Right-click on your camera driver and select Update Driver.

- Restart your computer. If that did not work, repeat the same steps, and select Uninstall Device this time around. Restart your computer again and launch Teams.
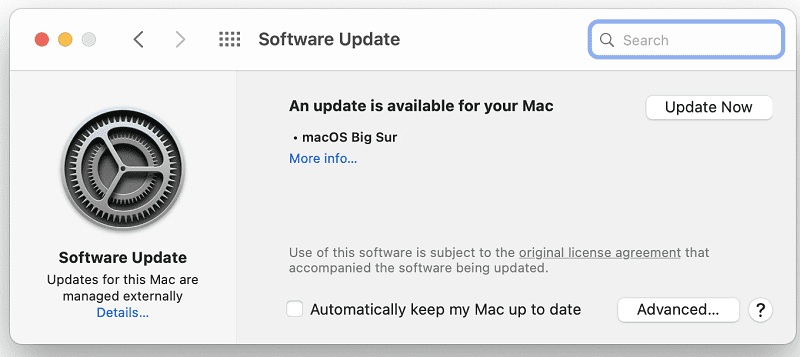
On Mac
Your Mac automatically installs the latest drivers when you update the OS itself. To do that, click on the Apple menu and select System Preferences. Then click on Software Update and check for updates.
Fix Camera Issues for Teams on the Web
If you’re using the web version of Teams, make sure your browser settings allow the app to access and use your camera.
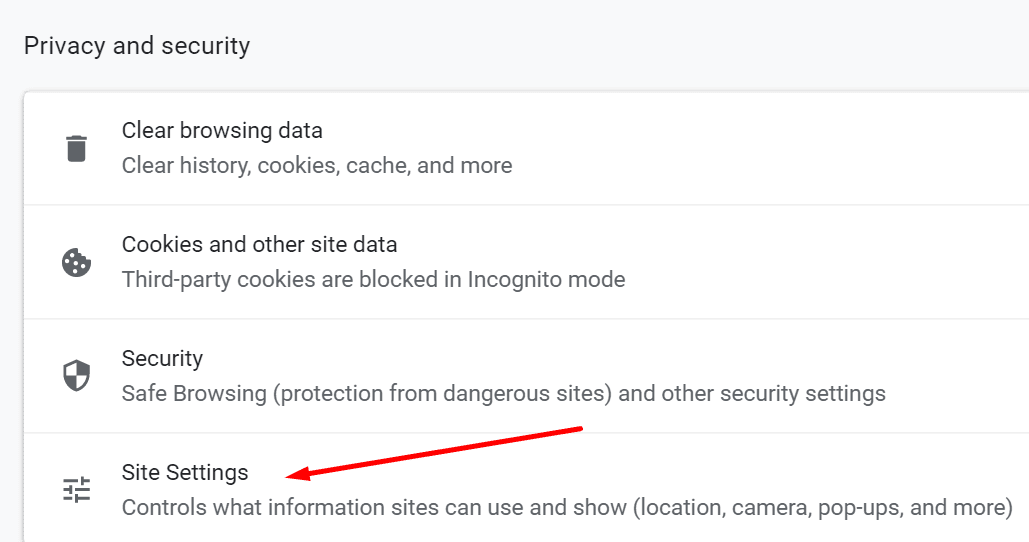
On Chromium Browsers
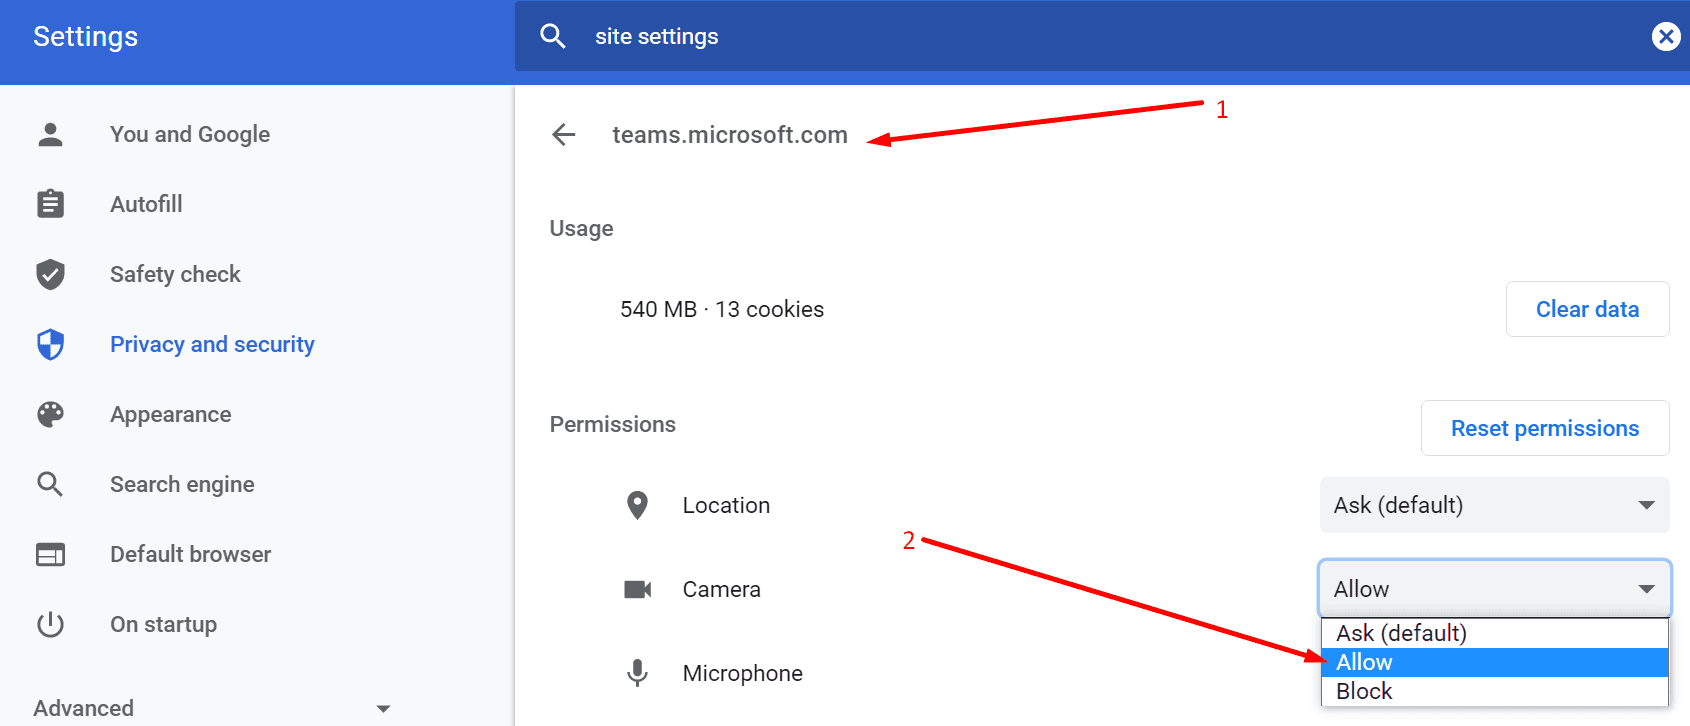
- Navigate to Settings → Privacy and Security → Site Settings.

- Then go to View permissions and data stored across sites—Enter teams.microsoft.com in the search bar and press Enter.
- If you recently opened Teams on the web, the app should be listed under Recent Activity.
- Select teams.microsoft.com and go to Permissions.
- Allow Teams to access your camera and microphone.

- Refresh your browser and check if the issue is gone.
Other Things You Can Do:
- Disable Your Extensions. See How to Remove or Disable Extensions in Google Chrome.
- Clear the cache. See How to Clear the Cache in Google Chrome.
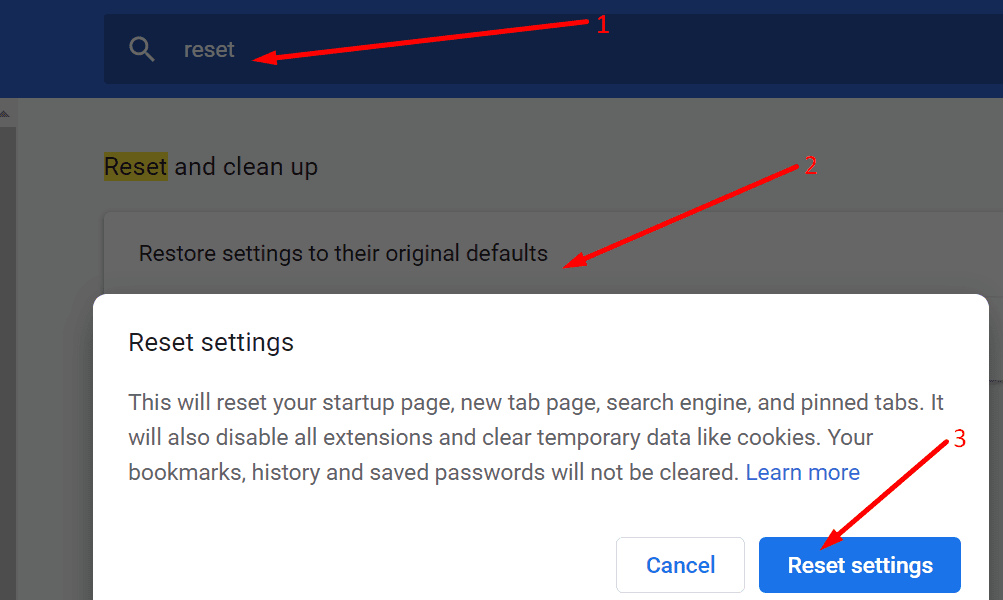
- Reset your browser to default settings.

- Reinstall your browser.
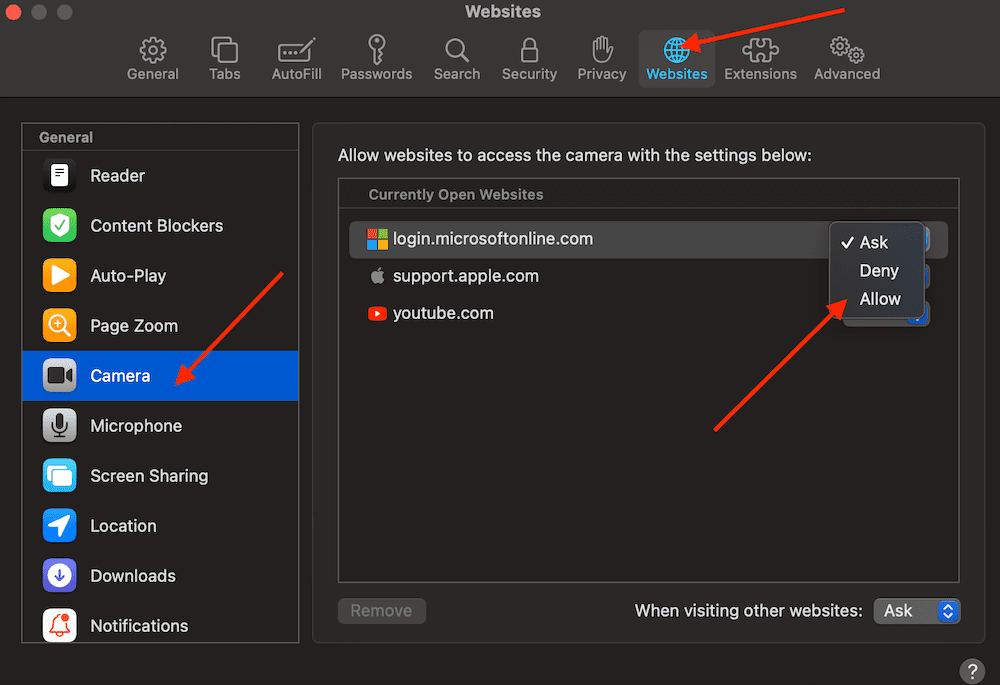
On Safari
- Launch Safari, go to teams.microsoft.com and click on the Safari menu.
- Select Preferences and then click on Websites.
- Click on Camera and use the drop-down menu to allow Teams to use your Macbook’s camera.
Other Fixes Suggested by Users
While the solutions below did not work for all the Teams users experiencing camera issues, they may just do the trick for you.
- Whitelist Teams. Set the app as an exception on your antivirus and firewall settings.
- Reinstall the app. If nothing worked, you can uninstall Microsoft Teams and then download a fresh copy of the app.
Let us know if you managed to troubleshoot this camera issue. Do tell us which method worked for you.


I have a Teams interview tomorrow. Couldn’t access camera on Mac Air. I went to permissions and made the change and it works. Thanks!
Nope, still not helpful. Teams isn’t even showing up on that list in Windows Settings. When I click on camera in Teams’ settings, the red “do not enter sign” appears over it like I’m literally not allowed to turn it on. I use Teams for work, maybe it’s a problem on their end?
thank you. i’ve been trying to fix this for ages!