
The Oculus Quest 2 has a good selection of VR titles to play. However, there are plenty of VR games that have never made it to the Oculus store. There is a range of reasons for this. They may not have wanted to be available on the platform. They may have applied but not been successful in getting their game approved. Or they may have had higher graphics requirements than the Quest 2 was capable of handling. So they chose not to release their game in a place where it will get sub-par performance.
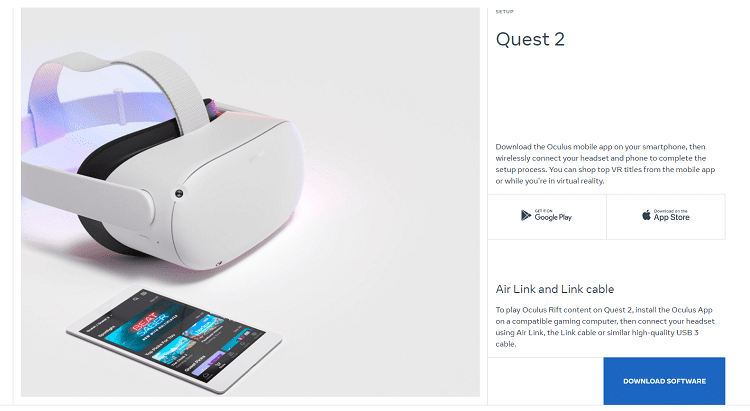
Thankfully, you can connect your Quest 2 to your gaming computer and play any PC VR games you might have via a – necessarily long – USB cable. This works well but has the issue of the trailing cable, which, while you’re blind to the outside world, is a tripping and tangling hazard and at risk of being yanked out of either the headset or your computer. Thankfully, Meta has developed and released an official first-party method of doing the same thing over Wi-Fi. This tool they’ve called “Air Link.”
Air Link
Air Link is currently an experimental feature. While it is unlikely to be disabled and doesn’t really have any performance or stability issues. Assuming you have met the requirements. It may undergo some changes over time.
Currently, software-wise, Air Link requires you to have the Oculus Link app installed on your computer and Windows 10 or later. Hardware-wise, you need an Intel i5-4590/AMD Ryzen 5 1500X or greater, 8GB of RAM, an Nvidia 1060 6GB or 1650Super, or higher. Or an AMD 400 series or higher (excluding the Radeon RX 6500, which is not supported). Of course, while these are the minimum requirements, you will perform much better the more you exceed the requirements.
It’s not technically required, though it is highly recommended, to have a router that can run a 5GHz Wi-Fi network, either AC or Wi-Fi6. It’s also strongly recommended to have your gaming PC connected directly to the router via an ethernet cable rather than over Wi-Fi. Both are soft requirements but are known to be common causes of performance issues.
How to Enable Air Link
First, ensure you have the Oculus Link app installed on your computer and that it is fully set up and running. You can download it from here if you haven’t already.
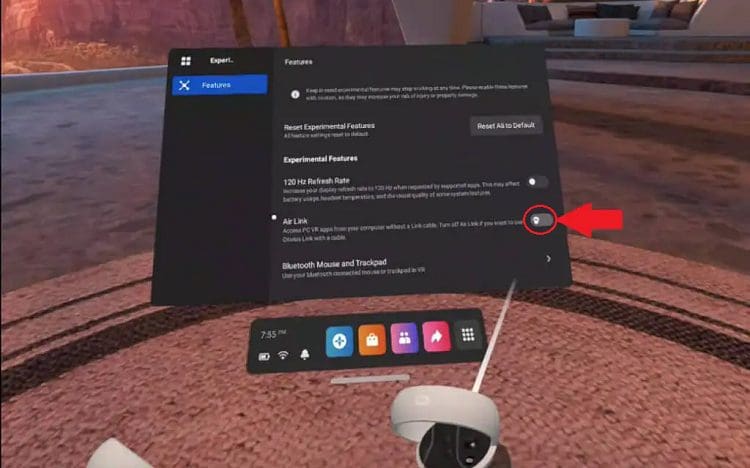
Once the software runs on your PC, put on your Quest 2, go into the experimental settings, and enable the Air Link option.
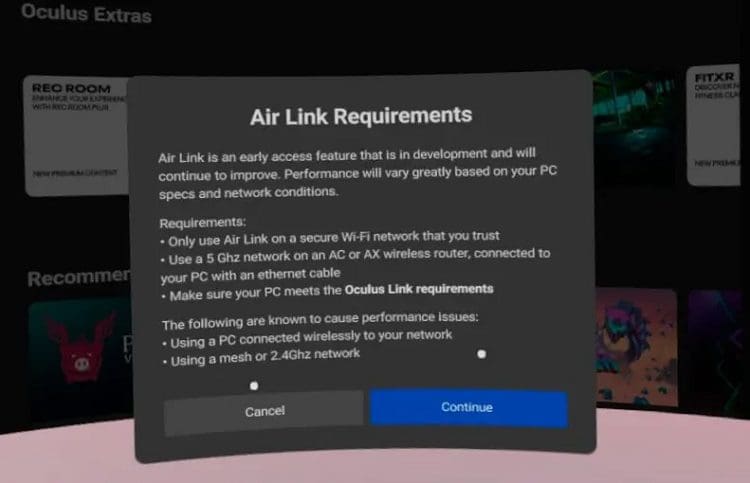
When you enable Air Link, you’ll see a popup box alerting you about the requirements and some common issues that cause performance issues. It’s worth a quick read to ensure you’ve not missed anything. Once you’re done, click Continue.
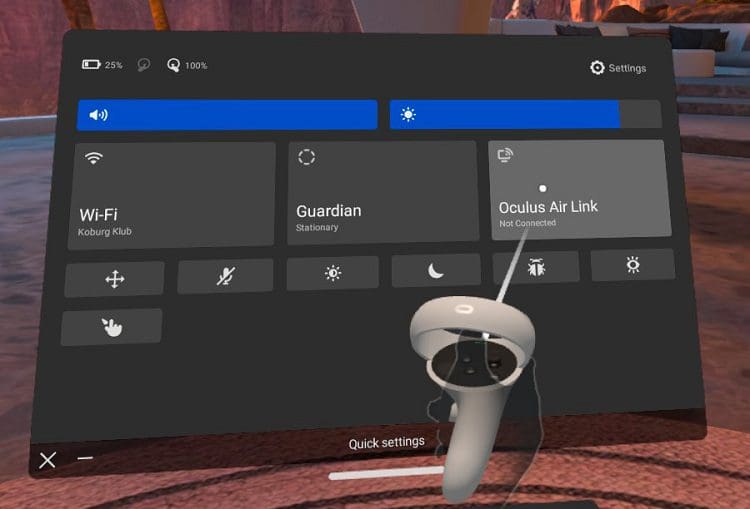
Now open the Oculus Quick Settings menu by pressing the Oculus button. You should see the large button on the right labeled “Oculus Air Link.” Click it to toggle Air Link on.
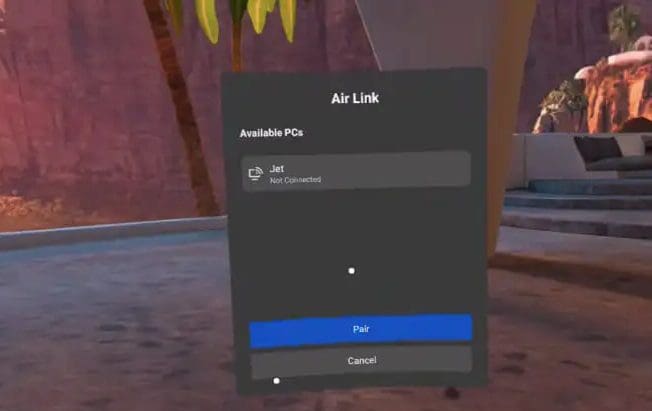
If this is your first time using Air Link, you must pair your headset with your PC. To do so, select your computer from the list of available devices. If it prompts you for a pairing code, you will need to provide it from your computer.
Once you’ve connected, you don’t need to enable Air Link in the experimental options or pair your computer and headset anymore. Simply toggle Air Link on while the Oculus Link app is running on your computer.
Conclusion
Once you’ve gone through these steps, you’re connected to your computer via Air Link and are ready to play your PC VR games on your Quest 2 free of any cables. What PC VR game are you most looking forward to playing without the restrictions of a cable? Let us know down below.


Hi! I have an issue. For whatever reason, I can’t find the “Air Link” option under Experimental Features. But it does appear on the page where the headset searches for computers to pair with. But then there’s another issue, even though my computer is found, it cannot connect. A prompt pops up saying “Air Link Connection Lost” and it tells me to check the connection of both my PC and headset. Both are connected to the same wifi, so what could be the issue?