If you’ve got tens of tasks you need to take care of on a daily basis, Trello offers you a handy feature that allows you to keep track of all your tasks and subtasks.
You can use checklists to ensure you’re on the right track and you can successfully meet the deadline set for the tasks you’re in charge of.
In this guide, we’ll show you how to add checklists to Trello boards. We’ll also list a series of useful tips and tricks to help you to increase your productivity.
Steps to Add Checklists to Trello Cards
Open your Trello board and select the card you want to add a checklist to. Open the card and you’ll see the Checklist button under the Add to card section.
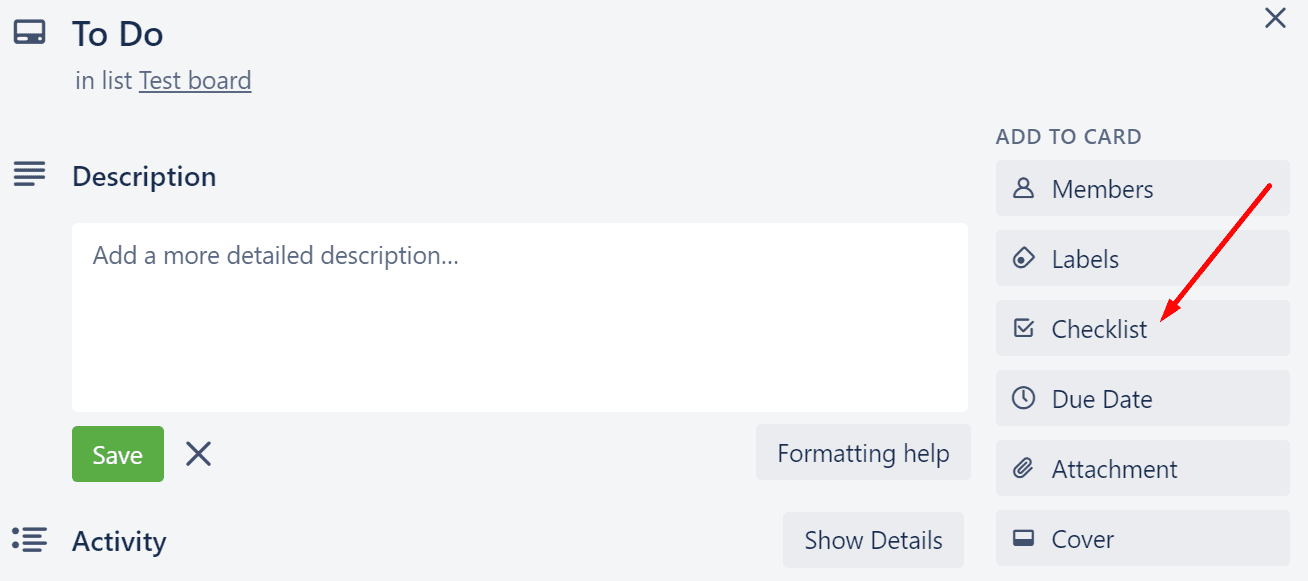
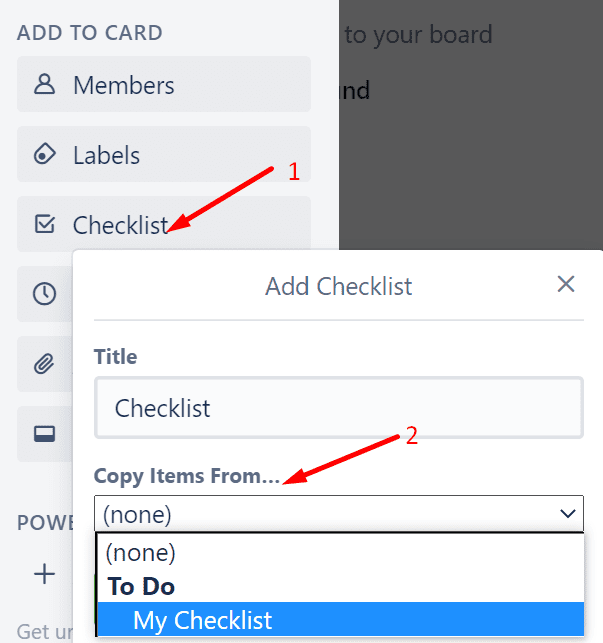
Click on the Checklist option, add a title for your checklist and then click on the Add button.

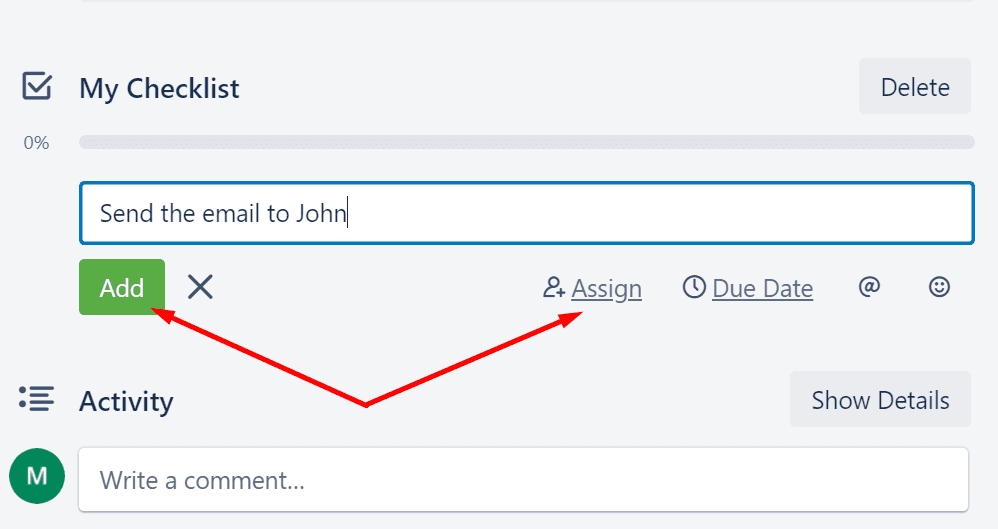
You can then start adding items to your checklist, assign the tasks to your colleagues (if you have the Trello Business Class version), set a deadline for the respective task, and more.
As individual tasks get completed, you can check the corresponding checkbox and the progress bar will advance.
You can also choose to hide the tasks you already completed in order to better focus on the upcoming tasks.

If you completed all the tasks on your checklist, the progress bar will go green.
You can then delete or archive the checklist.
Useful Tips
There are plenty of actions you can do when it comes to editing or managing your Trello checklists.
You can copy the items from another checklist on your current board. Go the Add checklist section and use the Copy Items From… option.
If you want to use the Trello shortcut to add a checklist, press the – key on your keyboard and Trello will automatically add a new checklist to your card.