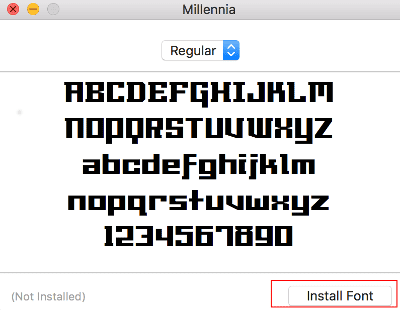
You can download fonts from sites like Google Fonts. What do you do with them once you download them though? If you want to use new fonts in your MacOS applications, you can install and enable them using these steps.
Option 1 – Open Font File
Font files will typically come with the extension of “ttf”, “otf”, or “ps”. You can install fonts by simply opening the file. Once opened, a window will appear where you can select “Install Font“.

Selecting “Install Font” will place it in the ~/Library/Fonts folder where it will be available for the single user to use.
Option 2 – Drag & Drop to Folder
You can directly drag and drop font files depending on the situation for which you intend to use the fonts.
Drag the font files to one of the following locations:
- ~/Library/Fonts = Fonts a specific user can use.
- /Library/Fonts = Fonts available to any user on the system.
- /Network/Library/Fonts = Fonts made available to users on the network.
- /System/Library/Fonts = Fonts used by the MacOS system. Don’t mess with these too much unless you know what you’re doing.
- /System Folder/Fonts = Legacy location for fonts for applications built for older versions of MacOS.


