
If you’ve got a friend who’s experiencing computer trouble on Windows 11 or 10, or you just need to show them how to do something on a Windows PC, you can help them right from where you’re sitting using Windows Remote Assistance.
Remote desktop sharing for PC troubleshooting has been here for a while. Since a computer is a digital system and it can communicate through the internet, it’s not necessary to troubleshoot or fix PCs physically unless there’s an issue with the hardware or internet connectivity. Thus, various third-party software developers developed remote screen-sharing software for end users and technical support agencies.
Computer repair agencies often used these third-party apps to take remote access to a customer’s Windows PC for software-level troubleshooting. With the appearance of Windows Remote Assistance or MSRA tool, the remote technical support ecosystem changed a lot.
Applications like WinVNC or LogMeIn used to be what was needed to access a computer remotely. They aren’t really needed anymore because of Windows 11. 10, 8, and 7 all come with Windows Remote Assistance built into the OS. Read on to learn more about the MSRA tool, how to send remote assistance invitations, and how to provide technical troubleshooting remotely using the Windows Remote Assistance app.
Contents
What Is the Windows Remote Assistance Feature?
Windows Remote Assistance is an out-of-the-box technical support tool from Microsoft. To make remote support effortless and affordable, Microsoft included this service with the Windows XP operating system.
Later on, with the Windows 7 OS, the Windows Remote Assistance tool became more intuitive and effortless. Microsoft kept revamping the tool through Windows 8, Windows 10, etc. Now, on Windows 11, you get a premium feeling of a remote technical support interface similar to paid apps like TeamViewer, AnyDesk, RemotePC, etc.
You can connect to a remote Windows 11 PC or invite someone you trust for troubleshooting to your own PC in a few clicks. The major upside of this tool is the virtually uncrackable encryption system and Microsoft remote gateway-based connectivity via intranet or internet.
With third-party remote desktop apps, there’s always a concern about connection encryption and interception by hackers. However, with the Windows Remote Assistance app, you get state-of-the-art cybersecurity when you send invites, approve connections, authenticate via email, and troubleshoot.
How to Access Windows Remote Assistance on Windows 11
Find below the methods to access the remote assistance tool on Windows or the MSRA app for Windows 11 PCs. The steps are pretty similar for other Windows operating systems like 10, 8, 7, Vista, etc.
1. How to Enable Windows Remote Assistance
Before you can use this feature, you must follow these steps to activate it within your Windows 11 computer:
- Press Windows + I together to open Windows 11 System app.
- Scroll down on the right-side navigation pane until you find the About menu. Click on it.
- Under Device specifications, select Advanced system settings.
- You should now see the System Properties dialog box. Click the Remote tab.
- Under Remote Assistance, checkmark Allow remote Assistance option.
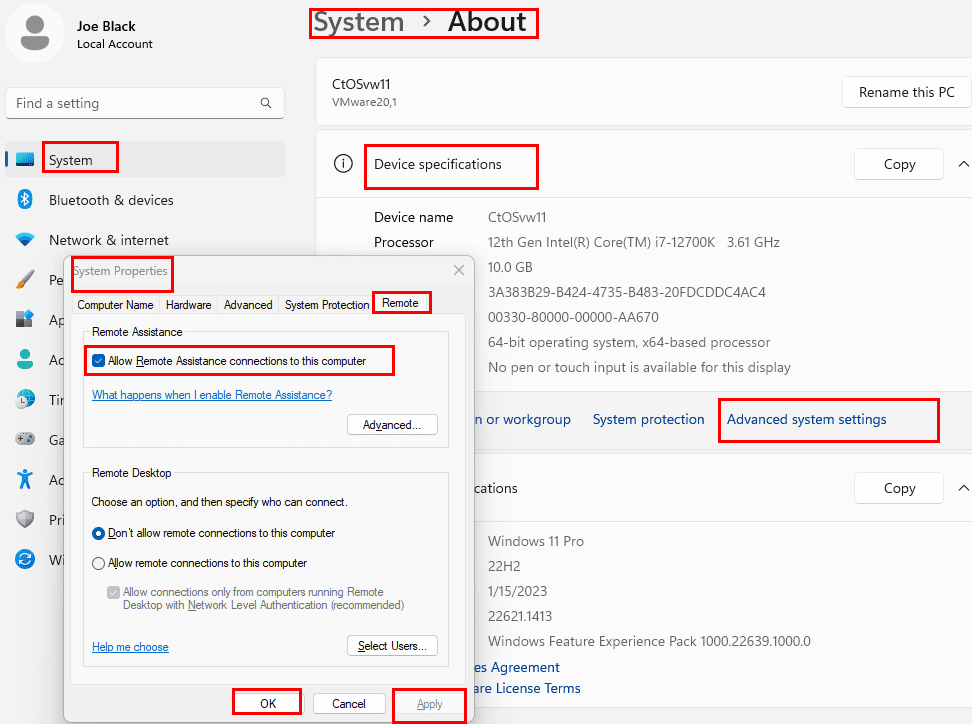
- Click Apply and select OK to save the changes.
2. Open Remote Assistance Using Run Command
Now that you enabled Windows 11 native remote assistance, here’s how to use the Run command box to call the service:
- Press Windows + R to get the Run box.
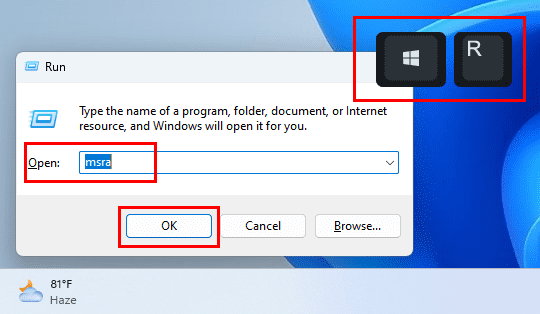
- Type the following syntax and hit Enter:
msra
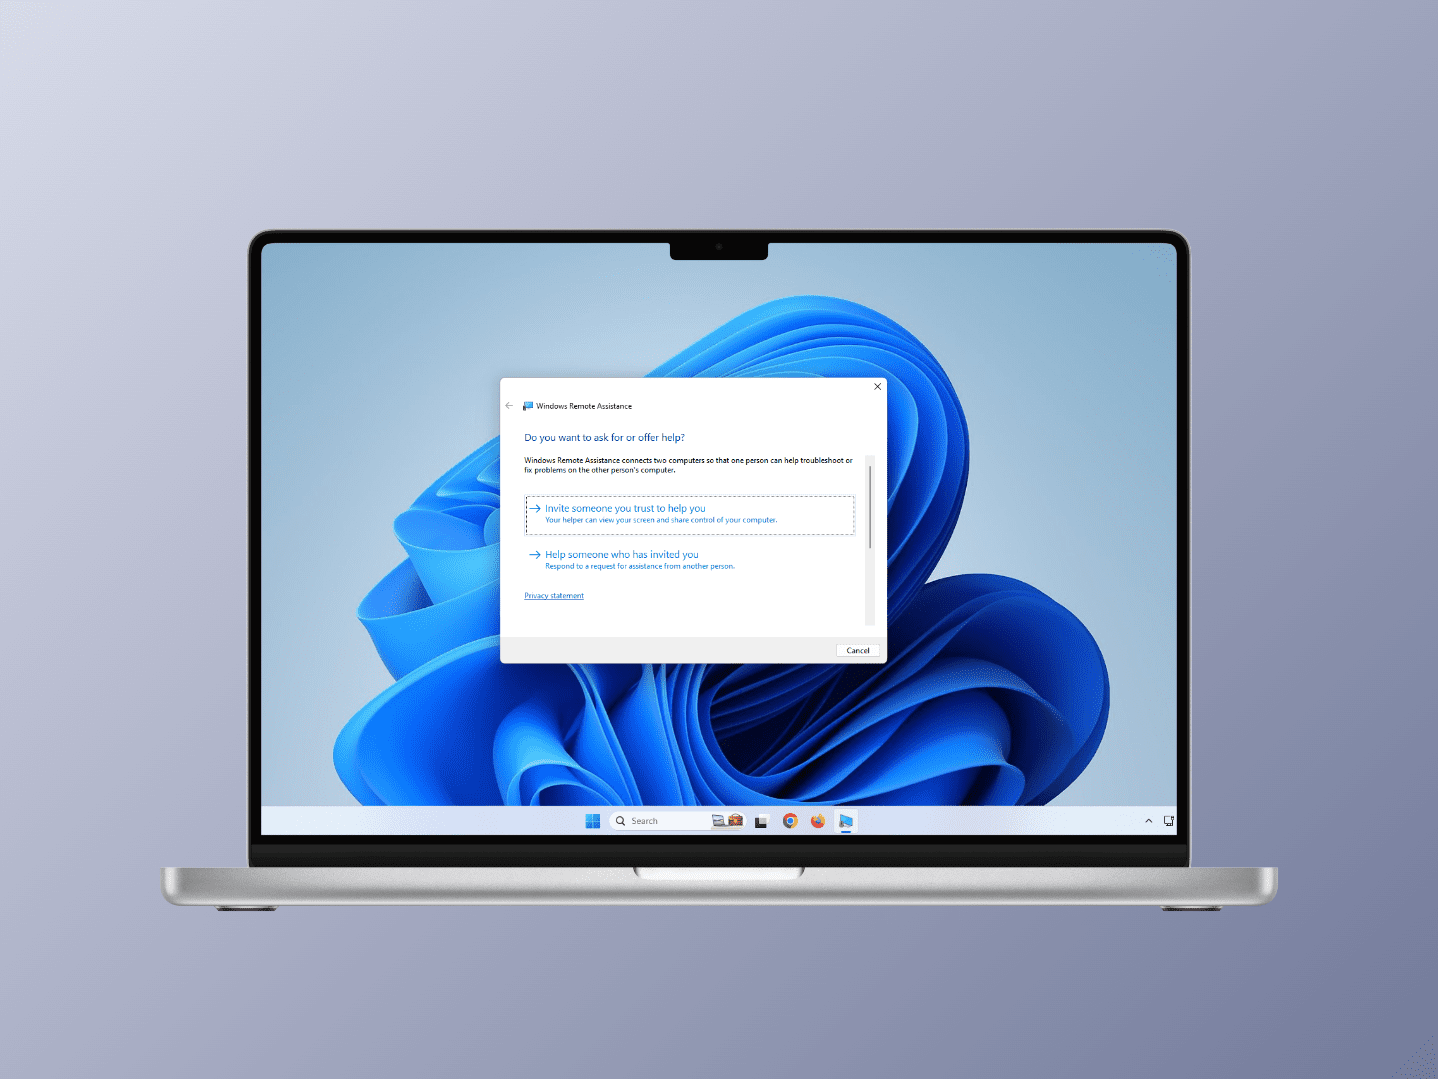
- You should see the Windows Remote Assistance wizard on the desktop.
3. Access Windows Remote Assistance Using MSRA App
You can also call the Microsoft Remote Assistance (MSRA) app directly to access the remote support wizard. Here’s how it’s done:
- Click the Windows Start menu icon on the Taskbar.
- Type MSRA.

- Click Run as administrator to get elevated MSRA access.
- You can also click the MSRA icon under the Best match section for standard access.
4. Run Remote Assistance Tool From System32
Windows 11 stores the MSRA executable file inside the System32 folder. Thus, you can just access the MSRA app’s executable file by visiting the following directory:
C:\Windows\System32
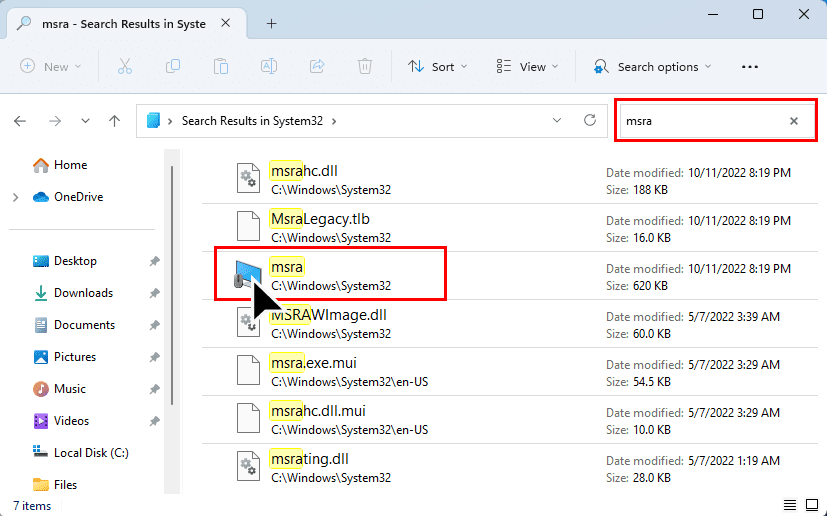
When you’re inside System32, search for the MSRA app in the search box.
5. Use a Microsoft PowerShell Command
If you need to automate or create an executable batch file to run the MSRA app automatically to initiate Windows Remote Assistance, you can use PowerShell in the following way:
- From the Windows Start menu, open PowerShell with admin rights by typing Powershell and clicking Run as administrator.
- Within the command line interface, copy and paste the following command:
msra.exe
- Hit Enter to execute.

- You can create a batch file and include the above command in there to automate the process.
6. Find Remote Assistance in Windows Control Panel
Should you need to access MSRA from the Control Panel tool, that’s also possible. Here’s how to do that:
- Type Control in the Windows Start menu and click the Control Panel app.
- In the Control Panel search box, type Remote.
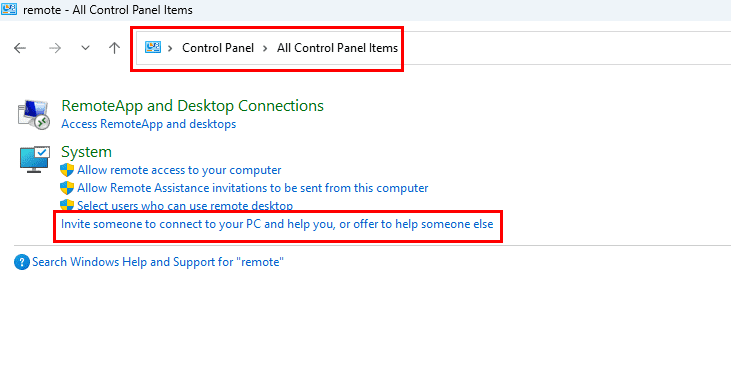
- Under the System menu, you should see the Invite someone… link.
- Click the above link to open the MSRA tool.
How to Use Windows Remote Assistance on Windows 11
Now you’re ready to send an invitation or accept an invitation for remote support. You can use any of the previously discussed methods to launch the MSRA tool.
Send Remote Assistance Invitation to Control Computer
- Hold the Windows Key, then press R to bring up the Run box.
- Type msra, then press Enter.
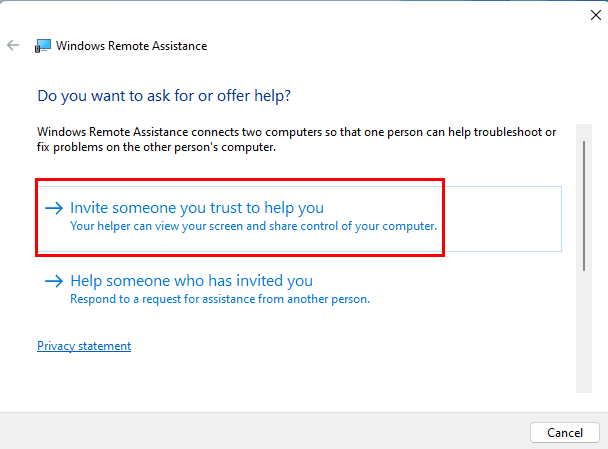
- Select Invite someone you trust to help you.

- You may be able to select Use e-mail to send an invitation if your default email client is set up properly.
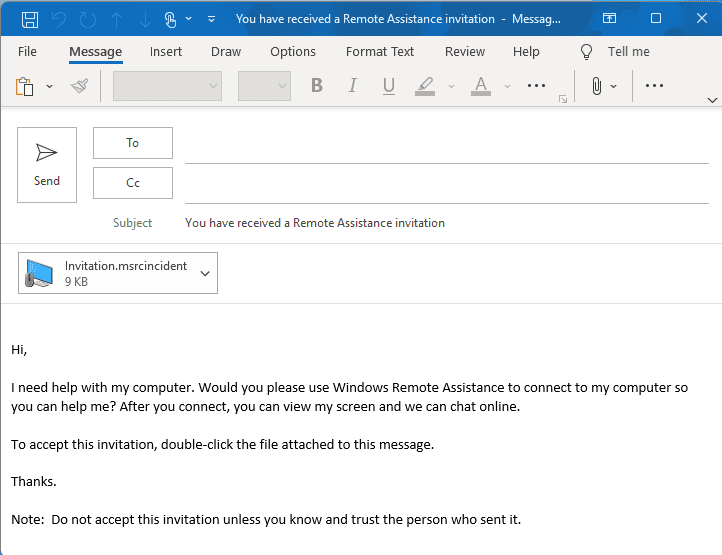
- This option will automatically start an email message and add the attachment you need. All you’ll have to do is type in the email address of the person you’re sending it to and send the email.
In the above scenario, you must complete the process to get the secret authentication key or the remote support password. Once you get it, add the password to the email and send it.
However, there’s a high chance that you didn’t set up your business or personal email in the Windows Mail app (Windows 8 and later) or the Windows Live Mail desktop app (Windows 7 and earlier). Outlook is always supported in any Windows PC that comes with the MSRA app. In such scenarios, here’s how to proceed:
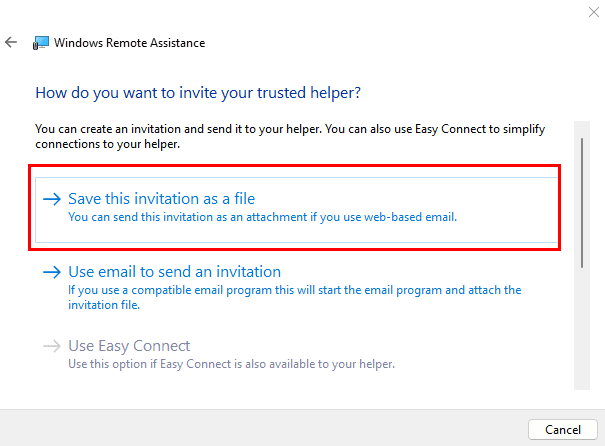
- In most cases, you should choose the Save this invitation as a file option and proceed with the next steps.

- Choose a place to save the invitation file. I like to place it where I can find it on my Desktop. Choose a location, then select Save.
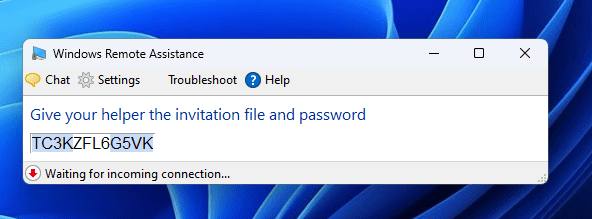
- A window will open with a password. Keep this window open, otherwise, the session will end.
- Compose a new email message using whatever email service you use.
- Provide your password and attach the invitation file to the message.
- Send it off to the person you want to connect to your computer.
Connect to a Computer After Receiving Invitation
Suppose, you received an invitation for Windows Remote Assistance. Here’s how to act on it:
- Hold the Windows key, then press R to bring up the Run command box.
- Type msra, then press Enter.
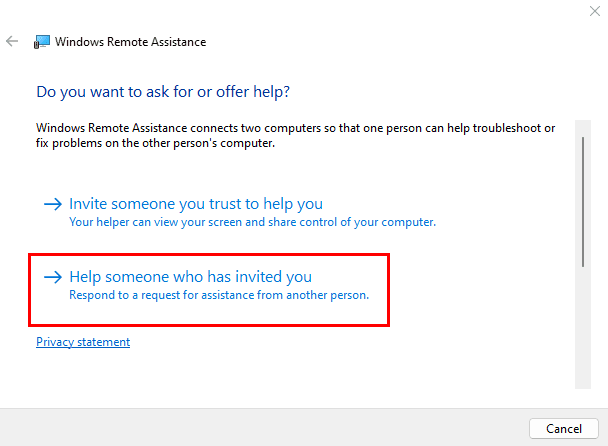
- Select Help someone who has invited you.

- Select Use an invitation file.

- Select the invitation file.
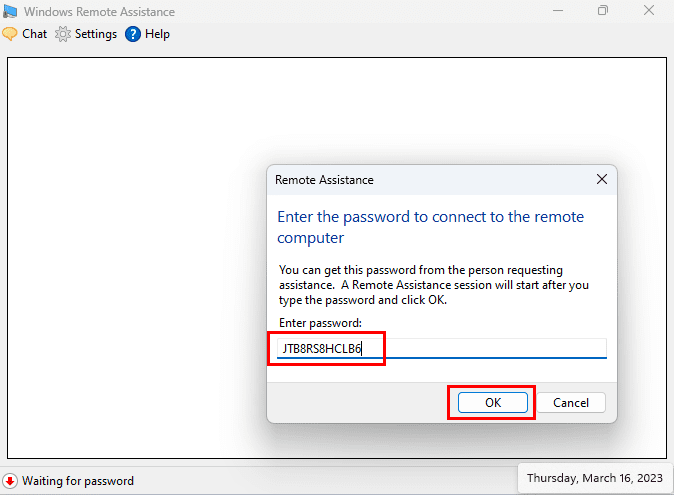
- Type the password provided in the email. Now, select OK.

- The remote support seeker will receive a notification to accept your connection request. They must click Yes.
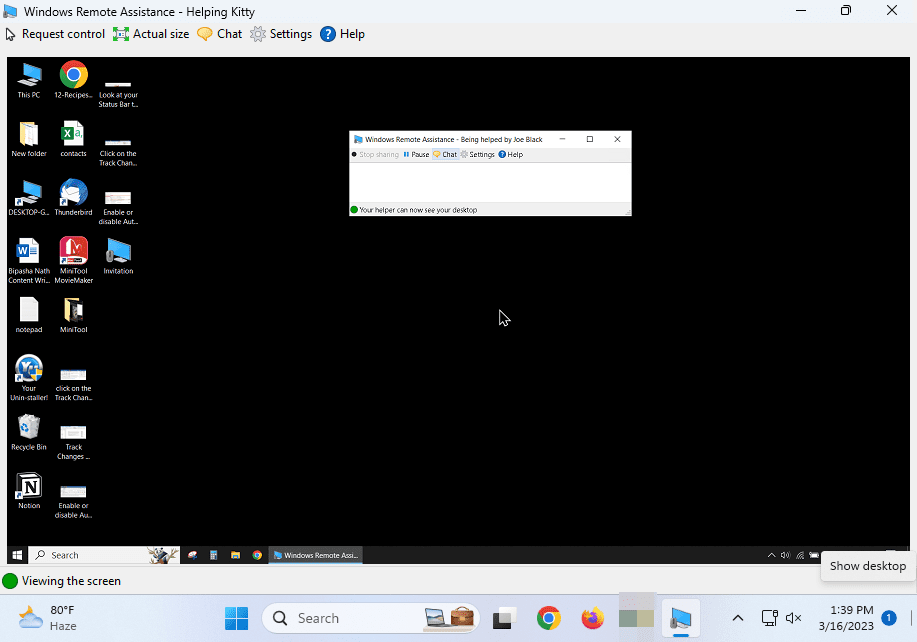
- If selected Yes, you get connected and can control the desktop using Windows Remote Assistance.
- Don’t forget to click Request Control on top of the screen and ask the support seeker to accept that on their end.
Another intuitive way to accept the invitation is by downloading the MSRCIncident or Invitation file from the email and double-clicking it. This will automatically open the MSRA tool. You just need to supply the password received from the support seeker to start the remote support session.
Risks of Remote Support
Remote desktop support always comes with certain risks. Thus, here are some tips so you can keep yourself safe:
- Don’t send remote assistance invitations to someone you don’t know personally.
- If someone claims that they’re from Microsoft and wants to help you with technical support, validate the claim first. If you can’t confirm their claims, simply ignore them.
- Don’t activate unassisted or unsolicited remote desktop connections.
- Whenever someone is helping you via Windows Remote Assistance feature, don’t go elsewhere. Constantly monitor the activities. If you see any foul play, instantly disconnect the connectivity.
- Don’t let the remote support technician browse through your private and personal files.
Conclusion
Remote Windows Assistance is a great addition to modern Windows PCs. Now, you don’t need to pay third-party software developers to provide or get remote support. The feature is also native to Windows PCs. Moreover, Microsoft ensures that the remote connectivity is encrypted for the privacy and security of the support provider and the end user.
Now that you know send remote assistance invitation and accept one, give the above methods a try. Don’t forget to comment below on how did it go. Also, share the article with your social contacts should they also want to learn this extremely useful feature of Windows 11.
Next up, Top Sites for Computer Troubleshooting and Tech Support.

I created a remote assist invitation for a 30 day period and sent it to a friend to help me. . The original connection worked fine. We closed the session, then tried to use the invitation the next day, and it would not connect because my PC was not in the assistance mode to accept the invitation. How do we use the 30 day invitation after the original session is closed?
If we request assistance again, it creates a new invitation and password.
Thanks Mitch this is a great site.
I couldn’t connect either
I hate microsoft.
Remote Assistance doesn’t work on the Pro version of Windows 10 that I have in my PC. I tried it today because my mother needed help and we’ve been able to use Remote Assistance before (then under Windows 7). BUT, because she now have Win 10 Home I can’t connect to her computer at all, and I’m using Win10 Pro. She can actually send an invitation file and the password and I received and place it in my RA window but nothing happened. It says that I can not connect to the remote computer. Nothingelse worked. Very frustrating indeed, What can I do?
Because of the new security procedures done by Windows 10 at the beginning of May, I could not remotely connect to my office computer from my home computer. Through the use of ZOOM and assistance from my institution’s IT person, he was able to find and solve the situation. Now I can successfully connect to my office computer from my home computer. The new update of Windows 10 done on or around May 8 really screwed up remote connections and I was not the only one from my place of employment to be affected.
Remote Assistance doesn’t work on less than the Pro version of Windows 10. I tried it today because my mother needed help and we’ve been able to use Remote Assistance before (then under Windows 7). BUT, because she now have Win10 Home I can’t connect to her computer at all, and I’m using Win10 Pro. She can actually send an invitiation file and everything, but nothing else works (the way it used to). Very frustrating indeed, and especially cause I blamed her a bit for doing something wrong.. as I thought.
Hey Nathan,
All you need to do is click in the search box then type “help”.
It will show up as one of the choices.
The run command is a precise and direct choice from several different ways to get there.
Why in the WORLD was Remote Assistance changed to a “Run” Command?
Ever since I went to Windows 10 I have been unable to connect to ANY computer I was able to before, making helping my family and friends MUCH more difficult. The emails I get from them requesting assistance will not work – double-clicking the attached file doesn’t work – then, using this “Run” command method of bringing up RA is not intuitive, when before it was actually on the start menu of programs, and finally if NEVER successfully connects.
RA used to be a great tool, and now it’s completely useless. And, looking on the Microshaft site, Looking for help is nigh-impossible, as all the Windows 10-specific help is on a different area with NO search capability.
My 83 year old Mom recently downloaded Windows 10. Now her printer is not set up, and several other issues she can’t handle including finding where to request my help that she could do with my help in Windows 7. This tutorial will help so much!!!! Thanks.