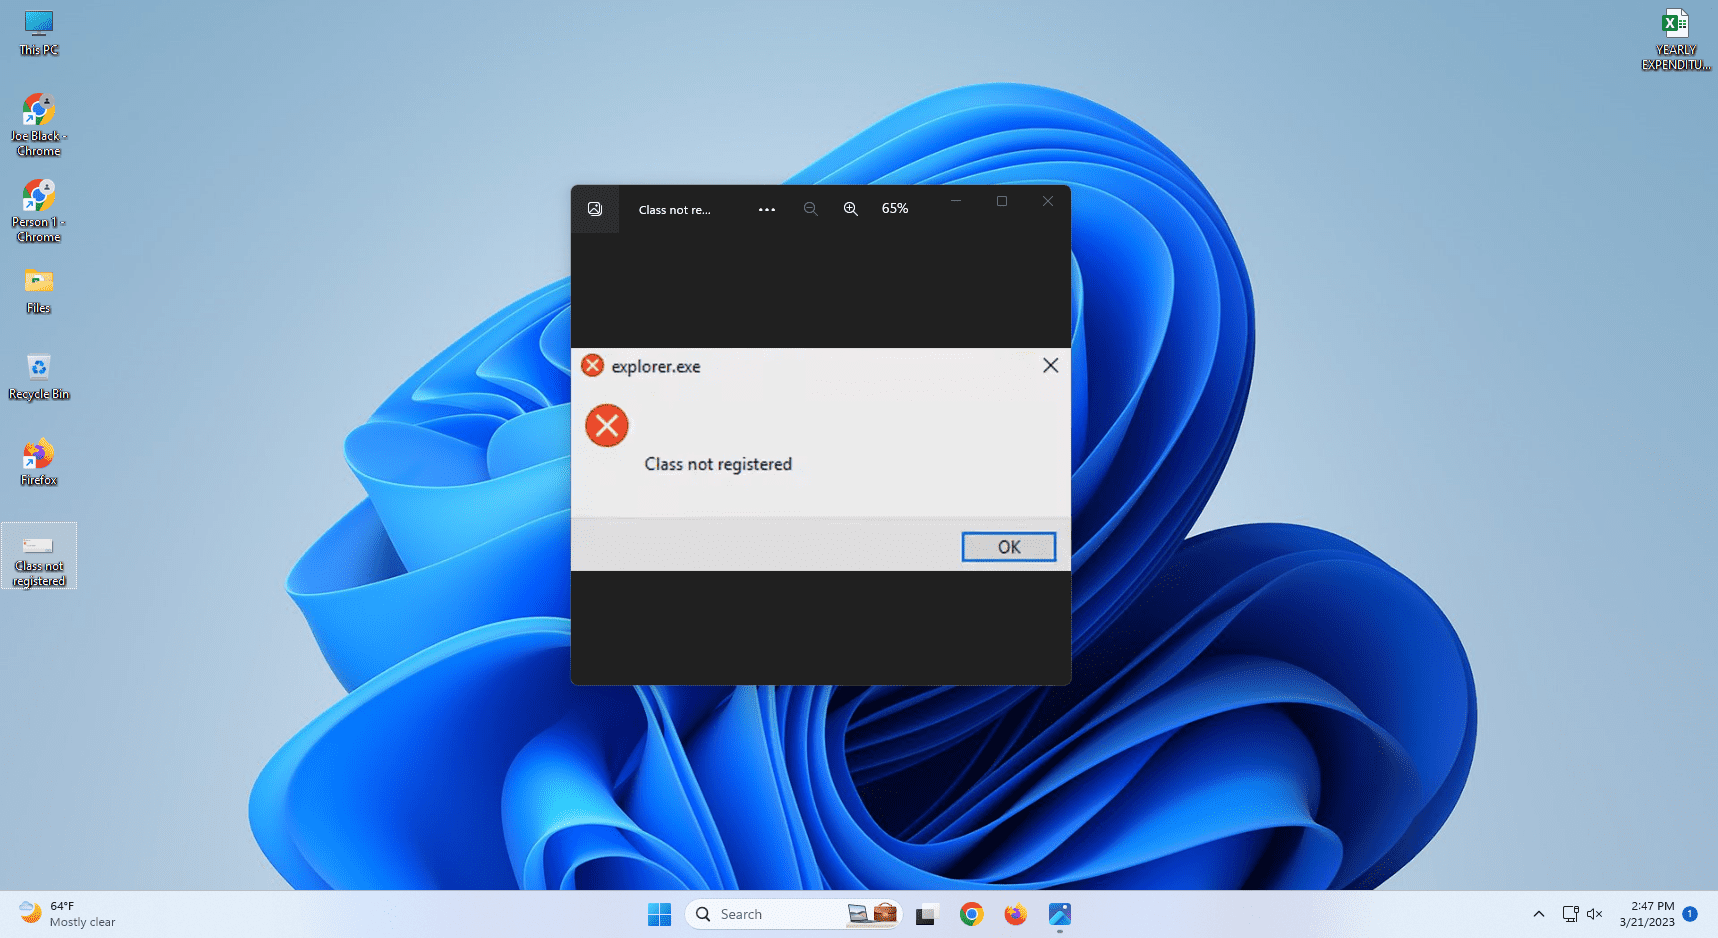
Did you just see the “Explorer.exe: Class not registered” error on your Windows 11 PC and looking for a resolution so you can get back Desktop items like Task Manager, Start menu, etc.? Read on to learn more.
“Class not registered” is a serious error on Windows PCs running operations systems like Win 11, Win 10, Win 8, etc. When you see the error, all Desktop icons and components vanish. You don’t retain full control of your Windows PC. On top of that, you may lose data on which you were working.
There are many variants of the “Class not registered error” and one most prominent is the “Class not registered: Explorer.exe” warning. Find some sure-shot Windows 11 troubleshooting methods to fix this for good. You can also try these fixes if you’re using Windows 10 or earlier operating systems from Microsoft. Let’s dig in!
Contents
- 1 What Is the Explorer.exe: Class Not Registered Error?
- 2 1. Temporarily Rescue the PC
- 3 2. Reset Default Apps
- 4 3. Disable All Startup Apps
- 5 4. Disable Internet Explorer 11
- 6 5. Fix Deleted or Corrupted ExplorerFrame.dll
- 7 6. Restart Windows Explorer
- 8 7. Re-Register Windows Shell Experience Package
- 9 8. Reinstall Windows 11
- 10 Explorer.exe: Class Not Registered: FAQs
- 11 Conclusion
What Is the Explorer.exe: Class Not Registered Error?
This error is mostly related to software compatibility on Windows PCs. If you’re running multiple software for the same task, then you can frequently get this error if those software aren’t intercompatible. For example, Internet Explorer 11 and Microsoft Edge frequently cause the “Class not registered error”.

Other common errors of this kind are:
- Runtimebroker.exe: class not registered
- Class not registered: looking for object with CLSID
- Explorer.exe: class not registered with blue screen
- Class not registered: msstdfmt.dll
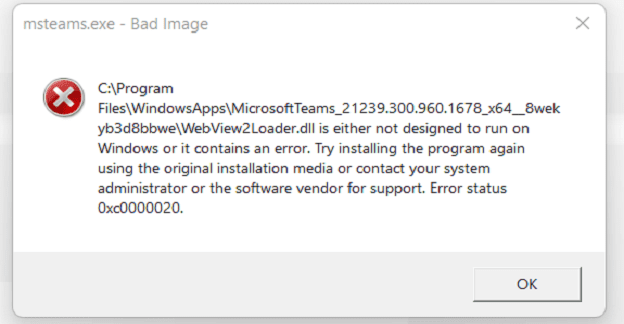
- Explorer.exe class not registered after an update
Online coverage of the issue:
Find below the quick and simple methods to deal with these issues:
1. Temporarily Rescue the PC
Since you don’t get any Desktop or Taskbar items when the error occurs, you must get out of the warning message by forcing a restart of the PC. Here’s how:
- Press Ctrl + Alt + Delete keys altogether.
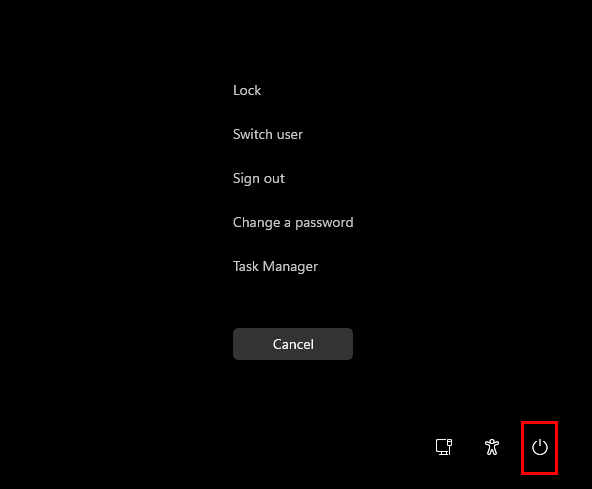
- On the lock screen, look for the Power button at the bottom right corner and click it.
- A context menu will open. Select Restart to reboot the PC.
Sometimes, the issue is only with the disappearance of the Start menu from the Taskbar. To get it back, try the following steps:
- Open Microsoft Edge and visit the Windows 11 update portal.
- Choose your Windows OS edition from the tabs you see.

- Click the first resolution card to find the Check for updates button.
- Click that and select Open Settings on the browser notification or pop-up.
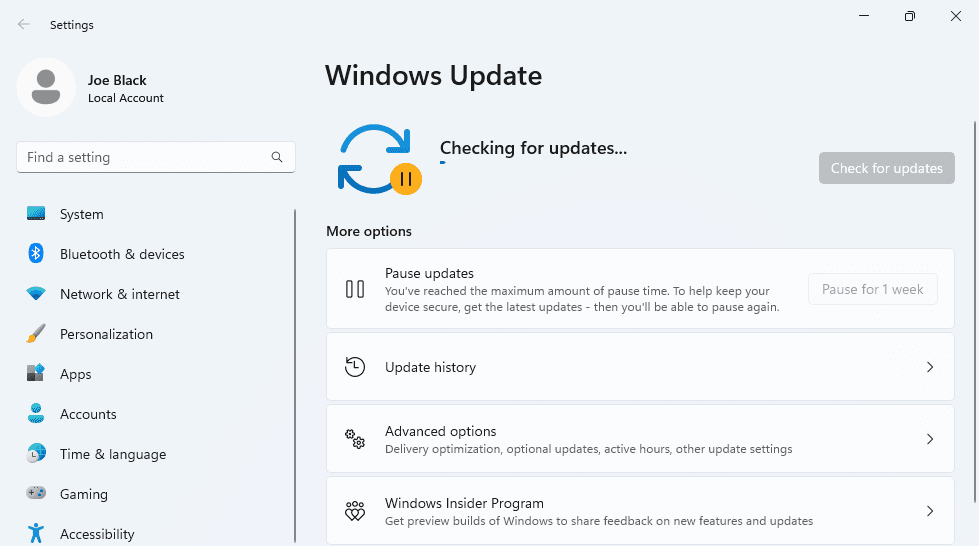
- The Windows 11 Update app will open.
- By now, the Start button should also appear.
- If it doesn’t apply any pending updates and Windows 11 will restart automatically.
- After the restart, you should see all the usual Desktop and Taskbar elements restored automatically.
Now, this method only helps you to get back the device controls. To fix this from the root, continue with the other troubleshooting methods below.
2. Reset Default Apps
If the “Explorer.exe: Class Not Registered” warning is due to conflicting apps, here’s how you can solve this:
- Hit Windows + I keys together to open the Windows System app.
- Click Apps on the left side panel.
- No, select Default apps on the right-side navigation pane.
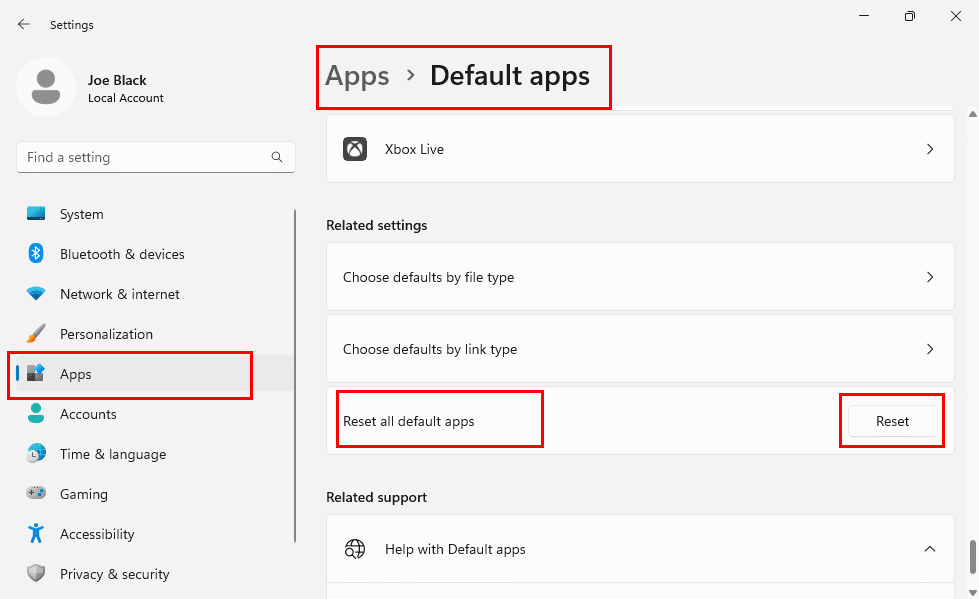
- Scroll down to the bottom to find the Reset all default apps option.
- Hit the Reset button.
Now, try to open the document, file, image, game, or any other component that you tried to open earlier and got the “Class not registered: Explorer.exe” error. This should be fixed by now.
3. Disable All Startup Apps
Sometimes, you may experience the Class not registered error right after restarting the PC after installing third-party software. The underlying cause is highly likely a startup app execution error since there are two conflicting apps. Thus, you need to disable all third-party Startup apps on your Windows 11 PC. Here’s how it’s done:
- Press the Windows + R keys simultaneously to bring up the Run command box.
- Run the following command:
msconfig
- This opens the System Configuration tool with the General tab as the default selection.
- Click the Startup tab.
- The tab will ask you to click the Open Task Manager link. Hit the link.
- You must see all the startup apps in front of you on the Task Manager tool.
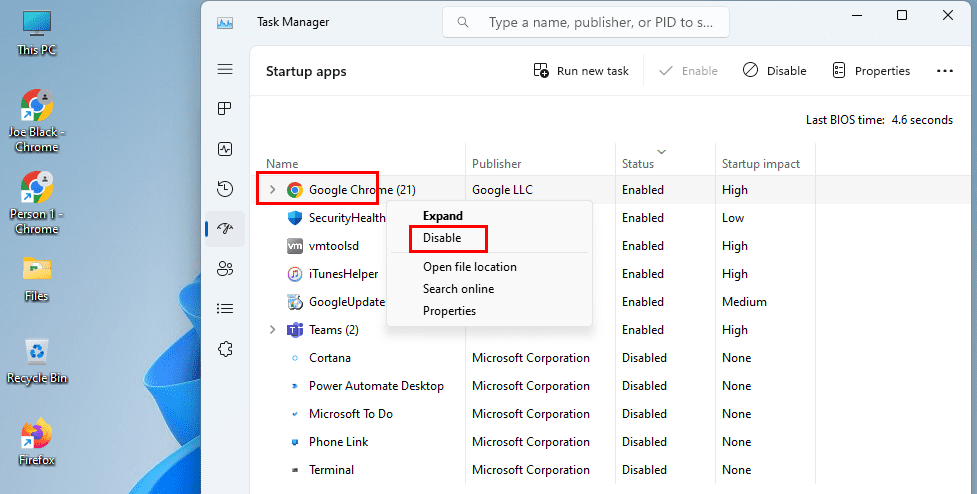
- Select an app, right-click, and choose Disable on the context menu that opens.
- Repeat the steps for all third-party or non-Microsoft apps.
4. Disable Internet Explorer 11
If you’re getting the error frequently while trying to open Microsoft Edge on Windows 10, follow these steps to deactivate IE 11 to avoid the issue in the future:
- Click Start and start typing Control Panel.
- Select the Control Panel icon to open it.
- Go to the Programs and Features menu.

- Click Turn Windows features on or off.
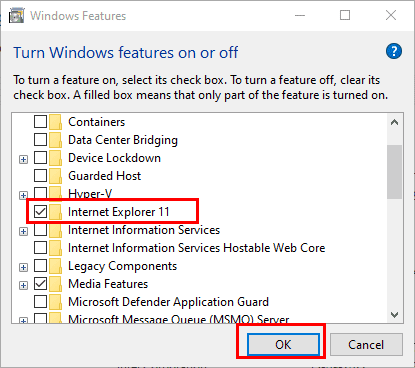
- Find Internet Explorer 11 in the list and uncheck the checkbox beside it.
- Click OK to save the changes.
5. Fix Deleted or Corrupted ExplorerFrame.dll
A missing or corrupted ExplorerFrame.dll file can definitely be the underlying cause for the “Explorer.exe: Class not registered” error on Windows 11, 10, 8, 7, etc., operating systems from Microsoft. Here’s how you can fix this:
- Get a working copy of the ExplorerFrame.dll file online or from another PC.
- If you wish to get it online, visit Dll-Files.Com and download the file for free.

- For 64-bit PC, download the file from Architecture 64 section.
- If you’re running a 32-bit PC, get the DLL file from Architecture 32 section.
- Extract the downloaded file and copy it.
- Now, go to the following destination on your PC and paste the file:
C:\Windows\SysWOW64

- For a 32-bit PC, go to this directory:
C:\Windows\System32
- If the previous ExplorerFrame.dll file is already present in the destination directory, don’t forget to replace it while copying.
- Don’t copy as a different file because that won’t work.
- Now, open a Command Prompt window with elevated or administrator rights.
- Copy and paste the following command and hit Enter:
regsvr32 ExplorerFrame.dll
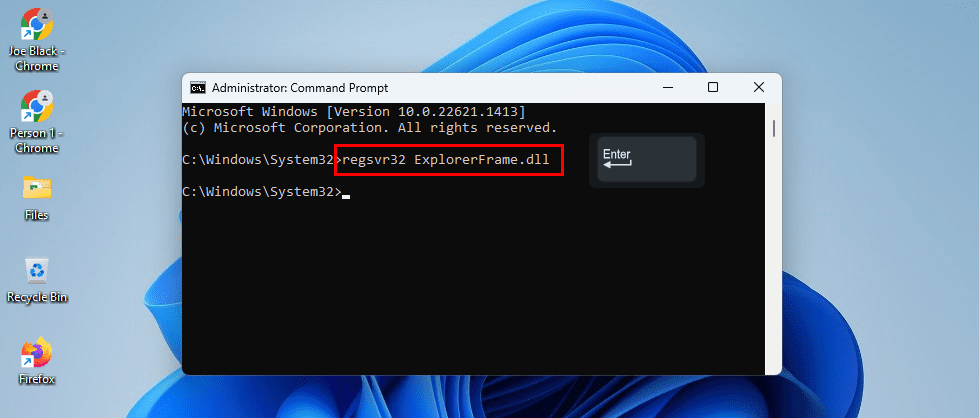
- This code will register the newly added ExplorerFrame.dll file.
That’s it! You’ve successfully re-registered a fresh copy of the ExplorerFrame.dll file which is necessary for the smooth operation of the Windows Explorer utility.
6. Restart Windows Explorer
Suppose, you were working on something important and you get the “Class not registered: Explorer.exe’ error. All apps vanished including Desktop and Taskbar items. Now, you can’t get started with the troubleshooting methods yet because the work is crucial.
In this situation, you can temporarily fix Windows Explorer to close your task at hand, and send your report or whatever task you need to finish. Here’s how it’s done:
- Press Ctrl + Alt + Delete altogether.
- On the lock screen, click Task Manager.
- Now, the Task Manager tool opens.

- Scroll down until you find the Windows Explorer task or process.
- Right-click and select Restart from the context menu.
- This action will force a restart of the Windows Explorer system app.
- The Desktop and Taskbar issue should be fixed for now.
7. Re-Register Windows Shell Experience Package
An outdated Windows Shell Experience package may also cause the “Class not registered” error. Here’s how you can fix this Windows 11 system file package using Powershell:
- Hit Windows + S to launch the Start menu and type Powershell.
- Once the app appears, right-click and select Run as administrator.
- Now, copy the following command:
Get-appxpackage -all shellexperience -packagetype bundle |% {add-appxpackage -register -disabledevelopmentmode ($_.installlocation + “\appxmetadata\appxbundlemanifest.xml”)}
- Go to the Powershell terminal and right-click.
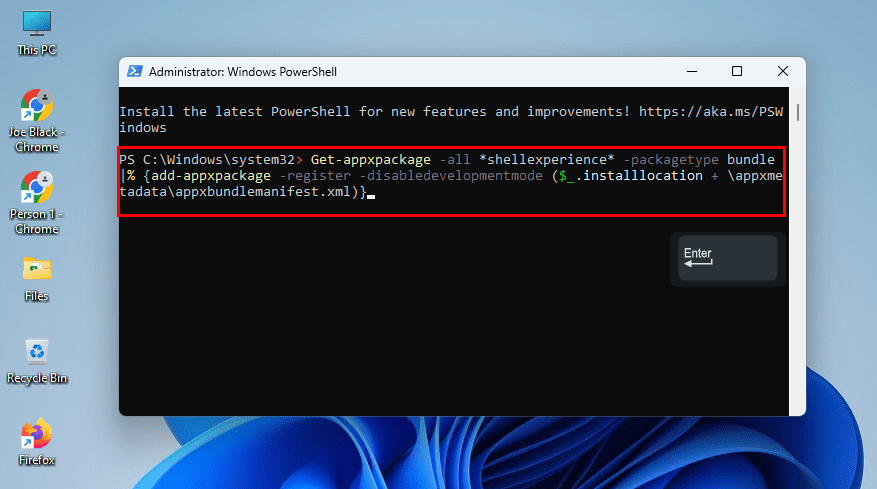
- The code will paste and execute automatically.
- Reboot the device.
Now, check if you’re getting the same error again or not.
8. Reinstall Windows 11
If none of the above works, you need to reinstall Windows 11, 10, 8, etc., operating systems. Ensure you back up the entire device before doing this.
When ready, follow the steps mentioned in this concise and easy article on “How to Reinstall Windows 11 for Free”. For Windows 10 and 8 the steps are pretty similar. Here’s another guide on “How to Download and Install Windows 10 S on Your PC”.
Explorer.exe: Class Not Registered: FAQs
How do I fix a Class not registered error?
You must re-register the component that’s causing the Class not registered error. It’s mainly the DLL file of components like Windows Explorer, Photos, etc. You’ll find the re-registering steps above in this article. You just need to find the right DLL file online or source it from another working Windows PC.
What is the problem of Explorer.exe Class not registered?
The issue is linked to the proper execution of the DLL file linked to an app like Photos, Paint, Edge, Windows Explorer, etc. Sometimes, these DLL files get corrupted due to HDD bad sectors or power outages.
Hence, you can replace your HDD with an SSD. Find below some suggestions for SSDs:
Also read: Best Budget SSDs 2022
If you choose to buy a SATA SSD, follow the steps in this article to install it: “How to Install an SSD on Desktop and Laptop PCs.” For instance, if your motherboard is compatible with NVMe SSD and you’re getting one, here’s “How to Install an NVMe SSD in a Desktop and Laptop”.
Conclusion
Now you know how to fix the “Explorer.exe: Class not registered” error. You can almost follow the same methods if you experience the “Class not registered” warning with other Windows System apps.
If you know a cool fix for the above issue, do mention that in the comment box. Also, share this article with your fans, followers, and friends to help them out.
Next up, how to fix Memory Integrity Is Off on Windows 11 error.