

Getting a Microsoft Windows 11 laptop connected to a projector or TV can be the most annoying part of getting ready for a presentation. Here’s everything you need to know to get up and running.
Presenting PowerPoint slides or arranging a family movie night on a large smart TV screen has never been easier than a Windows 11 laptop with HDMI display out. Such PCs also come with onboard Wi-Fi so there’s a high chance you can screencast content wirelessly from PC using Miracast. The task is also intuitive on Windows 10 PCs. Keep reading to learn all possible ways to connect a laptop to a projector/ TV wirelessly or using a cable.
Contents
How to Connect Windows 11 Laptop to Projector and TV
The best way to project content from your Windows 11 laptop or desktop to a TV or projector is by using the Miracast feature. However, if the projector or TV doesn’t support wireless connectivity, you can resort to HDMI cables. Find below both methods in separate sections step by step:
Connect Laptop to Projector/TV on Win 11 Using Miracast
Since you’re using a Windows 11 laptop, you must have the Miracast feature on it. Miracast empowers you to connect to wireless projectors and smart TVs in a flash. To ensure your laptop has got the right kind of Miracast feature, try the followings:
- Hit Windows + R to access the Run command tool.
- Run the following cmdlet in the tool by hitting the Enter key:
dxdiag
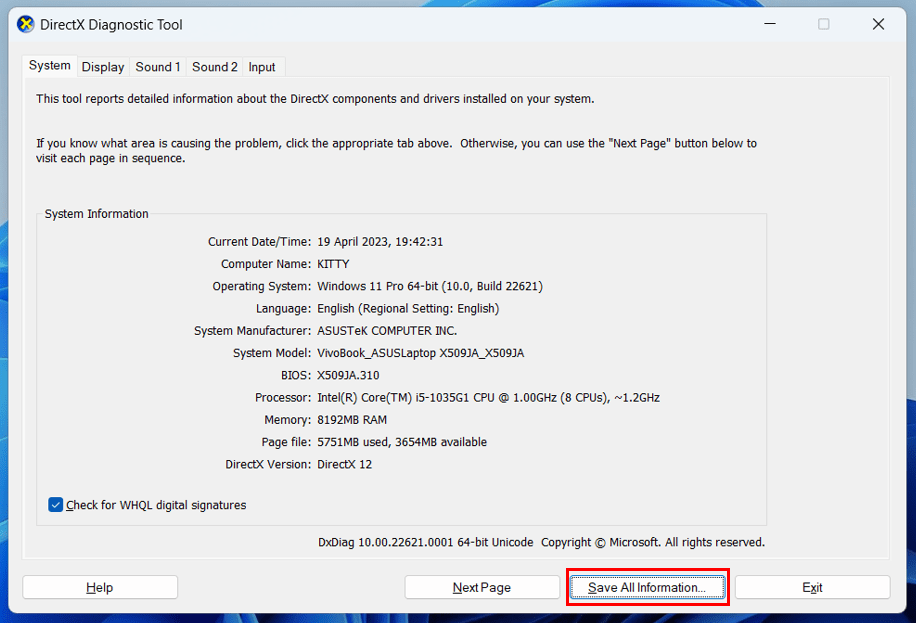
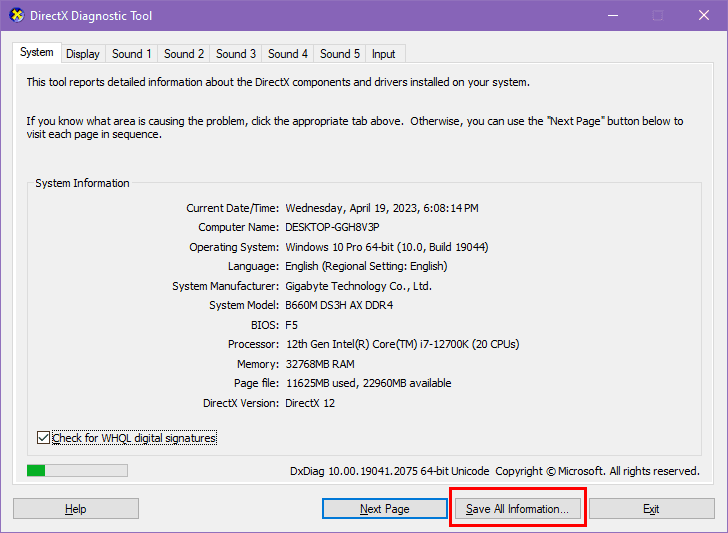
- On the DirectX Diagnostics dialog box, click Save All Information.

- Access the DirectX report and look for the following:
Miracast: Available, with HDCP
Now, you’re ready to connect your laptop to a wireless TV display or projector. Follow these quick instructions:
- Turn on the smart TV or projector.
- Use the dedicated remote control to activate wireless screen mirroring.
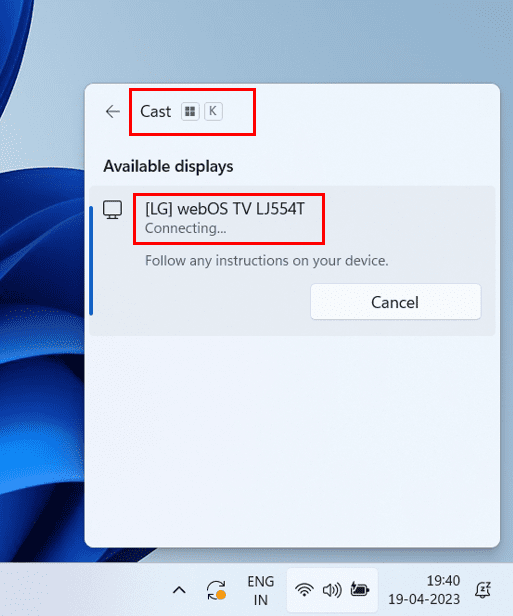
- On your Windows 11 laptop, hit Windows + K to open the Project menu.
- There, select your wireless display or projector.
- Follow onscreen instructions to complete the pairing process.
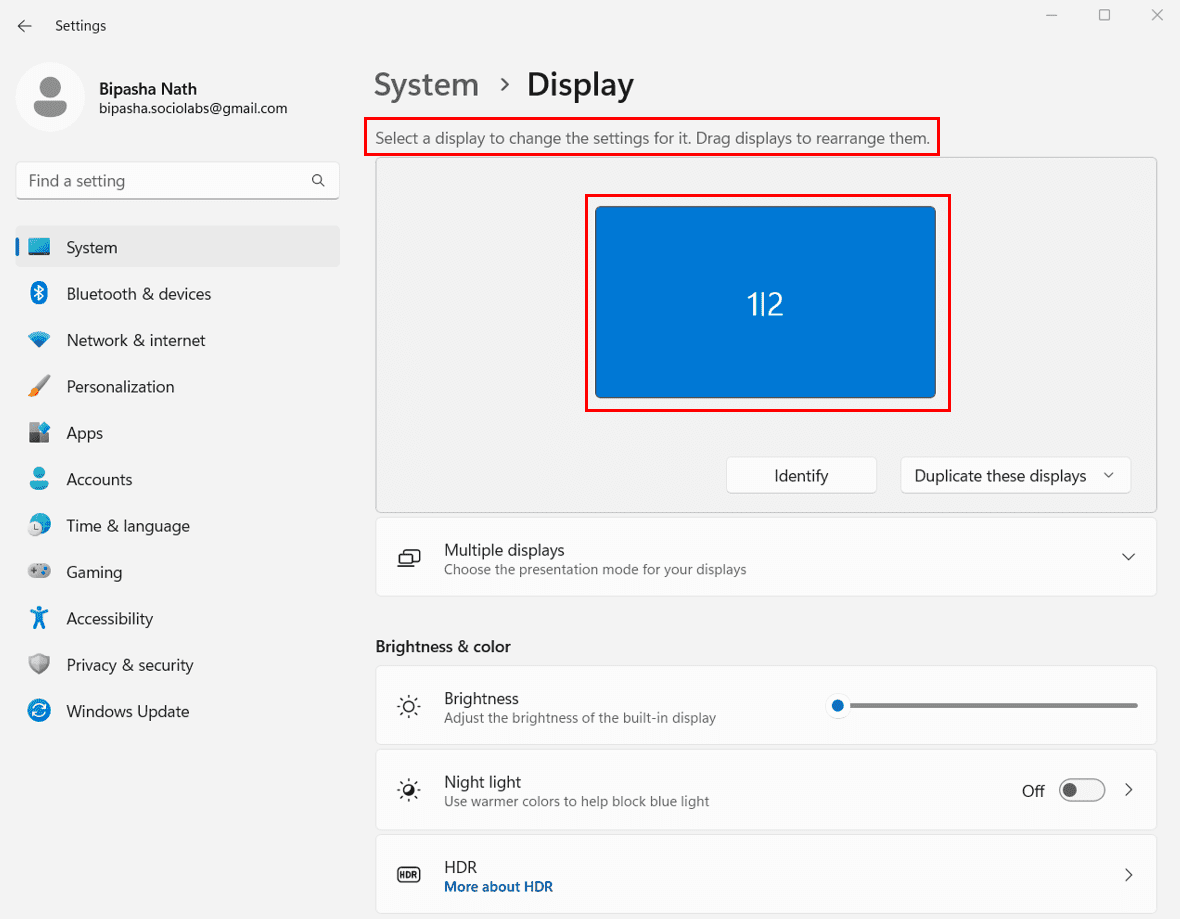
- Once done, you should see the 1|2 display indication on the System > Display screen.
- By now, the TV or projector should have started projecting a laptop screen on a large display or projection canvas.
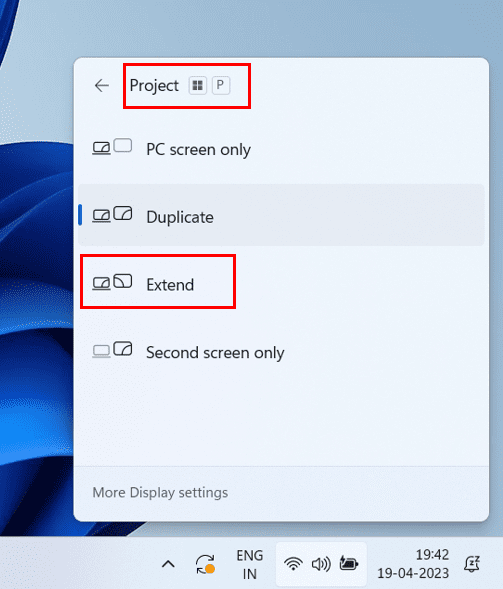
- To modify the display properties, hit Windows + P and choose from projection options like PC screen only, Duplicate, Extend, and Second screen only.
Link Laptop to Projector/TV on Win 11 Using a Cable
Most Windows 11 laptops come with the HDMI display out option. So, you can use an HDMI cable to connect the laptop to a projector or TV that doesn’t support wireless connectivity. For Windows 11 desktops, there may not be additional HDMI out other than the primary one. Mostly, you get one HDMI port on the motherboard and another one on the graphics card (GPU).
If you use onboard graphics, then connect one end of the HDMI cable to the motherboard HDMI port. The other end of the cable goes into your projector or TV. Now, if you use GPU, then connect the cable to GPU HDMI instead of onboard HDMI. Either way, your desktop may not be able to use a dual display.
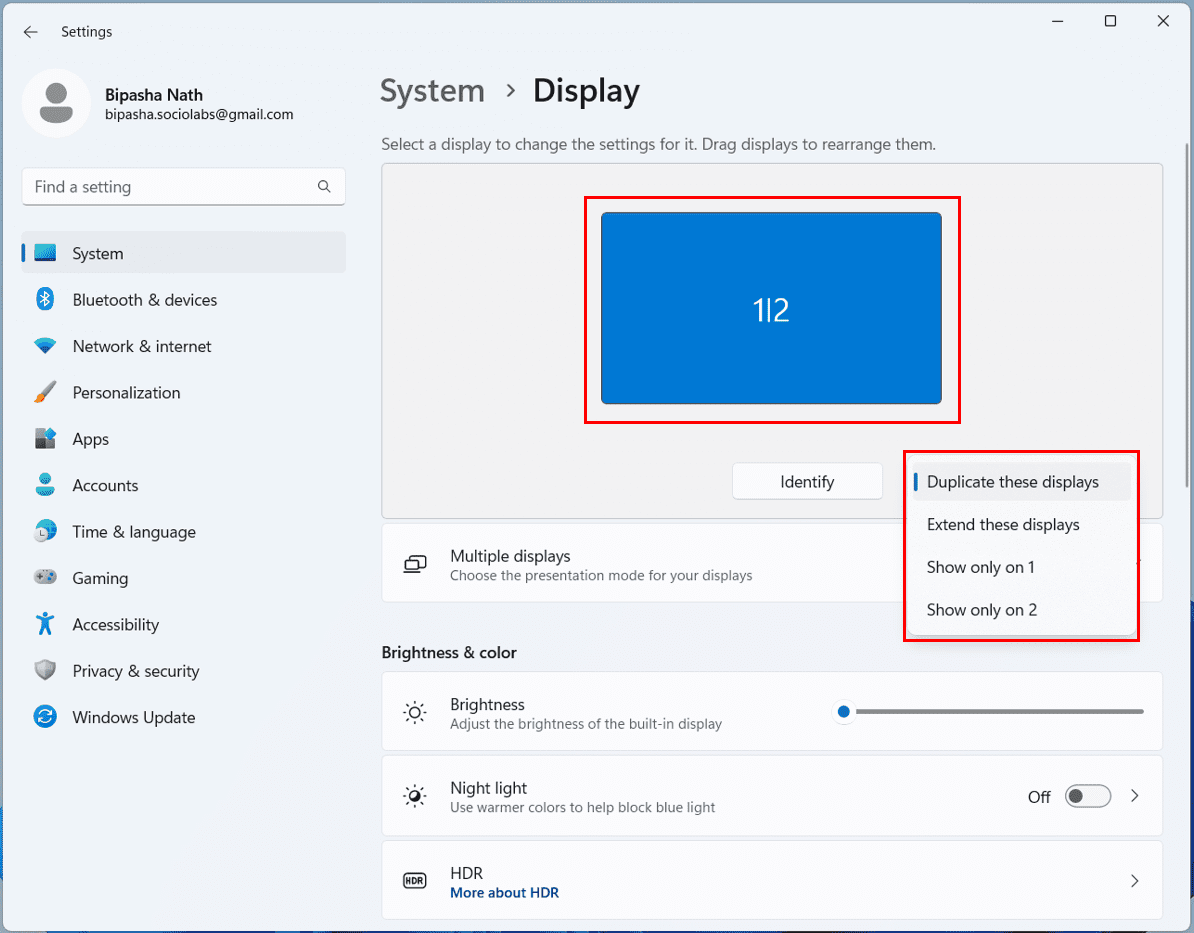
As soon as you connect a computer and projector or TV, you can start presenting your content. If you need to adjust dual display settings, you can go to Settings (Windows + I) > System > Display > Duplicate these displays menu. Now, choose from any of the following dual-display options:
- Extend these displays
- Show only 1
- Show only 2
Connect Laptop to Projector/TV on Win 11 Using WiGig
WiGig is the fastest wireless display connectivity that you can use to project content with zero lag. If you’re in a business or home setup where a wireless TV or projector is connected to a WiGig dock, here’s how you can use WiGig to connect a laptop to a projector/TV:
- Open the Settings tool by hitting Windows + I buttons on the laptop.
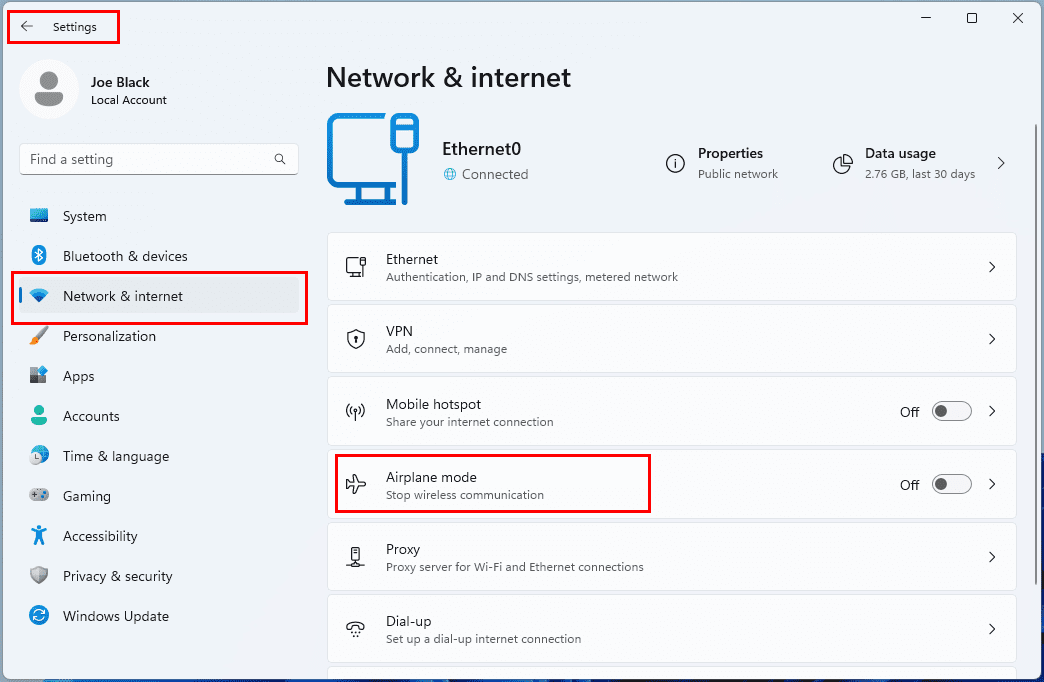
- Click Network & internet on the left and choose Airplane mode on the right.
- There, you should see a toggle button for WiGig just like buttons for Wi-Fi and Bluetooth.
- Click the toggle button to activate WiGig.
- Now, hit Windows + K to open the Cast menu and choose the available WiGig dock.
- Remember, in this process, you need to connect the laptop to a WiGig dock to which the wireless projector or display is connected.
- Don’t connect directly to the wireless display or projector. If you do, you won’t be able to enjoy the WiGig bandwidth which is faster than Miracast.
How to Connect Windows 10 Laptop to Projector and TV
Find below the accessories and technologies you must use when connecting a laptop to a projector or TV in Windows 10.
Making a Wired Connection
There are so many different types of display ports. So there are many different ways your laptop might connect to a TV or projector.
| Technology | Photo | Cable Required |
| HDMI |  |
Standard HDMI cable. Audio routed. |
| DisplayPort |  |
DisplayPort to HDMI cable. Audio routed. |
| Mini HDMI |  |
Mini HDMI to HDMI cable. Audio routed. |
| VGA |  |
VGA to VGA cable. Audio not routed. |
| USB/DisplayLink |  |
The adapter allows video through USB to HDMI or VGA. |
Connect via any of the methods above and ensure the input selection on the TV or projector is toggled to the input you are using with your laptop.
Also read: How to Connect iPad to a Projector
Making a Wireless Connection
Laptops running Windows 10 are well suited for the wireless projection of a PC on a wireless projector or TV. Because all laptops come with onboard Wi-Fi and Bluetooth. However, you can’t be sure if your Windows 10 desktop PC is eligible for wireless screen mirroring.
Check Miracast Compatibility
To learn if your desktop is also eligible or not, follow these steps:
- Hit the Windows + R keys together to open the Run command box.
- There, type the following cmdlet and hit Enter:
dsdiag
- The DirectX Diagnostic Tool dialog box will open.
- Let the tool load complete system information of your Win 10 desktop.
- Now, hit the Save All Information button.
- The Windows Explorer Save As dialog box will pop up.
- Choose a directory to save the DirectX Diagnostics report.
- Now, click Save to store the Notepad file.
- Navigate to the directory and open the Notepad file.

- Hit Ctrl + F and type Miracast.
- If the wireless projection is available on your desktop PC, you’ll see Miracast: Available, no/with HDCP.
Also read: How to Connect Android to Projector
Connect PC and Wireless Display
Once you’re sure that both the Windows 10 desktop/ laptop and the receiving device like a smart TV or projector support wireless pairing, follow these steps to connect these devices:
- Hit the Windows + I keys together to bring up the Windows Settings tool.
- There, click System and choose Display at the left-side navigation panel.
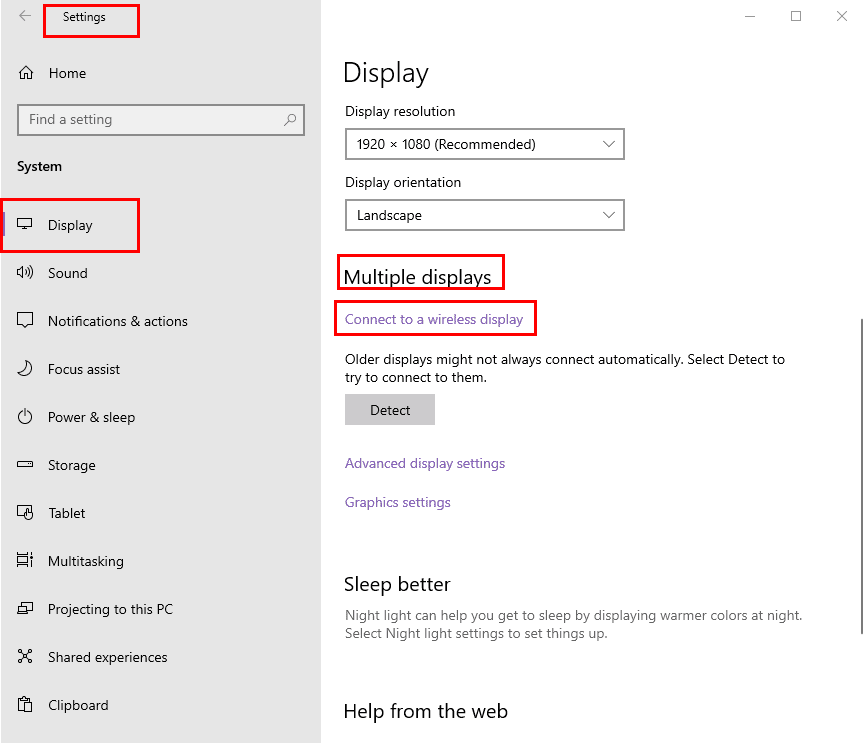
- Now, scroll down the screen on the right side of Display settings and go to the Multiple displays section.
- There, click Connect to a wireless display hyperlink.
- The Connect sidebar will pop up from the right side of the desktop or laptop screen.
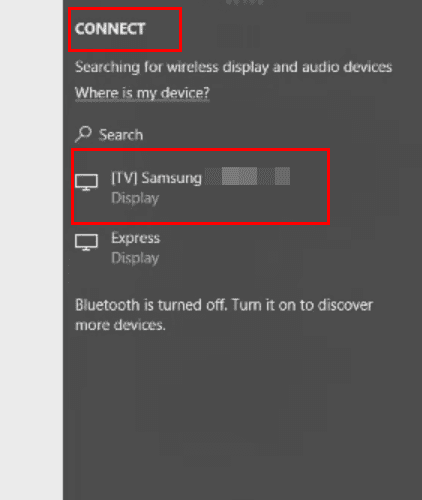
- If you’ve turned on the wireless display feature on the projector or TV, any of these devices will show up on the Connect panel. You can also call Connect by hitting Windows + K keys together.
- Choose the appropriate wireless display from the list.
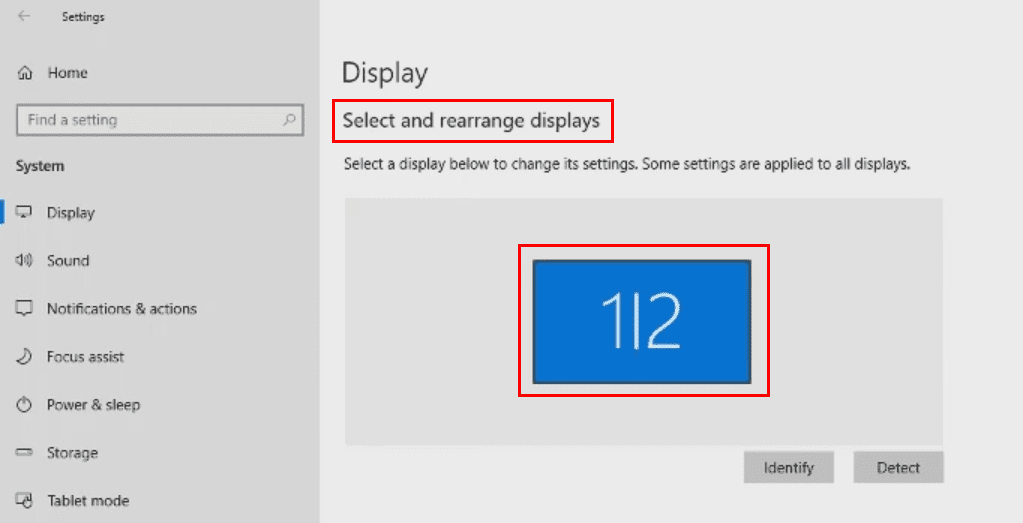
- If the connection happens, on the Display settings screen, you should see the Select and rearrange displays message along with two displays indicated by 1|2.
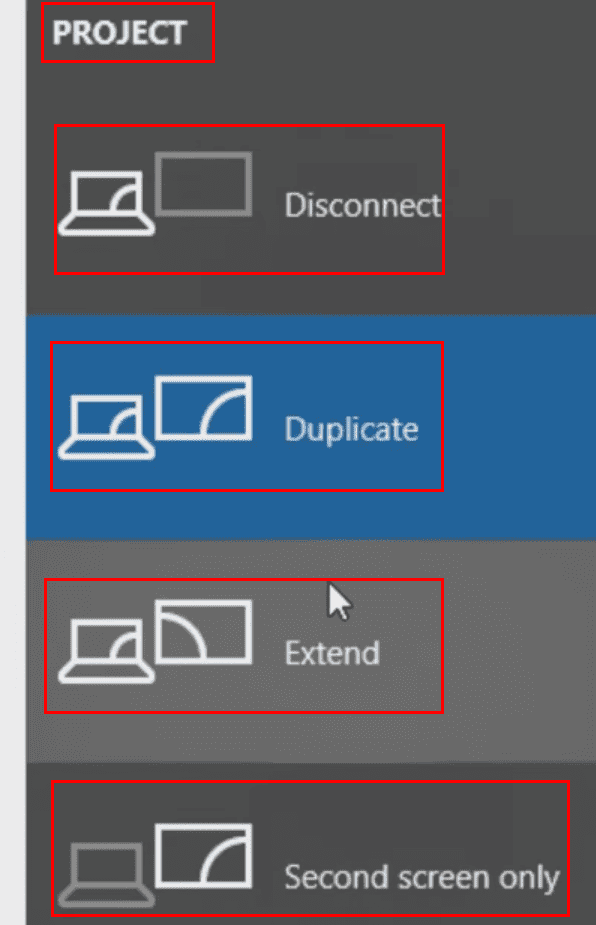
- On the Connect sidebar, below the selected wireless display, you should see Change projection mode. Click on it.
- Now, simply choose anything from Disconnect, Duplicate, Extend, and Second screen only to get started with your PowerPoint presentation or content projection on a smart TV/ projector.
Also read: How to Connect and Mirror LG G7 ThinQ to TV
Windows 10 Laptop Connection Settings
Once connected, hold down the Windows Key and press P to toggle the selection to the desired setting:
- Duplicate
- Extend
- Second screen only
In some cases, you may need to utilize the Fn key and one of the function keys (F3, F4, F5) along the top of the keyboard.
Common Problems You Can Expect
The whole process should go smoothly when you use any of the above wired or wireless methods to connect a Windows 10 laptop to a TV or projector. However, you may experience any of the following issues. I’m sharing the solutions as well below:
1. Driver Update Needed
It’s common (especially on Lenovo ThinkPad machines) to experience problems connecting your laptop to a TV or projector. If the video is blank on one screen or flashes black or white, an upgrade to the display adapter drivers usually fixes the issue. There have been some occasions where a BIOS update has fixed a display problem.
To obtain the latest display adapter drivers and BIOS software, visit the website of the manufacturer of your laptop. You may also be able to simply Google the “model number of your laptop + display drivers.”
2. Start With Everything Off
In some cases, you may need to start with both the laptop and projector off. Once you connect the proper cables between the projector and laptop, turn the projector on. The projector may take a while to warm up. Once the projector is online, you may start the Windows 10 laptop. This is the most successful order of starting a pair of connected projectors and laptops for screen mirroring purposes.
Conclusion
Connecting a Windows 11 and 10 PC to a wireless or wired display has become effortless since the introduction of these next-generation operating systems by Microsoft. Both Windows 11 and 10 PCs come with an elaborate hardware driver library, open-source wireless connectivity technologies, Miracats, and a lot more. All you need to do is just activate wireless on both devices and hit a few keys to start projecting.
You can also use standard projector cables like HDMI cables to connect a laptop or PC with a TV or projector. I’ve mentioned all the methods above in a step-by-step manner. Depending on your devices, choose any of the methods and get going with content presentation from a Windows 11 or Win 10 device. Don’t forget to comment below about your experience of using these methods on your side.

Still failed to connect with the projector
Thanks for information
Not yet coz my data projector connects to the laptop via HDMN cable and RBG adapter to HDMN cable
Helen, you should be able to use a VGA to HDMI cable for that connection.
I have a Lenovo T420 Thinkpad – it looks like I need an output of a VGA cable but the input on the Projector is HDMI – would this be right (before I go off and buy the wrong thing!)?
Informative article. Thanks for sharing such an valuable article.this is best article .
my projector has started displaying half dark. its connected to a tv. whats the problem ?
BRILLIANT! – “Once connected, hold down the Windows Key and press “P” to toggle the selection to the desired setting:” Just curious, is this available somewhere in Settings/Display/???
I have purchased a Projector & tried to connect to a Lenovo Laptop but no signs indicated. When I switched on the projector, then some preeceded icons from the projector appeared while it doesn’t communicate with the laptop. When I connect the VGA cable into the laptop, no signs indicated at all. Thus, is there any option were I can apply to solve this problem?
That was really a tricky post, Mitch. Do you have another article that shows, how to connect a projector to Linux system?