
When you create a new folder on Microsoft Outlook, you’re one step closer to keeping things organized. You can create as many folders as you need to keep things such as your email organized. Even if you’re new to Outlook, you’ll see how easy it is to create those folders.
Keep reading to see how you can make those folders for Outlook on Android, Web, and Desktop. Don’t forget to leave your comment below on your experience creating the folders.
Contents
How to Create a New Folder on Outlook for Android
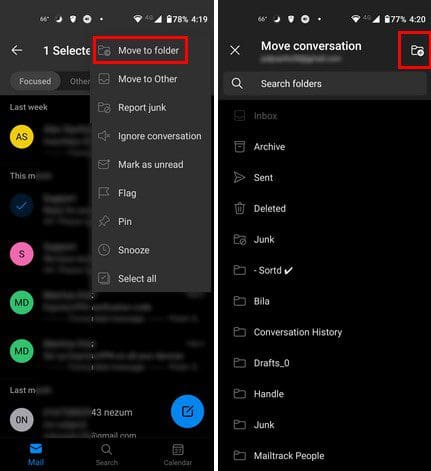
If you forgot to download the app, you could go to Google Play to download it. Once you set it up and it’s open, long-press on any email, followed by the three dots at the top right. A menu will appear with different options; tap on the Move to Folder option.
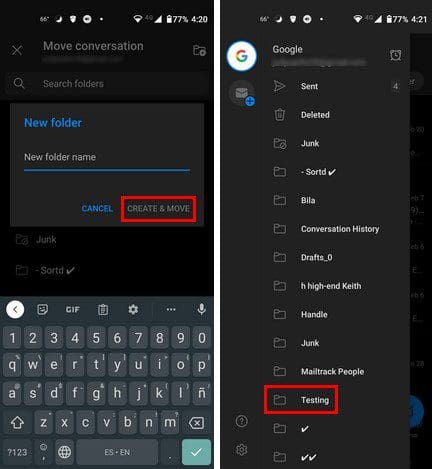
Instead of tapping on one of the already existing folders, please tap on the folder with the plus icon on it. It’s located at the top right. In the next step, you’ll need to name your folder. Once it’s named, don’t forget to tap on the Create and Move options.
Unfortunately, you can only create a folder on Android. The Android app doesn’t let you erase it. If that’s what you need to do, you’ll need to use the desktop client or web.
How to Create and Remove a Folder for Outlook – Desktop and Web
When you have the desktop client open, click on the three dots at the bottom left. Choose the Folders option, and the already existing folders will open to the left. Right-click on any folder and choose the option to create a new one.
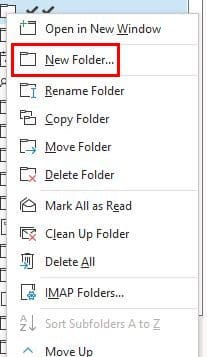
When you click on the New Folder Option, you’ll need to name it. Once you click on the OK button, your new folder will appear with the rest of them. As you can see in the image above, by right-clicking on the folder, you can make changes such as:
- Rebane folder
- Copy folder
- Move folder
- Delete folder
- Mark all as read
- Clean up folder
- Delete All
- IMAP Folders
Web
Creating a folder is even easier if you’re signing into Outlook using your preferred browser. You don’t have to right-click since the option is right there. Scroll down a little on the left pane, and the New Folder option should be there.
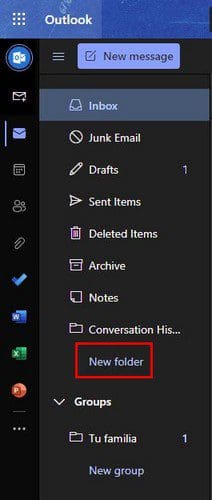
As soon as you click on the New Folder option, type the folder’s name and press Enter. Your new folder will appear automatically. If you want to make any changes to the folder, right-click on choose from the different options such as:

- Create new subfolder
- Delete folder
- Empty folder
- Mark all as read
- Rename
- Add to favorites
- Move
- Open in new tab
Conclusion
Regardless of where your accessing Outlook from, creating a folder is easy. Whether it’s the desktop client, the web, or the Android app, the steps are beginner-friendly. You also saw how you could do more with the recently created folder, such as creating a new sub-folder. From what device do you check your email? Share your thoughts in the comments below, and don’t forget to share the article with others on social media.